Saturday, February 26, 2011

Six of Everything

We finally have six of everything for entertaining: six fancy water glasses, six matching cloth napkins, six salad plates, six dessert plates, six steak knives, six matching chairs at a lovely new table, and matching silverware to boot....so we had to have four of our friends over for a mid-week dinner party. We haven't had a chance to use the lovely tagine that we received as a wedding present, so I decided to prepare a lamb tagine that I made as our very first tagine, which I wrote about here. One of our friends has very specific food aversions, including nuts, chocolate, and aged cheese--three things we discovered we use routinely. So dinner planning was a bit of a challenge, but a welcome one. Finding an appetizer without nuts or aged cheese was the first challenge. Dessert without chocolate was the second. Epicurious came through with flying colors on both fronts. I decided on a goat cheese with roasted yellow pepper and dill for an appetizer, served with lavash crackers from Damascus bakery on Atlantic Avenue in Brooklyn. For dessert, I chose a honey cake called Basboura. The Basboura was a hit; everyone had a second piece.

Basboura

2 cups fine semolina
1 cup dessicated coconut
1/2 cup sugar
1 tsp baking soda
A little less than 2/3 cup melted butter or ghee or semnah
1 cup milk

For the syrup...
1 1/2 cups sugar
1 1/2 cups water
1 tbsp lime juice or 2 tbsp lemon juice
2 tbsp honey

Preheat the oven to 345 degrees F. In a large bowl mix all the dry ingredients, the semolina, coconut, sugar and soda together. Mix in the melted butter and milk and stir until well combined. Pat this mixture into a buttered, shallow medium sized oven proof dish and level the surface with a spatula or a palette knife. Bake for 30 minutes or until golden brown on the top.

In a medium sized sauce pan, place the sugar and water on low heat and stir until the sugar dissolves completely. Increase the heat to medium and then bring the mixture to a vigorous boil and cook until it coats the back of a spoon or reduces by about one-third or until it reaches 220 degree F on a cooking thermometer. Stir in the lime juice and allow to cool. Once cooled or warm, mix in the honey and stir well.

Allow the cake to cool sllightly, for about 10 minutes and then cut it into squares or diamonds. Carefully pour the syrup over the cake. It will look like a lot of syrup, but the cake will absorb all the syrup gradually.

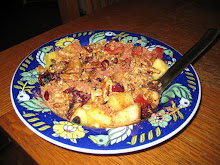
Serve at room temperature. We served ours with a dollop of yogurt mixed with a splash of rose water, and a generous sprinkling of dessicated coconut. The dessert can be served, or baked, with almonds as well.

Goat Cheese and Yellow Pepper Dip

2 yellow peppers, halved, seeded
2 jalapeno peppers, cut in half and de-seeded
2 tablespoons olive oil
8 ounces sharp soft goat cheese
2 tablespoons chopped dill, plus 1 sprig for garnish
1 tablespoon lime juice
Coarse salt and fresh cracked black pepper
Pinch cayenne

Roast peppers over an open flame until soft and a the skin a little charred, about 5-8 minutes. Place them in a plastic bag for about 20 minutes, remove and peel the skin off. Emulsify the peppers in a food processor and add the goat cheese, lime juice, dill, cayenne pepper, black pepper and salt to taste. Pulse until combined well. Serve with flat bread or pita chips.

Monday, February 21, 2011

Kimchi's Best Friend

I started buying packaged bulgogi from Trader Joe's about a year ago and it has become one of our favorite go-to dinners. We love kimchi so much, and pile it high on the plate alongside a modest amount of the seasoned beef and white rice. I swear we could go through a few pounds of kimchi every week without even trying. We've tried to find other kinds of bulgogi in different Asian shops, but haven't been able to find an alternative to Trader Joe's (which is kind of expensive) that doesn't have high fructose corn syrup. D kept suggesting that we could probably make it ourselves, and I don't know why I was so intimidated. Not only was it easy, it was actually deeply satisfying to make. Rubbing the meat with brown sugar and then mushy kiwi was an almost sensual experience. Even now as I write, I can still smell the sesame oil and garlic on my fingers.

I found this recipe on Epicurious, of course. That website never lets me down. The following is an adaptation of the recipe, which unmodified is probably very good.


Homemade Bulgogi

1 1/4 lb skirt steak, cut into 2 inch pieces
2 tablepoons tamari
2 teaspoons sesame oil
2 teaspoons crushed garlic
2 tablespoons brown sugar
1 tablespoon rice wine (sake)
Pinch of black pepper
1/2 tbsp sesame seeds
1 fresh kiwi, juiced in a blender

Juice the kiwi--it's okay if its just in little pieces. It's probably better if it's not completely juiced. Trim the fat off the beef with a sharp knife. Rub the sugar evenly into each piece of the beef. Allow beef to sit for at least 10 minutes. In a separate bowl, mix together the soy sauce, sesame oil, garlic, sesame seeds, sake, and black pepper. Put aside. Massage the beef with the kiwi using your hands. The kiwi works as a tenderizer. Add the soy sauce mixture and mix. Allow the beef to marinate for 10 minutes, and then pack closely into a plastic bag. Pop it in the fridge and it will be awesome in a day or so. When you're ready to prepare it, just heat up a wok or a cast iron pan with oil until smoking. Cook the meat directly from the bag quickly until browned, being careful not to overcook. Serve either over or to the side of white rice, with a generous side of kimchi. We've found that pickled mangoes on the side are a nice accompaniment, too.

Squid Memories

Seafood was not big in our house when I was a kid, so when I started hanging out with my late friend Jon Paul , I was constantly fascinated with the seafood stir frys, stews, and soups that he and his partner Wende would dish up for us after a night of street outreach for the needle exchange program that we worked with in Philadelphia. Tentacles, legs, sometimes even eyes would be floating around in the bowls he would hand me; the food they prepared was always delicious. I rarely work with that kind of seafood, but I picked up some fresh Long Island calamari at the farmer's market this weekend, and tried this recipe. JP passed away a few months ago, and this dish brought back fond memories of him.

Thai Calamari with Chili

1 pound calamari (squid)
1 medium onion
1 1/2 teaspoons chopped garlic
3 fresh red chilies, seeded and chopped
3 tablespoons vegetable oil
2 tablespoons Thai fish sauce
1 tablespoon rice vinegar
2 tablespoons palm sugar or brown sugar
2 tablespoons water
1 teaspoon cornstarch

Cut the calamari into chunks; leave the tentacled ones the way they are. Slice onion from top to bottom to form curved strips. in a skillet cook onion, garlic, and chilies in oil till onion is almost tender. Add calamari and cook for a few minutes or till they curl and become tender. In a bowl stir together fish sauce, vinegar, sugar, water, and cornstarch. Add to skillet. Cook and stir till thickened and bubbly. Cook and stir 2 minutes more.

Finally! Perfectly Risen Sourdough Loaf

If you know me, or have read this blog at all over the past year, you know that I've been working with sourdough since December 2009, baking at least two loaves of bread nearly every weekend. Maybe you've even been the recipient of one of my experiments. One of the most mysterious things about this process is that I haven't been able to find one good recipe for a rustic sourdough loaf that has the classic hard crunchy outer crust, and the spongy, fragrant inner bread. I've also had a hell of time getting my white breads to rise beyond bloated flatbread shapes. I finally stumbled upon a good recipe that produced a nice loaf with a strong rise. I served this bread at a chili party/meeting I hosted for my softball team and it got rave reviews.

Sourdough Olive Bread

2 cups lukewarm water (110°F)
2 cups white sourdough starter, room temperature
2 teaspoons active dry instant yeast
1/2 teaspoon diastatic malt**
7 to 8 cups bread flour***
1 tablespoon salt
2 tablespoons finely-minced fresh rosemary
2 tablespoons olive oil
2 cups Kalamata olives, pitted and coarsely chopped
Semolina flour, for dusting

** Diastatic malt is powdered malted grain, usually barley, but wheat, and rice may also be malted It breaks down the starch in dough to yield sugars on which the yeast can feed.

*** The thickness of your sourdough starter can determine how much flour needs to be used. If you think the dough is too moist, add additional flour (a tablespoon at a time). The same is true if the dough is looking dry and gnarly. Add warm water (a tablespoon at a time). Your dough should not be sticky but should form a nice elastic ball. I usually have to add extra flour.

Combine water, sourdough starter, yeast, and diastatic malt in the bowl of a mixer; stir with a rubber spatula or wooden spoon, just to moisten. Add flour, salt, rosemary, and olive oil; mix the dough until it snaps back quickly. Turn the dough onto a lightly floured board; add olives and knead by hand for several turns to be sure the olives are well incorporated and the dough is smooth, adding additional flour if needed. NOTE: Knead dough by pulling the dough towards you and then pushing down and forward with the palms of your hands (kneading gives the bread the elasticity and lets it rise).

Place the dough in a lightly oiled large bowl. Cover the bowl with plastic wrap Let rise until it doubles in volume (when you can put your finger in the dough and it leaves and indentation and doesn't spring back out) approximately 4 to 8 hours (depending on the temperature and the starter used, the rising time can vary as much as 2 hours).

Punch dough down and knead it on a floured board to feed it one more time before baking. Divide dough in half and shape each dough ball into a loaf or round shape (boule); place each loaf into a pan (I used both a loaf pan and a round spring-form cake pan). Cover with plastic wrap and place in a warm spot to rise until doubled in size, approximately 1 to 3 hours.

Oven Bread Rising: Sometimes I use my oven for the rising. Turn the oven on for a minute or so, then turn it off again. This will warm the oven and make it a great environment for rising bread. If you can't comfortably press your hand against the inside of the oven door, the oven is too hot. Let it stand open to cool a bit. Sourdough rises more slowly than yeast bread; Always remember, the longer the rise time, the more sourdough flavor.

Cool or Refrigerator Bread Rise: If I don't have the time to wait for the rise to finish or I know that I will be interrupted before the completed rise, I do a cool rise. A cool rise is when the dough is place in the refrigerator and left to rise slowly over night approximately 8 to 12 hours. I usually do this after the first rise and the dough has been shaped into a loaf. As this is a longer rise time, it improves the sourdough flavor in your finished bread.

Preheat oven to 450 degrees F. After the bread has risen, slash the bread with a bread razor or a very sharp knife making three 1/2-inch deep diagonal slashes. Brush or spray the top of the bread with cold water. Slide the trays in the oven. Spray the oven with a spray bottle full of water and close the oven door. Thirty seconds later, open the oven door and mist the oven again. Repeat this two more times, then turn the oven temperature down to 400 degrees F. and let the bread bake for 15 minutes.

After 15 minutes, turn the bread around 180 degrees so it can brown evenly; bake another 10 minutes or until nicely browned. NOTE: A good check is to use an digital thermometer to test your bread. The temperature should be between 200 and 210 degrees F.

Remove from oven and place bread on a wire rack to cool. Let the loaves cool for 30 minutes before cutting (this is because the bread is still cooking while it is cooling).

Poor Man's Fish

It's been so long since I've been to the Grand Army Plaza Farmer's Market, things have just been too busy. But yesterday, despite the violent wind, I took a walk through the neighborhood to the farmer's market with a short shopping list in mind: fresh fish, butternut squash, and kale. It's hit or miss at the fish market, and if you don't get there early, some of the fish is sold out and the line is always long. But this Saturday, I was lucky. The wind was so bitter and strong that there weren't that many people out, and instead of the regular fish stand, there was a new one with only two or three people on line. The poor woman who was staffing the table was rosy red with cold and her hands looked like they were on the verge of frostbite. I watched her "fish" out a big slab of cod and a squirmy-looking handful of calamari for the woman in front of me, and so I got the same. The cod looked beautiful--it was a thick, white, meaty 2 1/4 lbs coming in at a whopping $29, but it was Long Island line-fished, never frozen, and we hadn't eaten fish for so so long.

When I brought it home, D was shocked at the price. He told me that codfish used to be known as the "poor man's fish," they used to make fish sticks out of cod. But to me, it's political. We spend too little on food in this country, and we get what we pay for. Fishing off the Long Island coast is probably no easy matter in this weather, and fishermen have to make a living (not to mention the freezing cold fish monger!) I'd rather splurge on a nice piece of cod once a month, than pick up some cheap fish every friday night from Chinatown like we used to do. God knows where that fish comes from, and you can totally tell it'd been frozen. Unfortunately, I violated the complicated fish rules in terms of sustainability. The sustainability issue, as well as the health-related issues surrounding fish, are one of the reasons we hardly eat fish anymore. I still can't quite figure out the rules, but when I consulted one of my food experts, Mark Bittman, while writing this entry, I learned that cod is overfished. : (

We found this spice mix that must have been part of a gift basket at one point, and decided we'd use it on the fish. It is amazing, just check out the ingredients: ginger, roasted garlic, sea salt, caraway seeds, sugar, roasted sesame seeds, cumin, paprika, cassia, chillies, coriander, blackpepper, turmeric, mint, nutmeg, grains of paradise, rose petals, and saffron. D loves roasted cauliflower, so we decided to use that with some sauteed spinach to accompany the fish. D's the king of fish, so he's the one who pulled this meal together. He just asked me to make a tahini sauce like the kind we get at Tanoreen. I can't compare my cooking to that of the chef at Tanoreen, but I think the sauce came out pretty well. We suspect that Tanoreen fries their cauliflower, and nothing beats the taste of fried cauliflower, no matter what the sauce.

This is the recipe I used:

Tahini Lemon Sauce with Pomegranate Molasses

2 tbsp tahini
1 tbsp lebne
2 tbsp plain yogurt (low-fat, for texture)
1 tsp cumin
1 tsp salt
2 tsp minced and mashed garlic
1 tsp fresh ground black pepper
1 1/2 tbsp lemon juice
1 1/2 tsp pomegranate molasses

Combine all and stir vigorously with a fork until it's really smooth. This sauce should be poured over the cauliflower and just thick enough to stick on the vegetables; it shouldn't be the consistency of a dip or a liquid.

We sauteed small pieces of cauliflower with some salt and pepper and when it was nicely browned, it was done. We served it alongside the fish with the sauce drizzled over the cauliflower with a drizzling of additional pomegranate molasses--both for taste and for decoration.

For the cod, D marinated the fish with olive and lemon with salt and pepper, and let it sit for three hours in the fridge. When we took it out to prepare dinner, he coated it generously with the spice rub and patted it into the fish with his hands. He sauteed it on one side for three minutes, flipped it, put a handful of spinach on top, splashed it with some white wine, and some butter and covered it to let it steam for about 7 or 8 minutes at a simmer.

Sunday, February 6, 2011

Last Minute Brownies

We had a few friends over to watch the Superbowl, and after setting out all of the dips and veggies and popping the chicken wings in the oven, D asked me if we had anything sweet. We didn't, but I offered to whip up a quick batch of brownies. I was lucky enough to have just enough organic cocoa from Trader Joe's left. The recipe only made about 10 decent sized brownies, but that was perfect. They were chocolatey and chewy...but they would have been better with some Ghiardelli chips.

Epicurious Best Cocoa Brownies

10 tablespoons (1 1/4 sticks) unsalted butter
1 1/4 cups sugar
3/4 cup plus 2 tablespoons unsweetened cocoa powder
1/4 teaspoon salt
1/2 teaspoon pure vanilla extract
2 cold large eggs
1/2 cup all-purpose flour
2/3 cup walnut

Preheat the oven to 350°F. Spray your baking pan (8" square) with olive oil. Combine the butter, sugar, cocoa, and salt in a medium heatproof bowl and set the bowl in a pot of water so that it fits, and bring to a simmer. Stir from time to time until the butter is melted and the mixture is smooth and hot enough that you want to remove your finger fairly quickly after dipping it in to test. Remove the bowl from the skillet and set aside briefly until the mixture is only warm, not hot. Stir in the vanilla with a wooden spoon. Add the eggs one at a time, stirring vigorously after each one. When the batter looks thick, shiny, and well blended, add the flour and stir until you cannot see it any longer, then beat vigorously for 40 strokes with the wooden spoon or a rubber spatula. Stir in the nuts. Spread evenly in the pan. Bake until a toothpick plunged into the center emerges slightly moist with batter, about 30 minutes. Let cool before attempting to cut, but not too much. These brownies are delicious warm.