Wednesday, June 30, 2010

Searching for Kimchi

A few weeks ago, D and I discovered Oaxaca Taqueria, a restaurant that had opened in our neighborhood in Brooklyn. I was really impressed with the simplicity, freshness, and decor of this place. I especially fell in love with the Korean Tacos made with bulgogi and kimchi. They were tiny, but they were tasty and filling. On our second visit, we asked for extra kimchi because it was so delicioso. We asked the owner where they got their kimchi, and he told us that he got it from a Korean deli just a few blocks away. He couldn't remember exactly where, but he said that the deli has the pre-packaged industry kimchi, but they also sell one that they make right there on the premises alongside the manufactured kimchi. I went to the corner he said he thought the deli was at (5th and Carroll), but the owner disavowed making her own kimchi; she also disavowed the fact that there were any other Korean delis in the neighborhood! Off I went to another Korean deli one block over at Garfield and Carroll. No homemade kimchi. 7th and Carroll--nope. 7th & Garfield--bingo! The unassuming containers of kimchi sat on the shelf and the cashier had to ask the owner in the back how much the containers were. I took 2 for $3.99 each because we go through an entire container in one sitting.

We're desperate to figure out how to make our own, but no online recipes work out well, and I don't know anyone who's willing to share their favorite recipe. A colleague of mine has a roommate who started Mother In Law Kimchi based on her MIL's restaurant in LA--the company has been pretty critically acclaimed, but they don't sell in some of the key places...like Trader Joe's, which has some of the best pre-prepared bulgogi I've ever tasted. Unfortunately, MILK doesn't market itself very well, and despite the fact that the kimchi is very good, the website offering it for sale is horribly designed and misleading. Nor do I think the owner would share her recipe with me.

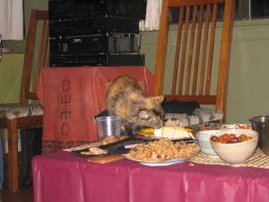
We served the kimchi with TJ's bulgogi over some organic jasmine rice. Definitely one of our favorite dinners.

Tuesday, June 29, 2010

Tasty Eight Balls

This used to mean something else at a different time in my life, but tonite, it meant delicious 8-ball zucchini stuffed with quinoa, onions, garlic, toasted walnuts and herbs and spices. It seems labor intensive, but it's not. You'll have some of the quinoa mixture leftover, which is good all on its own. You can mix some seasoned tofu into this, which is how I had meant to make it but forgot. It was fine on it's own. The spices you use will really make this dish special.

Toasted Walnut & Quinoa Stuffed Eight Ball Zucchini

4 Eight Ball Zucchinis
1 cup quinoa
1 cup vegetable broth
olive oil
1/4 cup toasted walnuts
1/4 cup currants
3 tbsp chopped parsley
3 tbsp chopped basil
1 medium onion
4 garlic cloves, chopped
spice mix (I used a Yucatan Spice mix described here; but you can use cumin, paprika, cinnamon . . .)

Cut the zucchini heads off like you were cutting out a pumpkin for Halloween. Scrape out the insides, chop them up into little pieces, and set them aside. Set the empty zucchinis into a baking dish with a bit of broth on the bottom.

Toast the quinoa in a cast iron pan and then cook with one cup of water and one cup of broth. Season with salt and pepper.

Sautee the onion and garlic in a cast iron pan. Once the onion starts to brown, add the zucchini and sautee until tender. Add half of the chopped herbs, the currants, and the walnuts. Once everything is mixed and heated through, add to the quinoa with the rest of the fresh herbs. Mix thoroughly. Spoon into each of the eight ball zucchinis and bake at 400 F for about 30-45 minutes.

We served this with a dollop of lebne and a bit of sriracha sauce on the side (you could substitute plain yogurt or sour cream and hot sauce), and a Middle Eastern Beet Salad with parsley, toasted walnuts, and rosewater.

Sunday, June 20, 2010

English Muffin Afternoon

I found this recipe on Epicurious after hearing a co-worker talk about making it a few weeks ago. I hate wasting my sourdough when I feed it, so this is another good alternative. I used the sourdough starter I'm calling "Wedding Sourdough" because its a combination of my San Francisco starter and 25-year-old Swedish starter that got mixed up the week before my wedding and I just started a new one with it. I've been feeding it with whatever happens to be around, so it's nicely unidentifiable.

Apparently, this epicurious recipe that I adapted myself was adapted from a Mark Bittman recipe. I used a Martha Stewart recipe to alter it.

Whole Wheat Seeded Sourdough English Muffins

1 cup sourdough starter
1 1/2 cups all-purpose flour
1 cup whole wheat flour
1/2 cup flour for dusting and rolling
1 tsp. instant yeast
2 tsp. salt
2 Tbl. olive oil
1 Tbl. honey
2/3 cup lukewarm milk

For the topping
1 egg
Seeds (I use a variety of poppy seeds, black and white sesame seeds, hemp seeds, and sea salt)

Mix together the the starter, flour, yeast and salt, then add all the rest of the ingredients and mix together until it starts to form a ball around your spoon. At that point, start kneading the dough until it's a well-defined ball that's tacky but not truly sticky.

Lightly grease a plastic or wooden bowl. Place the dough in the bowl and cover it loosely. Let it sit until it's doubled in size, about two hours. Deflate and let rest for 15 minutes.

Oil a cookie tray and sprinkle with semolina. Roll the dough out onto a well floured surface and using a bisquit cutter (or cooker cutter or the mouth of a glass), divide the dough into eight to 12 pieces (depending on how big you want your muffins). Lift each muffin up and set it on the cookie tray. Let them sit for about 30 minutes.

When they've puffed up a bit, use an egg wash to brush the tops of the muffins and sprinkle with seeds.

Heat up an unoiled cast-iron skillet and cook each muffin in olive oil on both sides until lightly browned. It should take about 1-2 minutes per side. When they are nicely browned, take them out of the pan and place them on a cleaned, oiled, and semolina-ed cookie sheet and pop them in the oven for about 10-15 minutes, or until the insides of the muffins are about 190 degrees F.

Monday, June 7, 2010

Venison Experiment


Last year, D and I were given a gift of venison meat cubes from a friend of D's who is a bow hunter. At that time, we were venison virgins and had no idea what we would do with the meat, or what to expect. I think we were both a little afraid of a "gamey" taste. We decided to do a tagine with it, and it's now one of our signature dishes. I wrote a blog entry about the recipe I adapted here.

This year, my new brother-in-law, also a hunter, brought over a bag of deer meat just before our May 1st wedding. We didn't have the time to look at it, much less do anything with it, before the wedding. We got a tagine as a gift, and the first thing I thought about was taking the venison out of the freezer and making a stew as our first tagine. When I defrosted it over the weekend, I realized to my dismay that what we'd been given was cutlets, which would certainly not work in the tagine. I'm not sure why I felt stymied by cutlets, but I did. I decided to marinate two servings of it in some olive oil, garlic, salt, pepper, and thyme and pop it back into the fridge until I could decide what to do.

I decided to cook it in a cast iron pan and top it with a black currant sauce with a side of sugar snap peas that I picked up at the Farmer's Market over the weekend. I couldn't find a black currant sauce that I liked, so I made this one up:

Black Currant Sauce

1 cup chopped onions
1 cup black currants
1 tbsp brown sugar
1 tbsp cornstarch
1 tsp dry mustard
1 tablespoon red wine vinegar
1 tbsp lemon juice
1 1/2 cups water

Sautee chopped onions until starting to brown. Add the brown sugar, cornstarch, and dry mustard. Stir for about a minute, add vinegar, currants, lemon juice, and water. Continue cooking, stirring constantly, until thick. Turn the heat off and let cool for a bit. Blend 3/4 of the mixture in a blender and add back to the saucepan. Reheat and spoon over the meat when heated through.

Sunday, June 6, 2010

Rich People's Bread

I've been experimenting with sourdough bread since Christmas; I think I've made over a hundred loaves of bread since then. I keep looking for a recipe that combines the right timing with the right flavor. Many a morning I've been late to work because I'm waiting for dough to rise or bread to finish baking. Many of the sourdough recipes I've found require days of developing the dough and rising, and those recipes are just not practical for everyday bread for someone who works full time. This recipe, which I tried early on and just filed, was a hit. Every time I tried a new recipe, D would say: "Why don't you make that oat and flax bread again? That was great!" The first time I made it, he called it "rich people's bread." So that's what I'll call it here. I adapted it from a recipe I found on a blog called Kath Eats Real Food: A Blog Devoted to Healthy Living

The blog suggests a way to make your sourdough starter from scratch, but I've used a sourdough starter that a friend from Sweden gave me: it's a hearty wheat-grain sourdough that's been going for 25 years! I feed it about once every two weeks with 1/2 cup of warm water + 1/2 cup of wheat or rye flour. Sometimes I throw a drop of honey or a tsp of flax into the mix.

Rich People's Oat and Flax Sourdough Bread

1 3/4 cup starter
1 1/2 cup wheat flour
1 ¼ cup bread flour
1 cup oats
3 Tbsp flax seeds
2 ½ tbsp honey
1 ½ cup water
1 tsp instant yeast
1 tbsp kosher salt
1/3 cup walnut pieces

Warm water to body temperature. Pour in oats and flax and let soak for 5-10 minutes. Then mix all ingredients EXCEPT walnuts until mixture comes together. Add walnuts. It should be fairly sticky but not runny, and have good strength when tugged. Let dough ferment for 2 hours, folding after the first hour. After the second hour, shape into a compact ball and allow to rest for 10-20 minutes. Shape dough ball into two oval loaves and place in two 9×5 loaf pans. Oil and dust pans with some kind of a dusting agent (I've used oats, sesame seeds, hemp seeds, and pysllium husks) Allow to rise for 1 1/2 hours. After 1 hour preheat oven to 400. Brush the top of the risen loaves with an egg wash and sprinkle with oats or seeds. Bake for 30-35 mins until very dark in color and interior hits 190.

This bread is delicious with fried eggs and smoked salmon, which is how we ate it this morning! It's also delicious toasted with butter, or all by itself. The author of the original blog recommends french toast, which sounds intriguing.