Friday, November 30, 2012

Ceasefire Stuffing

On the way out of town the Wednesday before Thanksgiving, I said to D: the only thing I wasn't able to get was a brioche or a challah bread for the stuffing. He asked if I wanted to take a detour to the Lower East Side to B & H Dairy for some fresh challah. He told me that his dad, a NYC taxi driver, used to stop there all the time and bring home a fresh loaf for the family. Sadly, I never met D's dad. From what I know of him--an irascible character with an outsized personality--I think I would have really liked him a lot. So off we went into the morass of traffic (which was great, because for some reason, I remembered as we were driving that I had left our brining turkey on the porch back in Brooklyn. A discovery better made in Lower Manhattan than in New Jersey). As we neared the shop on Second Avenue, D wondered if they'd even have any bread left the day before Thanksgiving. I figured if the Dairy didn't have it, then Moishe's across the street would. But we were in luck! I asked for the challah (which I never imagined would look like this) and the woman behind the counter handed me the loaf, "still warm from the oven," she said. It was $4.

Beautiful challah loaf
 Such a shame to cut this beautiful bread up for stuffing cubes! So I set aside four slices for breakfast tomorrow morning before everyone comes for dinner. Chop the rest of it I did, though, in large chunks. I placed those on dry baking sheets and stuck them in the oven at 250 F for about 15-20 minutes until they were hard and dry.

toasted challah cubes


The title of this post is "Ceasefire Stuffing" because today, after 8 days of sustained violence in Gaza, Israel and the Palestinians agreed to a ceasefire, and I combined challah bread with pork for my Thanksgiving stuffing. Clearly, the two events are not at all comparable: the former being a critical global event that will save countless lives and the latter a simple tasty dish. But the blog post needed a title, and the dish needed a name. 

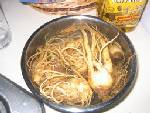
pork sausage, removed from its casing, with fresh thyme.
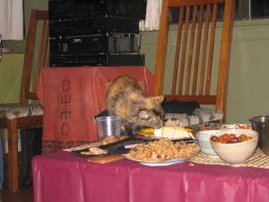
There are some foods that are just designed to go together, and apple, sage, sausage, and leek are like a close knit group of friends--they are so good together--in a soup, a stir fry, and best of all, a stuffing. Thankfully no vegetarians this year, but I guess you could substitute a vegetarian tofu sausage, or even leave the meat out altogether. The smell of this dish cooking, as Julia Child would say, will make you feel like home.


The key to this dish, I think, is the careful way you have to fold the wet ingredients into the dry. Don't be afraid to use the butter--your guests will appreciate it. I was worried that the stuffing would be too wet with all of the stock, butter, and egg, but once you bake it, this liquid will ensure that your stuffing is moist and holds together. This recipe made quite a bit of stuffing, but we're having 8 with healthy appetites for dinner, and I hope there's some left over for turkey sandwiches!


Ceasefire Stuffing
Challah Stuffing with Apple, Leek & Sausage

1 large loaf of challah bread
2 large leeks, chopped
3 celery stalks, chopped
8 oz mushrooms, chopped
4 apples, diced
4-5 sausages or ground pork*
1-2 tbsp chopped fresh thyme
3 tsp sage
1 tsp salt
1 tsp cracked black pepper
3 cups chicken or vegetable stock
4 tbsp melted butter
1 beaten egg

*spicy, sweet, seasoned or not, depending on your taste.

Cut the bread into 1" or 1/2" cubes, depending on how you like your stuffing. Spread out evenly on cookie sheets and toast at 250 F until dry.

Saute the chopped leeks and celery in a cast iron pan with some olive oil until soft. Add the mushrooms, apples, sage, salt & pepper and cook until the apples are tender.

Transfer the leek-apple mixture to a very large bowl. By this time, your bread should be done. Take it out and set it aside. In the same cast iron pan, saute the pork and thyme. When the meat is nicely browned, transfer to the bowl with the leek-apple mixture. Melt 4 tbsp butter in the pan you've just taken the meat out of; add the melted butter to the meat-veggie mixture. Stir in the stock. And then, when the mixture has reached room temperature, add in the beaten egg.

Carefully stir the toasted bread cubes into the meat-veggie mixture a little bit at a time to fully coat the bread with the mixture. Stir together until everything is incorporated. Pack the stuffing into a casserole dish, cover, and bake at 350 F for 30-40 minutes. Uncover the stuffing for the last 5 minutes and turn up the heat to 400 F to brown the top. You can also prepare the stuffing the night before and pop it into the oven the next day before dinner.

Enjoy!


Saturday, November 17, 2012

Drunken Kabocha

On the way up to the country in the car, we heard an interview with  Hiroko Shimbo, author of a new book Hiroko's American Kitchen and she was talking about using kabocha squash for pie instead of pumpkin. Her description of the nutty flavor and buttery texture of the squash was intriguing, and I figured it was something I was definitely going to have to try. We stopped at a grocery store close to our destination, and what do you know--there was a big pile of kabocha squash. So I tried it out. I don't yet have her book, so I had to look for some other model recipes and found one from the New York Times that I had most of the ingredients for on hand.

It was a great alternative to pumpkin pie this season and I would definitely make it again. I'm looking forward to experimenting more with kabocha--ginger kabocha soup is on deck, and next week I'd like to try a red curry stir fry with the squash.

Drunken Kabocha Pie

2 cups of pureed kabocha squash
8 ounces softened cream cheese
3/4 cup sugar
1 teaspoon vanilla
1 1/2 teaspoon cinnamon
1 teaspoon cardamom
1/2 teaspoon salt
3 tablespoons good quality whiskey
2 eggs at room temperature
1/4 cup cream
(your favorite pie crust for the bottom. We use the crust from Four & Twenty Blackbirds)

Combine all of the ingredients in a bowl, and then pre-bake your crust at 375 degrees for about 15 minutes. When the pie crust is done, add the squash mixture and bake for another 25-30 minutes or until a toothpick comes out clean. Serve with fresh whipped cream. Enjoy!

Sunday, November 11, 2012

Pumpkin-Madness

Everybody's making fun of all the pumpkin-flavored things that people load up on this time of year: pumpkin spice latte, pumpkin muffins, pumpkin scones, pumpkin donuts, pumpkin-Pringles, pumpkin pasta, pumpkin salsa, pumpkin-flavord martini, and even pumpkin pie margarita....but I really do enjoy pumpkin season.

It seemed pretty obvious to me that our Sunday pancake routine could use a dash of pumpkin, so I found this recipe on the blog "i am baker." I adapted it with my sourdough starter and the addition of more spices and pecans. You can do a lot of adjusting with this recipe. If you like thinner, creamier pancakes, use a lot more liquid (milk, sourdough, buttermilk, water); if you like them cakier, follow this recipe strictly.

Pumpkin Pecan Pancakes

1 cup flour
1/2 cup cornmeal
1/4 cup sugar
2 tablespoons baking powder
1/2 teaspoon salt
1 teaspoon vanilla
1/2 teaspoon cinnamon
1/2 teaspoon nutmeg
(any other spices you like: cardamom, ginger, allspice)
1 beaten egg
1 1/2 cup milk (or sourdough or buttermilk)
1/2 cup pureed pumpkin
(chopped pecans to sprinkle on top)

In a large bowl, combine the dry ingredients. In a separate bow, mix together the wet ingredients. Add the dry to the wet, and blend until incorporated. If the batter is too thick, you can add warm water or more milk.

Drop pancakes by the heaping tablespoon, depending on how big you like your pancakes, onto a very hot griddle with oil and/or butter. Sprinkle pecans on the uncooked side. Cook until just a few air holes appear on the top of the pancakes or the sides become shiny, and then flip.

Serve with maple syrup, local bacon, and hot coffee.


Monday, October 29, 2012

Sandy Sourdough

Hurricane Sandy gave us a 4-day weekend and we're making the most of it.****[see postscript]

While I should be reading, I am cooking up a storm to match the one outside.

Here's a new spin on one of my favorites, Rich People's Bread. I adapted this staple by adding 1/2 cup of pumpkin, and a little bit of nutmeg & cinnamon. I substituted the cranberries/raisins that I usually use with chopped dates. Delicious right out of the oven with some butter.

Should I name the recipe Sandy Sourdough?

****I wrote this blog on October 29th--well before the destruction wrought by Hurricane Sandy became real--for my family and my city. While my family made it through with only property damage (some really severe), a lot of people lost their lives. The storm plunged the city into darkness and water, and the displacement has been profound. Some communities were nearly decimated. Red Hook's Fairway--the place where I get many of the ingredients I use in recipes recorded in this blog--suffered catastrophic damage. Let this be a lesson: do not underestimate or joke around with Mother Nature. 

Sunday, October 28, 2012

Spicy Autumn Chutney

Chutney is my new favorite thing. I recently replicated a salad I had at an Albany restaurant, the secret ingredient was spicy apple chutney. I described the salad in a previous blog post, but didn't yet tell you how to make the chutney.

Now's the time to stock up on this stuff, right at the end of the apple season. I cut some apples for a tart, saving the best and most beautiful slices for the tart and discarding the uglier pieces for this chutney. The last time I made it, it was a little too hot. This time, I think I could have used just a speck more jalapeno. It'll be great though with greens and goat cheese.

Spicy Apple Ginger Chutney

4 cups of chopped apple
1 tbsp diced ginger
3 garlic cloves, diced
1 medium onion, coarsely chopped
1 jalapeno, finely diced
1 cup apple cider vinegar
1 cup brown sugar
1 cup raisins
1 tsp salt
1/2 tsp nutmeg
1/2 tsp cinnamon
1 tsp pickling spices

Saute the ginger, garlic, onion, and jalapeno in a deep sauce pan. Once they are carmelized, add the apple and stir to coat and warm. Add the vinegar, brown sugar, raisins, salt, nutmeg, cinnamon, and pickling spices and stir often over a medium flame. The mixture is finished cooking when most of the liquid is evaporated and the apples are soft and nicely mushed with the raisins.

Spoon in to clean canning jars and seal tightly. If your lids pop, you can keep this at room temperature for quite some time. If they don't, refrigerate and use within three weeks. You can eat the chutney right away, but I find that the flavors deepen after a few days.

I've heard that spicy apple chutney is great with a pulled pork sandwich, too, and that's the next destination for this batch.

Sunday, October 21, 2012

Pearl Couscous for an Autumn Date

I created this recipe for a fall dinner with friends of Tilapia and a kale-goat cheese-chutney salad recipe, which I blogged about here

All of the ingredients in this dish are underrated. Together, the flavors are fantastic. And it's totally easy to make as well. You can substitute just about any dried fruits, nuts, vegetables, and liquids in this recipe for what I've chosen.


Pearl Couscous with Dates, Walnuts, and Preserved Lemon


1 medium onion, diced
2 cloves garlic, diced
1 stalk celery, chopped
2 tbsp olive oil, or rice bran oil
1 ¼ cups vegetable broth
1 cup water
2 tablespoons finely chopped dates 
2 tablespoons chopped walnuts 
1 tablespoon diced preserved lemon
½ teaspoon salt 
¼ teaspoon ground cumin
¼ teaspoon ground black pepper
1 cup pearl couscous

Sautee the onion, garlic, and celery in oil in a deep and wide sauce pan. Add couscous and season with salt, pepper & cumin. Toast for a minute or so, and then add vegetable broth & water, which will sputter. Quickly add dates, walnuts, lemon and give it a quick stir. Bring to a boil, and then reduce the heat and cover. Resist the urge to stir, or you'll make the dish sticky. Once the liquid is evaporated, test the couscous and make sure it's cooked. Do not overcook or the couscous will be mushy and/or burned at the bottom of the plan. Fluff with a fork and serve. You can garnish with chopped cilantro or parsley.


Saturday, October 20, 2012

Burning Hands Relish

My hands were burning like hell three years ago. I had just finished making 200 little jars of hot pepper relish as wedding favors. I spent that Saturday night at my BFF's house with both hands in big containers of yogurt while drinking red wine from a straw and watching Saturday Night Live.

Two blunders mark that experience: First of all, I never wrote down the recipe I used. And second, I didn't wear gloves while cutting hot peppers.

I'm recording the recipe as best I can this time, having improvised quite a bit from a recipe found in The Complete Book of Pickles & Relishes, originally published in 1965 by Leonard Louis Levinson. This book, which I acquired by marriage from my husband who is a trained chef, is my basic pickle-, relish-, and chutney-making bible.

During a visit to the Red Hook Added Value Community Farm, I lamented that I hadn't made relish for a long time. My husband encouraged me to take some time this weekend to make some, and so we picked up an assortment of late-summer produce: purple and green tomatillos, red, purple, and green bell peppers, and assorted, colorful hot peppers. Making relish is a snap--you just have to remember the damage these hot pepper can do to your nose, your eyes, and your hands. I guess I didn't learn my lesson from the last time.

Hot Pepper & Celery Pickle Relish

6 tomatillos
6 bell peppers
6-12 assorted hot peppers, depending on your taste and their size
1 large onion
2 stalks celery
2 cups cider vinegar
1/2 cup sugar
2 teaspoons pickling or canning salt
8 small jars

Chop the tomatillos, onions, celery, and peppers roughly and then put in a food processor. Chop just enough so the relish is fine, but not a paste. Combine in a pot on the stove with vinegar, sugar, and salt. Bring to a boil. Strain the relish from the liquid, reserving the liquid. Spoon relish into clean jars and fill with reserved liquid to the consistency you like. Screw on lids tightly and set aside until they pop. Distribute jars to close friends and advise them that the relish is good on such things as scrambled eggs, fish, hot dogs, and kielbasa.


Saturday, October 13, 2012

Late Summer Treasure

I travel to Albany, New York for my job. A lot. Most people groan when they hear that, and offer their sympathy. But I adapt to my surroundings, and I love going to Albany.

In my opinion, the Albany food co-op is the city's greatest hidden treasure. I've never seen anything like it. If you read this blog, you know I cook a lot. And I use ingredients that you don't find in your everyday supermarket. I can always find exactly what I need at the Albany food co-op, and more. The people are friendly, the prices are great, their bulk section is amazing (I never knew there were so many different kinds of flour!), and they even have raw milk.

Albany's restaurants are also pretty amazing. New World Bistro Bar, a 10-minute drive from the capitol building and a place where you can often see Albany powerbrokers brokering power over a drink and a meal, is my favorite.

The menu is seasonal, and the food creative. It's warm and comfortable, and the service has always been friendly and attentive. They have a great wine list, except I'm always disappointed with their selection of local New York wines.

Farmer's Market Salad was on the menu that last time I visited, and I was blown away. I don't know if it was the menu description of the dish, or the server's recommendation, but I'm glad I chose it. I knew I had to make it at home. When I returned to Brooklyn, I had the opportunity to re-create the salad for friends who came over for dinner. I served it as the second course following pumpkin soup, and before tilapia over date-nut couscous. It was a hit.

New World Bistro Late Summer Farmer's Market Salad

Bunch of kale
Bunch of escarole
2 tbsp Apple chutney
1 tbsp Curried Cashews
2 tbsp Curried vinaigrette
3 oz goat cheese

Roughly chop the kale and escarole after washing thoroughly. Both greens retain a lot of sand. Toss the lettuce and chutney with the curried vinaigrette until the leaves are lightly coated. Tip: Add the vinaigrette gradually to taste instead of adding all 2 tbsp immediately. You may want to reserve some for the table. Toss in pieces of goat cheese and curried cashews. Arrange on a plate displaying all ingredients. Serve and enjoy!


Sunday, October 7, 2012

Ginger Rehab

You know you're cooked when you get that little tickle in your throat. Too late for the echinacea, too late for the Vitamin C. You just gotta stock up on the tea & cough drops and hope your schedule allows for a day or more resting at home. Mine didn't this time around. I had a 3-day retreat that I'd planned for my department in Albany, New York and a big party at home that Saturday night--neither of which I could cancel. Unfortunate, because in my experience, if you try to work through sickness with medication (my preferred coping meds are a steady stream of DayQuil and NyQuil), you're just staving off symptoms and your cold lasts longer. And that is, indeed, what happened.

What made this cold a tiny bit more bearable was the fresh ginger I picked up at the Albany food co-op. I'd never seen it before, and the co-op workers told me they wouldn't have it for long. I bought enough to do three things: make some ginger-tofu stir fry, stick one of the little root ends in water to see if it would grow, and cut little slivers into throat-coat tea all week. Delicious.

Sunday, September 30, 2012

Kicking Summer to the Curb with Apple Spice Cake

Mohonk Mountain House is an amazing place. Just outside of New Paltz, New York, hidden atop a gorgeous mountain and overlooking a lake on one side and a valley on the other, the estate used to be a Quaker retreat and now all kinds of people and groups retreat there for the beautiful and peaceful natural vistas. The restaurant, staffed mainly by graduates of the nearby Culinary Institute of America, complements the place well. The food is excellent. 

I sit on the Board of Directors of the New York State Perinatal Association, an organization that advocates for better maternal and infant health policies and outcomes, and I was fortunate that the Board organized a retreat a Mohonk in September. 

There are so many things that were inspiring about that place, not the least of which was a deep dish over sterno cups that contained a mess of apples in caramel sauce. I don't know what drew me to it, but it was my fortunate choice from the dessert table. I vowed to replicate it for this year's Kicking Summer to the Curb party. I was pleased with the results I got from this recipe, with a few alterations (no walnuts, and bumped up spices). I picked up apples from the Albany food co-op on the way back from a work trip, and made this cake the day before the party. I also tripled the recipe for 48 servings.

End of Summer Apple Spice Cake with Caramel Sauce

Apple Spice Cake 
1/4 cup butter or 1/4 cup margarine, room temperature
1 cup sugar
1 egg
1 cup flour
1 tsp cinnamon
1/2 tsp cardamom

1/4 tsp nutmeg
1/4 tsp allspice
1/2 tsp ginger1 tsp baking soda
1/4 teaspoon salt
3 apples, peeled and grated (I used a food processor)


Preheat oven to 350-degrees F. Spray a 8-inch square cake pan with non-stick olive oil or grease pan and set aside. In a large bowl cream butter with sugar. Beat in egg. Stir in flour, spices, baking soda and salt. Fold in apples. Pour into prepared pan. Bake for 30-40 minutes or until cake is done and toothpick comes clean when inserted in cake. Cut in squares when cool.

Caramel Sauce
1/4 cup butter or 1/4 cup margarine
1/2 cup brown sugar
1/2 cup white sugar
1/2 cup whipping cream
1 teaspoon vanilla
salt

To make caramel sauce melt butter in saucepan over low heat and then add remaining ingredients. Bring to a boil, stirring constantly. Continue stirring for 5 minutes or until sauce thickens. Remove caramel sauce from heat and serve over apple cake squares.

Friday, September 28, 2012

Birthday Cupcakes


I love having the time to make cupcakes for a colleague I'm fond of. I was given a book of luscious cupcake recipes, titled simply cupcakes, as a wedding present, and I've worked my way through only about a half a dozen of them. This time, I wanted to try a chocolate with salted caramel. They were a hit with the small group we gathered to sing happy birthday, and the frosting was a big hit with my husband (though he thought the cupcakes themselves were a little too dense, which may have been because I left them in the oven just a little too long).

Chocolate Cupcakes with Salted Caramel Buttercream

Basic Chocolate Cupcakes
2/3 cup flour
2 1/2 tbsp unsweetened cocoa powder
3/4 tsp baking powder
1/4 tsp salt
3 oz bittersweet chocolate, chopped
1/2 cup plus 3 tbsp unsalted butter, cut into pieces
3/4 cup plus 2 tbsp sugar
3 large eggs at room temperature
1 tsp vanilla extract

 Preheat oven to 350 degrees, prepare a 12-cup muffin tin. Whisk together flour, cocoa powder, and salt. Melt chocolate and butter in a large heavy pan, stirring frequently until melted and smooth, about 5 minutes. Be careful not to let the chocolate burn at the bottom of the pan. Remove from heat and let cool.

 Stir the sugar into the chocolate mixture once it is cooled to room temperature until the two are combined. Stir in the eggs one at a time, beating until combined after each addition, then beat in the vanilla. Gently fold the flouer mixture just until no traces of flour remain; do not overmix (this also could have made the cake stiff). Place about 2 tbsp into each muffin cup, filling each to about 3/4 full.

Bake until a toothpick inserted in the center comes out with only a few moist crumbs attached, about 22-24 minutes. Let the cupcakes cool on a wire rack in the pan, then remove each from the pan and let them cool completely.

Basic Buttercream

3 large egg whites at room temperature
3/4 cup sugar
pinch of salt
1 cup unsalted butter, cut into 16 pieces, at room temp
1 tsp vanilla paste

In a large heatproof bowl, combine the egg whites and sugar. Set the bowl over simmering water in a saucepan and heat the mixture, whisking constantly, until the sugar has completely dissolved and the mixture is very warm to the touch, about two minutes. Remove the bowl from the saucepan. Using an electric mixer on high speed, beat the egg white mixture until it is fluffy, cooled to room temperature, and holds stiff peaks (the mixture should not look dry), about 6 minutes.

With the mixer on medium-low speed, add the salt and the butter, a few pieces at a time, beating well after each addition. If the frosting appears to separate or is very liquid after all the butter is added, continue to beat on high speed until it is smooth and creamy, 3-5 minutes more.

 Caramel Sauce

1 1/2 cups sugar
1 1/4 cup heavy cream
pinch of salt

(makes about 2 1/4 cups)

In a heavy-bottomed and high-sided saucepan, cook the dry sugar all by itself over medium-high heat until it begins to melt around the edges, about 5 minutes. Stirring with a clean spoon, continue to cook until the sugar is melted and has turned golden amber, about 3 minutes longer. Be careful not to burn--that's a different sauce!

Carefully pour the cream down the side of the pan in a slow, steady stream (it will bubble and spatter), stirring constantly until completely smooth. Stir in the salt. Pour the caramel into a small heatproof bowl and let cool completely before using. You can store the caramel for about a week. Bring it back to room temperature before using.

Swirl into the buttercream and frost each cupcake generously. Then drizzle caramel in designs over the cupcake top. Sprinkle with coarse sea salt. Serve and enjoy!

Saturday, September 15, 2012

Block Party Cubano Tacos

I've lived in the same place for almost 15 years in Brooklyn. Almost every year, our block has a party, but in years' past, I've been too busy to go. Recently, I've attempted to get involved in our newly-formed block association. I attend meetings when I can, but infrequently because of work. This year when the date of the block party was announced, I put it on my calendar and committed to go. Today was the block party, and I have never had more invitations to do different things: my softball team's party, a friend in from out of town, a colleague's birthday party--but I was committed to this block party. And I'm glad I made that decision.

Our block is really unique. There are people who've lived there all their lives, their apartments or houses were passed down through generations. There are entrepreneurs, families, same-sex couples, hipsters. There are people in new apartment buildings (three of them on the block), and some in crumbling brownstones. There's a hot new pie shop on the corner at one end of the block, and a reliable Chinese take-out on the other side that has a ginger and scallion soup that I swear cures the common cold. We have musicians who drum and play guitar on the roof every Saturday night, a motorcycle dude who annoys the hell out of me when he revvs his engine really loud, and the owner and founder of a local brewery. And even though I pass most of them by every day, I don't know very many of them at all.

I decided that I wanted to share my pickles and D's hot sauce this year, and made pernil as the platform. D happened to be away at a concert this weekend, but he cooked up a new batch of sauce and helped me roast the pernil last night. I made some pickles a few weeks ago, and had some pickled onions keeping in the fridge. So I made cubano-tacos: little corn tortilla halves, shredded jack cheese, shredded roast pork, pickle slice, pickled onions, and hot sauce. Folks were grilling with their families in front of their homes, so I went around and introduced myself and asked everyone if they wanted a little taco with some hot sauce.

People were so kind with their compliments and I got to talk to so many of them. My voting rights work, the state of the block's construction, the robust nature of the block association, and what "fracking" means were all little conversations I was able to have all day (D and I have a "no fracking" sign in our third-story window).

If I when I ever launch my pickle business, I'll start my marketing on my own block first.

Sunday, September 2, 2012

Don't Cry Over Spilled Hato Muji

I found this grain--Job's Tears, or hato muji, at the Albany food co-op several months ago. I'd never heard of it before, and it was supremely expensive, so I just had to try it. It is an ancient grain that looks and acts like barley, but isn't. It has all kinds of uses (medicinal, nutritional, artistic), but I planned to use it for a cold summer salad.

Ever since I stopped eating quinoa (here's why) I've been searching for an alternative grain. While hato muji is almost prohibitively expensive, it is really tasty.

I couldn't find a recipe for it anywhere, so I made one up based on a recipe I found for barley salad.

Apricot-Grain Summer Salad

1 1/2 cups hato muji
8 cups water
1 cube bouillion (veggie, mushroom)
[or you can use 2-4 cups of stock in place of the same proportion of water]
1/2 cup sliced dried apricot
1/2 cup shredded carrot
1 cup diced yellow pepper
1 cup finely diced onion
4 cloves diced garlic
1 tbsp diced ginger
2 tbsp olive oil, or toasted sesame oil (or a combination)
1/2 cup sliced toasted almond

Combined water/broth with the hato muji and bring to a boil. Simmer for at least an hour (frequently checking toward the end) until the grain is firm but chewy. While the grain is cooking, sautee in a cast iron pan the onion, garlic, and ginger in olive oil until tender and just beginning to brown. When the grain is done cooking, toss in a large bowl with the sliced apricots, shredded carrot, and the sauteed onion mixture. Quickly sautee over high heat the diced yellow bell pepper until some of the pieces are singed. Toss into the grain. Garnis with toasted sliced or chopped almonds. It's a nice alternative to a potato-based dish for a main dish of pork loin or ribs, or just on it's own.


Thursday, August 23, 2012

Craving Eggplant

When I was a kid, I convinced myself that I was severely allergic to eggplant. There was something about the texture of cooked eggplant that freaked me out, and I could command my body to react violently to the sight of it. To be honest, I don't know if I was convincing to anyone but myself about my allergy. My aunt, ignorant to my "allergy," cooked eggplant parmesan while I was visiting, and for some reason, I not only tolerated it, I loved it.

 As an adult, eggplant is one of my favorite things, and properly prepared eggplant parmesan is heavenly. A recent craving for the dish led me to search for a new Epicurious recipe to prepare two beautiful eggplants I found at a weekend trip to a farmer's market. I adapted this interesting recipe for eggplant roll-ups to a traditional eggplant parmesan dish that turned out really well. One of my requirements for a well-prepared eggplant parmesan is that the eggplant slices not be so thinly sliced that they eggplant disintegrates into nothing, so I tend to cut my slices extra-thick and the result is sometimes a pretty firm eggplant center, which I don't mind at all. But you might.

Every ingredient in the dish I made was locally sourced or homemade, and you could tell. The three cheeses I used were all from Hudson Valley dairy- or cheese producers; the produce was from local farms; and the tomato sauce was canned by my mom using tomatoes from her garden last year. The mint was a little disconcerting to my husband, but I found that it did just what the recipe reviews said it would: it brightened up the dish and made it a bit more summery. Though it is a summer dish, be forewarned: prep is a killer in a hot kitchen.


Minty-Ricotta Eggplant Parmesan

2 medium eggplants (about 2 1/4 pounds total), trimmed, cut lengthwise into 1/4-inch to 1/2 inch-thick slices Coarse kosher salt Extra-virgin olive oil
1 cup white flour
3 large eggs
 2 cups breadcrumbs (I used unseasoned whole wheat)
1-2 cups of olive oil for frying the eggplant
1 15-ounce container whole-milk ricotta cheese
1 1/4 cups finely grated Parmesan cheese, divided
1 1-pound bunch Swiss chard, center ribs removed
2 tablespoons chopped fresh mint
3/4 teaspoon freshly ground black pepper
1 15- to 16-ounce jar of tomato sauce (Mom's* is my preferred brand!)
1 8-ounce ball of fresh mozzarella sliced to taste.

*My mom's canned tomato sauce is so good that my husband thought I used fresh tomatoes and made the sauce myself that night from scratch!

Cover bottom and sides of each of 2 large colanders with 1 layer of eggplant slices; sprinkle generously with coarse salt. Continue layering eggplant slices in each colander, sprinkling each layer with coarse salt, until all eggplant slices are used. Place each colander over large bowl; let stand at least 30 minutes and up to 1 hour. Rinse eggplant slices to remove excess salt; dry thoroughly with paper towels.

Set up your eggplant-preparing station by filling three shallow bowls with, in respective order, flour, beaten egg, and bread crumbs. Lightly coat each slice of eggplant in flour on both sides, then dip in beaten egg, then lightly coat with bread crumbs. I dare you to not make a mess when you do this.

When each eggplant slice has been breaded, saute the slices in hot olive oil to a nice browness. Place finished slices on a tray to cool a little bit.

While your eggplants are cooling (or simultaneous to your saute, depending on how big your kitchen is) bring large pot of salted water to boil. Add chard to pot and boil just until tender, about 2 minutes. Drain; rinse with cold water. Squeeze chard very dry, then chop coarsely. Squeeze chard dry again between paper towels. Whisk eggs and pinch of coarse salt in medium bowl. Stir in chopped chard, ricotta cheese, 1 cup Parmesan, mint, and black pepper.

Lightly oil 15 x 10 x 2-inch glass baking dish. Spread half of tomato sauce evenly over bottom of dish. Arrange breaded eggplant slices over the sauce, then spread with the ricotta mixture. Top the ricotta with tomato sauce, and another layer of eggplant, and then repeat with ricotta & sauce if your dish is deep enough. Add a final layer of eggplant and then top slices of mozzarella. Sprinkle salt and pepper to taste, and bake at 300°F for 20-30 minutes or until the cheese begins to bubble and brown. You may want to crank up the temperature for the last ten minutes.

Make sure you let the dish set (rest) after taking it out of the oven so that the cheese top doesn't separate from the rest of the dish when you cut it. Serve a steamy, heaping slice to your loved ones. If you've done it right, you won't need extra sauce or parmesan cheese, but it wouldn't hurt to have some on hand!


Sunday, July 29, 2012

Aren't these pretty? Every once in a while, just for shits and giggles, I like to roast some gorgeous golden beets with a little salt, pepper, and olive oil.

Sunday, June 24, 2012

Alternative Pesto


Have you noticed how expensive pine nuts are? Oh my god. The last time I checked, they were well over $20 a pound. If you love pesto the way that I do, you will love this substitute that allows you to use a less expensive nut: walnuts. You can actually make pesto with hazelnuts and pecans, too (probably more, but I haven't tried any others). This is a delicious alternative to pine nut pesto. The next few weeks will be the best times to get fresh basil at the farmer's market. Make sure you pick up a bunch--if you make this recipe, you can freeze enough to keep yourself in fresh pesto through the winter.

Fresh Basil-Walnut Pesto

5 cups clean fresh basil leaves
1 1/2 - 2 cups parmesan cheese
2 cups walnuts
6 cloves of garlic
salt & pepper
1 - 1 1/2 cup olive oil
1/2 cup lemon or lime juice

Make sure your basil is washed thoroughly. I wash it, place the leaves in a bowl of cold water, and then stick it in the fridge til I'm ready to make the pesto. Start by placing about 1/4 of your basil leaves in a food processor along with about 1/4 cup of walnuts and 1-2 cloves of garlic. Once that has blended down, keep adding those three ingredients until they are all blended. Slowly add your oil until the mixture is a little loose; then start adding the cheese a portion at a time. Finish off with lemon or lime juice and salt & pepper to taste. Note: this is a really malleable recipe. You can use more or less of any of the above ingredients to taste. Just keep tasting your pesto until you get it just the way you like it.

Serve over your favorite pasta. We paired ours with some browned chicken breast, cherry tomato, and a lovely Long Island rose.


Monday, May 28, 2012

Chicks from Hell

Deviled eggs are one of my favorite things to see on a buffet table at a party. So when I saw a picture on my friend's Facebook page of these cute little chicks, I knew I had to try them with a fabulous filling the next time I had a party to go to. We were invited to accompany some friends to a Memorial Day weekend party hosted by their friends who live on an absolutely breathtaking parcel of land near Narrowsburg, New York. I was slightly concerned that the level of sophistication of the party would be marred by my kitchy chicks, but people loved them. The conversation ranged from fracking and politics to fashion, and my chicks were just fine.

I needed to find some way to make them my own, so I got the idea of making the egg filling spicy hot. I've been hooked on harissa lately--using it to marinate meat and shrimp, and as an addition to yogurt sauces. Our friend from Tunisia made our last jar of harissa, and it's now gone. I'm going to have to learn how to make my own, and thankfully, the New York Times can help me do it.

The process of making these little guys was not easy, let me just say that. I fact, let me say it again: it was not easy to make these little chicks. If you try to do it, plan to make double the amount of eggs so that you have enough that work. For the next time, I have to find some way to make the hardboiled eggs so that the yolk doesn't end up too close to the edge of the egg making it impossible to pop out without breaking the side of the egg white. Someone suggested stirring the water as it begins to boil to ensure that the yolk stays in the center.

How to do it:

Chicks from Hell

Make your hardboiled eggs using this technique. When they are sufficiently boiled, pop them in ice water for a few hours, or in the fridge overnight. When you're ready to assemble them, get a sharp knife, two bowls, and cutting board. Take an egg and feel gently for where the yolk is. Slice 1/3 of the egg at the top and if you're lucky, the yolk will be right there to easily pop out. If not, you have to find some way to gently extract it. Pop all the yolks like this out into a bowl. If you break any of the egg white bodies, dump those dead ones in another bowl. You can make some egg salad on the side. When the yolks are all out, and the little hats are separated from the little bodies, you can make the filling.

Deviled egg filling

As many yolks as you have chick-bodies
mayonnaise
salt & pepper
harissa
cilantro, basil, chive or whatever fresh herb you like best
about 2 scallions

You'll also need enough little eyes made of sliced black olives, and little noses made of little carrot wedges.

Mix together these ingredients to taste. Depending on the kind of harissa you have, you need to be very careful about how much you add. Remember, you can always give the filling more heat, it's impossible to take it away. And harissa kicks in after you bite it--make sure you account for the after-burn.

Once the filling is made to your satisfaction, begin assembling your chicks.

You need to slice a tiny sliver off the bottom of each egg so that it will be balanced enough to stand up straight on the plate. You can chuck those little slivers into the damaged chick-body bowl. Gently spoon some of the filling into the base of the body, then top with a mound. Place your eyes and noses on each chick, then top with the other 1/3 of the egg white.

Assemble on a fun tray, garnish if you wish, and serve. Since so many of my chick-bodies were disasters, I served them alongside a bowl of egg salad with crackers.


Wednesday, May 9, 2012

Where's the Pickles?

There's an ultimate frisbee tournament coming up and I'm fresh out of pickles. If you've ever been to an ultimate frisbee tournament, you've probably seen the guys on the sidelines after a few games chugging pickle juice straight out of the jar. Pickle juice is widely believed by athletes (though not yet scientifically proven) to relieve muscle cramping. I like bringing my homemade pickles to the fields so that after they chug down some neon green Vlasic pickle juice, the guys can enjoy a fresh, tasty, wholesome pickle.

I picked up a few pounds of kirbys today at the Albany Food Co-op, and decided that they deserve not some pre-packaged, stale pickling spice, but a fresh, homemade pickling spice. So I made some. I adapted it from a blog called Girlichef. It's worth making your own pickling spice if only for the smell of the toasted coriander and mustard seeds crushed in a paper bag that will linger in your kitchen.

Juniper Pickling Spice

4 Tbs. whole black peppercorns
4 Tbs. mustard seeds
4 Tbs. coriander seeds
2 Tbs. crushed red chiles
2 Tbs. whole allspice berries
1 tsp turmeric
2 small cinnamon sticks, crushed or broken into pcs.
24 bay leaves, crumbled
2 Tbs. juniper berries
1 Tbs. ground ginger

Lightly toast the first three ingredients in a small dry pan, slide them into a paper sack (like a brown lunch bag), and then roll over them with a rolling pin a few times. Combine cracked spices with remaining ingredients, mixing well. Store in a tightly sealed plastic container or glass jar. Then, make yourself some healing pickles. Best Dill Pickle Recipe as of May 2012 You'll need 4 or more pounds of kirbys; and at least four, if not six, canning jars. Make sure the jars and lids are squeaky clean. Some folks say you have to sterilize them, others take a short cut and put them in a dishwasher. I just do a very thorough wash with hot soapy water right before I begin the process. Soak whole kirbys in ice water for between 2-8 hours Make brine: 4 cups white vinegar 12 cups water 2/3 pickling salt 2 tbsp pickling spice 1 tsp turmeric 3 tbsp sugar Add to each jar: 2-4 cloves of garlic 2-4 sprigs of dill 1 tbsp of pickling spice 1/2 tsp turmeric While bringing the brine to a boil, cut the kirbys into spears. You don't want to do this beforehand because you want the pickles to stay crisp in the ice water til the very end. Pack the spears into the jars, and fill each jar to the top with the well-combined and boiling brine. Screw on the lids, and set onto tea towels until you hear the lids pop. Once they pop, the jars are sealed and can be stored at room temperature. If they don't pop, you need to refrigerate them and use them within a few weeks. Serve fresh from the fridge, or on ice from the jar on the frisbee field. : )

Monday, April 2, 2012

Preserving Lemons

A restaurant called Nomad on the Lower East Side serves the best couscous I've ever had. The secret? Little bits of preserved lemon. We ordered filet mignon brochettes (basically shish kebabs), served over this fabulous couscous. Meyer lemons were on sale at Fairway today, so I decided to try to make some myself. I have a lamb tagine planned in a few weeks, and I'd like to come close to making the best couscous we've ever had.

Moroccan Preserved Lemons

4 Meyer lemons, scrubbed very clean
1/2 cup kosher salt, more if needed
Extra fresh squeezed lemon juice, if needed
Sterilized quart canning jar

Place 2 tablespoons of salt in the bottom of a sterilized jar. One by one, prepare the lemons in the following way. Cut off any protruding stems from the lemons, and cut 1/4 inch off the tip of each lemon. Cut the lemons as if you were going to cut them in half lengthwize, starting from the tip, but do not cut all the way. Keep the lemon attached at the base. Make another cut in a similar manner, so now the lemon is quartered, but again, attached at the base. Pry the lemons open and generously sprinkle salt all over the insides and outsides of the lemons. Pack the lemons in the jar, squishing them down so that juice is extracted and the lemon juice rises to the top of the jar.

Fill up the jar with lemons, make sure the top is covered with lemon juice. Add more fresh squeezed lemon juice if necessary. Top with a couple tablespoons of salt. Seal the jar and let sit at room temperature for a couple days. Turn the jar upside down ocassionally. Put in refrigerator and let sit, again turning upside down ocassionally, for at least 3 weeks, until lemon rinds soften.To use, remove a lemon from the jar and rinse thoroughly in water to remove salt. Discard seeds before using. Discard the pulp before using, if desired. Store in refrigerator for up to 6 months.

Sunday, April 1, 2012

When life gives you lemons.....

When I make my New Year's resolutions, I always include at least one whimsical, relatively easy thing to do. A few years ago, making lemon curd was on the list. And it stayed there for about four years because I seemed to never find the time to do it. Today's my birthday, and I wanted to make myself some lemon curd. So I did, Epicurious.com as my guide.

1/2 cup freshly squeezed lemon juice
2 teaspoons finely grated fresh lemon zest
1/2 cup sugar
3 large eggs
3/4 stick (6 tablespoons) unsalted butter, cut into bits

Beat the eggs before whisking together with the juice, zest, and sugar in a saucepan. Stir in butter and cook over moderately low heat, whisking frequently, until curd is thick enough to hold marks of whisk and first bubble appears on surface, about 6 minutes. Transfer lemon curd to a bowl and chill, its surface covered with plastic wrap, until cold, at least 1 hour. Or, put it in a shot glass and eat some immediately.

Monday, March 5, 2012

Winter Slaw

My blog has been heavy on the meat and sweets lately, so I thought I'd bring it back to the roots and showcase a late-winter vegetable I found at the 5th Avenue Farmer's Market last weekend. Kohlrabi is a tuber-like vegetable that grows above-ground and is rich in vitamins and fiber and very low in calories--despite it's sweetness. There are a number of varieties, but the guy at the vegetable stand gave me a little slice of the purple kohlrabi to try, and I was sold. Kohlrabi is best to buy when the bulbs are relatively small, no more than 1 1/2 inches in diameter. They'll keep in the fridge for a week or so, but they are harder to grate the older they get.

I thought it would make a nice slaw as a light accompaniment to any of the meat dishes that we've been making. This week, we're serving it alongside some buffalo meatloaf, asparagus, and winter root vegetable mash. I actually threw the stubs of the kohlrabi (the pieces that you have to give up grating or else you end up grating your fingers and knuckles) into the winter mash as it cooked so I wouldn't waste anything.

I found this recipe which I adapted to accommodate the ingredients I had in the house.

Purple Kohlrabi Winter Slaw

2 medium kohlrabi, peeled, stems trimmed off, grated
2 carrots, grated
1/2 onion, grated
1/4 cup golden & black raisins
1 tbsp sugar
1 tsp salt
1 1/2 tbsp cider vinegar
4 tbsp chopped cilantro
1/4 cup mayonnaise (or more, if you prefer

Combine all ingredients in a bowl and mix well. Chill for several hours before serving.

Sunday, March 4, 2012

The Bee's Knees

Bees are essential for human life. Without bees, we would die. And without honey, we would be extremely unhappy. The honey pie is possibly the quintessential key to ultimate happiness.

D and I went to our first block association meeting a few weeks ago at the corner pie shop, Four and Twenty Blackbirds. (Everyone should have a corner pie shop.) The proprietors very generously provided free pie to the group, but when we got there and looked up at the menu we saw something we couldn't pass up: salted honey pie. We weren't going to take a chance that they'd serve us the honey pie, so D went up prepared to buy a slice to share--they gave it to us on the house. It was one of those foodie moments that actually changes your life. And whenever we have that kind of experience, we leave the restaurant thinking; we've got to make this at home. Four & Twenty made this easy by graciously making their recipe for this divine pie publicly available.

For some reason, D and I started paying a lot of attention to bees. Bees became a theme in our wedding--we had little marzipan bees on our wedding cake, there were bees worked into our wedding invitation, and a friend of D's created a terrific design for wedding-themed frisbees that D gave to his ultimate frisbee friends (pictured here). We even got bee tattoos.

Unfortunately, the honey bee population is in crisis and very few people seem to be paying attention. Check out this documentary, Colony, about the collapse of the honey bee population. Recently, New Yorkers won the right to keep raise bees in the city. I've thought about doing it, but haven't fully assessed whether I have the wherewithall to make that kind of commitment. There's a course offered here at the Beekeeper's Association that I'm thinking about taking.

So what do we do in the meantime? We are careful about the kind of honey we buy and we try to support local honey producers so that they remain profitable and keep doing what they're doing. There's been a raging scandal in the food community about honey that most people don't even know about: the honey that you buy at the supermarket is probably not honey at all. You can read about the scandal here, and take action by seeking out local honey producers. Because you can raise bees just about anywhere, you can even find locally-produced honey in Brooklyn!


You have to make a recipe dozens of times before you get it perfectly right, so D and I have started the process. The recipe we used calls for one ingredient that you may never have heard of, I know I hadn't: vanilla bean paste. It's a bit pricey, but you don't need a lot of it. I found it at my new favorite place, the Albany Food Co-op. Two weeks ago, on our way out to our friends' country house, we decided in the car that we wanted to try to make the honey pie for the first time, but I had left the recently-purchased vanilla bean paste at home. We were prepared to substitute extract, but were delighted to find that our friend stocked vanilla bean paste in his cupboard. (I wonder what he uses it for?) Another key ingredient is salt flakes. Maldon is the best kind of flaked salt; don't try to substitute another kind, it won't work. The last key ingredient is, of course, good honey. We went to the Hamlin Buffalo farm and picked up some locally-produced honey (and some buffalo short ribs!) and made this pie.

Salted Honey Pie

(Makes one 9-inch custard pie)

Preheat oven to 350F. Have prepared one pre-baked pie shell of your choice, the recipe for the Four & Twenty Blackbird pie crust is below.

For filling

1/2 c butter melted
3/4 c white sugar
2 Tbsp white cornmeal
1/4 tsp salt
3/4 c honey
3 eggs
1/2 c cream
2 tsp white vinegar
1 tsp vanilla paste
1 or 2 Tbsp flake sea salt for finishing (Maldon is a good choice)

All of the mixing can be done by hand. Melt butter and combine with the sugar, salt and cornmeal to make a thick paste. Add the honey, vanilla and vinegar and mix together. Fold in the eggs, add the cream and blend. Pour the filling into a pre-baked pie shell and bake at 350 F for 45 to 60 minutes. The filling will puff up like a marshmallow and the center will be just slightly wobbly. Once cooled (at least one hour), finish with a sprinkling of flake sea salt. Slice and serve with freshly whipped cream.

Four & Twenty Blackbirds Pie Crust

This recipe makes one double crusted, 9-inch pie (you only need one crust for the honey pie--if you make both, you can freeze the other one).

2 1/2 cups all-purpose unbleached flour
1 teaspoon salt
1 tablespoon sugar
1/2 pound (2 sticks) cold unsalted butter, cut into 1/2-inch pieces
8-10 tablespoons ice water with cider vinegar, or more as needed (combine 1 cup cold water, 1/8 cup cider vinegar and ice)

Whisk the dry ingredients together and blend with a hand-held pastry blender (or a knife and fork or two forks) the chopped, cold butter, being careful not to overwork during this step. The butter should be in pea-sized chunks, not too big, but not completely incorporated. Slowly add the ice water and vinegar mixture and bring the dough completely together by hand, again being careful not to overwork. Aim to create a marbleized effect, so that the butter is still visible. Divide into 2 discs, wrap in plastic and chill 1 hour or more before use. To pre-bake a crust for a custard pie: Roll one disc of crust out to fit a 9-inch pan, about 1/4 inch thick. Place in a buttered pie pan, and crimp the edges as desired. Allow to rest and cool in freezer or fridge for at least 20 minutes. Line the rolled-out crust with tinfoil or unwaxed parchment paper, add pie weights or about a cup of dry beans if you don’t have pie weights. Distribute them evenly. Bake in a 375 F oven for 20 minutes. Allow to cool slightly before filling with custard.

Monday, February 20, 2012

The Sourdough Experiments

People really appreciate freshly-baked bread. You pop a loaf in the oven before guests arrive and the smell wafting from your kitchen will make people feel as welcome as anything. I've been experimenting with sourdough recipes since I brought my first starter back from San Francisco about three years ago. I've had a very hard time finding a recipe for a nice rustic loaf, but this one is the best so far. This recipe is from the King Arthur flour website, and it worked pretty well--it yields a nice crust and a chewy center. The problem that I've had is with the rising. I don't know if its the climate or what, but I rarely ever get the nice air pockets that characterize a good sourdough. I also have a hard time getting the loaves to rise high when I made free-form loaves; my dough seems to expand lengthwise, but not rise up. This time I used additional yeast toward the end of the process, and formed a lip of aluminum foil around the dough to keep it from expanding outward. This experiment makes me think that I ought to search for some spring-form dough ring for my next loaf.

I made two loaves in preparation for weekend guests. We served the freshly-baked loaves with a dinner of pan-seared venison, leeks, and sweet potatoes. The leftovers went well with pea soup for the next day's lunch, and toasted for tuna-salad sandwiches.

Rustic Supper Sourdough

1 cup "fed" sourdough starter
1 1/2 cups lukewarm water
2 teaspoons instant yeast
1 tablespoon sugar
2 1/2 teaspoons salt
5 cups flour

Combine all of the ingredients, kneading to form a smooth dough. Allow the dough to rise, in a covered bowl, until it's doubled in size, about 90 minutes. Gently divide the dough in half; it'll deflate somewhat. Shape the dough into two oval loaves--this is where I deviated from the recipe. I sprinkled a little bit of dried yeast and stretched it through the dough, folding it over and under itself until I had two smooth loaves. Place the loaves on a lightly greased baking sheet. Cover and let rise until very puffy, about 1 hour. Towards the end of the rising time, preheat the oven to 425°F. Spray the loaves with olive oil or lukewarm water. At this point, you can also do an egg wash to make the crust shiny. I didn't do that this time around. Make two fairly deep diagonal slashes in each. Bake the bread for 25 to 30 minutes, until it's a very deep golden brown. Remove it from the oven, and cool on a rack.