Showing posts with label Brooklyn. Show all posts

Saturday, August 31, 2013

Scotch Bonnet Hot Pickle Relish


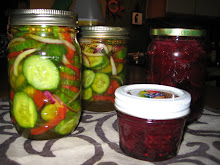
My end-of-summer scotch bonnet yield was a neat dozen. I made the third version of hot pepper relish of the season: a sweet hot pickle relish. I hope this one makes us holler.

Scotch Bonnet Pickle Relish

1 large white onion
1 large green bell pepper
4 kirbys
12 scotch bonnet peppers
1 cup cider vinegar
1 cup white vinegar
1 1/2 cups sugar
1 1/2 tsp salt

To prepare, put a pot of water up to boil and fill with your jars & lids. For this amount of veggies, I used four small jars. In another pot on the stove, place your vinegars, sugar, and salt. Turn the heat on the vinegar mixture once your veggies are almost finished with the chopping. Next, in a food processor, pulse the white onion a few times and then add the scotch bonnets.

After those are chopped finely, add the green bell pepper and three of the kirbys. It may take a bit of arranging to get stuff chopped uniformly. Because I like a chunkier relish, I diced the last kirby by hand. Once the vinegar mixture has heated, add the chopped veggies to the liquid and bring to a boil. Boil for about two minutes. Strain the relish, reserving the liquid.

Take the boiled jars out of the pot and place on a clean surface. Spoon very wet relish into each jar. If you like your relish a little more liquidy, you can add some of the strained pickle juice. Seal the jars quickly and set to rest until you hear a "pop." That means the jars are sealed and you can put them up. You can eat the relish right away, but it's best in about a week.

Sunday, August 11, 2013

Hot (Pepper) Mess

Porch peppers beckon, even when you're not feeling well. When they're ripe, they're ripe and you gotta use them or they'll rot. So this weekend was time to make hot pepper relish. Only the red hot peppers were ready; in a week or so, the scotch bonnets will be ready. Those are a whole nother level of hot. I didn't use gloves this time and my hands are burning right now. I can't neglect to use them for the scotch bonnets.

I scavenged all of the old jars that people returned to me after our wedding (jars of hot pepper relish were the wedding favors), washed them in steaming hot water and got started. I rarely write down my relish recipes, but this time I did.


Hot Pepper Relish

One dozen hot red peppers
2 green bell peppers
1 red bell pepper
1 yellow bell pepper
1 large white onion
6 tomatillos
1 tbsp kosher or canning salt
3/4 cup sugar
1 1/4 cup cider vinegar
large saucepan
hot boiling water

Carefully handle the red peppers to cut off the stems and de-seed them.


Chop the vegetables in manageable pieces and in thirds, distribute the veggies & peppers into the food processor. Process until finely chopped. Place in a large saucepot. Sprinkle with 1 tbsp kosher/canning salt and then pour boiling water on top. Let sit for about 5 minutes.

After 5 minutes is up, drain the water from the peppers and place back on the stove. Pour in cider vinegar and sugar, and bring to a boil again. Turn the heat off after the boil begins, then spoon the finished relish into jars and quickly secure the lids.

They should indicate that they're sealed if they pop within an hour or so. If they don't pop, you'll have to refrigerate them. They'll be ready to use in 2-3 weeks.

Foreign Eggs

We love eggs. I've written about our love of eggs in this blog before. So when I found scotch eggs in London last year--eggs surrounded by spicy pork, rolled in tasty breadcrumbs and baked--I knew it was only a matter of time before I started making them at home.

Actually, I was really impressed with food and drink in London. I don't know why it's the butt of anyone's joke. I regularly order hard cider (my favorite is pear) whenever it's available now. And the bodegas carry Jack Daniels and Coke in a can. Super.
It took about a year to turn my attention back to Scotch Eggs, but here's my first iteration. I made them for a picnic at a Prospect Park concert where hummous is the staple and graces almost every blanket. And I made it vegetarian with Gimme Lean sausage. My favorite part was getting my friends to try and guess what the ball of goodness sitting on the plate was before I cut it in half, revealing the egg. This recipe will make a tasty scotch egg, but I can only imagine what well-seasoned pork would do. I used large eggs, but I could see using medium, small, or even quail eggs to make these--depending on the occasion and whether they will be a meal or an appetizer.

Spicy Baked Scotch Eggs

4 medium hardboiled eggs, peeled
1 14 oz tube of gimme lean sausage
2 cups flour
2 cups bread crumbs
2 tsp harissa
2 tsp cumin
2 tsp coriander
2 tsp chili powder
2 tsp paprika
2 tsp garlic powder
2 tsp salt
2 tsp ground black pepper
1 raw egg, whisked
spray olive oil
baking dish
4 bowls

You'll need four bowls: (1) sausage mixed with 2 tsp harissa; (2) flour with one tsp each of cumin, coriander, chili powder, paprika, garlic powder, salt & pepper; (3) bread crumbs with one tsp each of cumin, coriander, chili powder, paprika, garlic powder, salt & pepper; (4) whisked egg.

Preheat the oven to 400 F. In clean and oiled hands, take 1/4 of the sausage mixture and flatten it evenly in your hand. Place a single hardboiled egg in the center and gently wrap the sausage evenly around the egg. Once all of the egg is covered with sausage, roll the ball in the seasoned flour. Dunk the flour-coated egg into the raw egg and coat. Then carefully roll the eggy-egg in breadcrumbs to coat evenly. Place the large round ball in an olive oil-coated baking dish. Repeat three more times, washing your hands in between each one. Place each round coated egg on an oiled baking dish and pop in the oven for 1/2 hour. Check for golden-brownness and rotate the dish if you need to for a few more minutes. Let cool and eat one on it's own, or serve with any number of condiments: salt & pepper, hot sauce, mayo, horseradish sauce, sriracha....


Monday, March 5, 2012

Winter Slaw

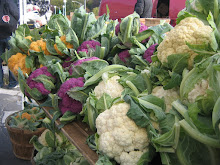
My blog has been heavy on the meat and sweets lately, so I thought I'd bring it back to the roots and showcase a late-winter vegetable I found at the 5th Avenue Farmer's Market last weekend. Kohlrabi is a tuber-like vegetable that grows above-ground and is rich in vitamins and fiber and very low in calories--despite it's sweetness. There are a number of varieties, but the guy at the vegetable stand gave me a little slice of the purple kohlrabi to try, and I was sold. Kohlrabi is best to buy when the bulbs are relatively small, no more than 1 1/2 inches in diameter. They'll keep in the fridge for a week or so, but they are harder to grate the older they get.

I thought it would make a nice slaw as a light accompaniment to any of the meat dishes that we've been making. This week, we're serving it alongside some buffalo meatloaf, asparagus, and winter root vegetable mash. I actually threw the stubs of the kohlrabi (the pieces that you have to give up grating or else you end up grating your fingers and knuckles) into the winter mash as it cooked so I wouldn't waste anything.

I found this recipe which I adapted to accommodate the ingredients I had in the house.

Purple Kohlrabi Winter Slaw

2 medium kohlrabi, peeled, stems trimmed off, grated
2 carrots, grated
1/2 onion, grated
1/4 cup golden & black raisins
1 tbsp sugar
1 tsp salt
1 1/2 tbsp cider vinegar
4 tbsp chopped cilantro
1/4 cup mayonnaise (or more, if you prefer

Combine all ingredients in a bowl and mix well. Chill for several hours before serving.

Sunday, March 4, 2012

The Bee's Knees

Bees are essential for human life. Without bees, we would die. And without honey, we would be extremely unhappy. The honey pie is possibly the quintessential key to ultimate happiness.

D and I went to our first block association meeting a few weeks ago at the corner pie shop, Four and Twenty Blackbirds. (Everyone should have a corner pie shop.) The proprietors very generously provided free pie to the group, but when we got there and looked up at the menu we saw something we couldn't pass up: salted honey pie. We weren't going to take a chance that they'd serve us the honey pie, so D went up prepared to buy a slice to share--they gave it to us on the house. It was one of those foodie moments that actually changes your life. And whenever we have that kind of experience, we leave the restaurant thinking; we've got to make this at home. Four & Twenty made this easy by graciously making their recipe for this divine pie publicly available.

For some reason, D and I started paying a lot of attention to bees. Bees became a theme in our wedding--we had little marzipan bees on our wedding cake, there were bees worked into our wedding invitation, and a friend of D's created a terrific design for wedding-themed frisbees that D gave to his ultimate frisbee friends (pictured here). We even got bee tattoos.

Unfortunately, the honey bee population is in crisis and very few people seem to be paying attention. Check out this documentary, Colony, about the collapse of the honey bee population. Recently, New Yorkers won the right to keep raise bees in the city. I've thought about doing it, but haven't fully assessed whether I have the wherewithall to make that kind of commitment. There's a course offered here at the Beekeeper's Association that I'm thinking about taking.

So what do we do in the meantime? We are careful about the kind of honey we buy and we try to support local honey producers so that they remain profitable and keep doing what they're doing. There's been a raging scandal in the food community about honey that most people don't even know about: the honey that you buy at the supermarket is probably not honey at all. You can read about the scandal here, and take action by seeking out local honey producers. Because you can raise bees just about anywhere, you can even find locally-produced honey in Brooklyn!


You have to make a recipe dozens of times before you get it perfectly right, so D and I have started the process. The recipe we used calls for one ingredient that you may never have heard of, I know I hadn't: vanilla bean paste. It's a bit pricey, but you don't need a lot of it. I found it at my new favorite place, the Albany Food Co-op. Two weeks ago, on our way out to our friends' country house, we decided in the car that we wanted to try to make the honey pie for the first time, but I had left the recently-purchased vanilla bean paste at home. We were prepared to substitute extract, but were delighted to find that our friend stocked vanilla bean paste in his cupboard. (I wonder what he uses it for?) Another key ingredient is salt flakes. Maldon is the best kind of flaked salt; don't try to substitute another kind, it won't work. The last key ingredient is, of course, good honey. We went to the Hamlin Buffalo farm and picked up some locally-produced honey (and some buffalo short ribs!) and made this pie.

Salted Honey Pie

(Makes one 9-inch custard pie)

Preheat oven to 350F. Have prepared one pre-baked pie shell of your choice, the recipe for the Four & Twenty Blackbird pie crust is below.

For filling

1/2 c butter melted
3/4 c white sugar
2 Tbsp white cornmeal
1/4 tsp salt
3/4 c honey
3 eggs
1/2 c cream
2 tsp white vinegar
1 tsp vanilla paste
1 or 2 Tbsp flake sea salt for finishing (Maldon is a good choice)
–
All of the mixing can be done by hand. Melt butter and combine with the sugar, salt and cornmeal to make a thick paste. Add the honey, vanilla and vinegar and mix together. Fold in the eggs, add the cream and blend. Pour the filling into a pre-baked pie shell and bake at 350 F for 45 to 60 minutes. The filling will puff up like a marshmallow and the center will be just slightly wobbly. Once cooled (at least one hour), finish with a sprinkling of flake sea salt. Slice and serve with freshly whipped cream.

Four & Twenty Blackbirds Pie Crust

This recipe makes one double crusted, 9-inch pie (you only need one crust for the honey pie--if you make both, you can freeze the other one).

2 1/2 cups all-purpose unbleached flour
1 teaspoon salt
1 tablespoon sugar
1/2 pound (2 sticks) cold unsalted butter, cut into 1/2-inch pieces
8-10 tablespoons ice water with cider vinegar, or more as needed (combine 1 cup cold water, 1/8 cup cider vinegar and ice)

Whisk the dry ingredients together and blend with a hand-held pastry blender (or a knife and fork or two forks) the chopped, cold butter, being careful not to overwork during this step. The butter should be in pea-sized chunks, not too big, but not completely incorporated. Slowly add the ice water and vinegar mixture and bring the dough completely together by hand, again being careful not to overwork. Aim to create a marbleized effect, so that the butter is still visible. Divide into 2 discs, wrap in plastic and chill 1 hour or more before use. To pre-bake a crust for a custard pie: Roll one disc of crust out to fit a 9-inch pan, about 1/4 inch thick. Place in a buttered pie pan, and crimp the edges as desired. Allow to rest and cool in freezer or fridge for at least 20 minutes. Line the rolled-out crust with tinfoil or unwaxed parchment paper, add pie weights or about a cup of dry beans if you don’t have pie weights. Distribute them evenly. Bake in a 375 F oven for 20 minutes. Allow to cool slightly before filling with custard.

Tuesday, December 13, 2011

Sick Burger

Inspired by an episode of Diners, Drive Ins, and Dives, D and I made the sickest burger you've ever heard of. The Minotaur's Lair is a burger designed by a place called Kuma's Corner in Chicago, made with pear, onions, brie, and bacon.

We used grass-fed beef from Fleischer's market in Brooklyn to make really nice meat patties, formed with some sauteed onion, garlic, salt and pepper. We grilled the burger patties on our little grill on the back porch. Then we poached and grilled some sliced pears. We served the grilled burgers on toasted ciabatta rolls with carmelized onions and brie, topped with the poached pears. Sick.

Thursday, September 8, 2011

Favorite. Ice Cream. Ever.

When my close friend and roommate left me eight years ago to move in with his wonderful boyfriend just down the street, he left me a lot of things. His boyfriend was a well-provisioned adult, and I was barely scraping by, so the hand-me-downs were welcome. One of the things he left was an ice cream maker. Every once in a while, I would contemplate the idea of making ice cream but I never did.

Eight years went by and the ice cream maker collected dust. Last year, my husband and I pulled it out and considered selling it at the yard sale my friend and his boyfriend were holding down the street--they were moving to a smaller apartment two neighborhoods away. We didn't sell it; instead, we dusted it off and put it in a new storage place. We vowed to use it soon. We didn't.

Another year went by, but I recently took it out. I experimented first with a simple vanilla ice cream, using some vanilla beans that I foraged in a Mexican market a few years ago. It turned out alright--though a little too fatty for my taste. It was kind of buttery. I served it over a fresh peach pie. My second experiment was with peach ice cream. D had bought a basket of peaches at a roadside green market in Pennsylvania and we couldn't possibly eat them all. This second batch was a little less buttery, but still a bit too creamy for me.

This week I decided to throw myself into the ring all the way and make my favorite ice cream of all time: mint chip. A colleague from work turned me on to a blog by David Lebovitz who writes, among other things, about making ice cream. I printed out the recipe for mint chip and headed to the market. I had no idea how many bunches of mint would make two cups, so I overbought. Then for good measure, I threw a bottle of mint extract in the cart. Instead of heavy cream, I bought light. And instead of whole milk, I bought two percent. In addition to those two ingredient changes, I also added my chopped chips in half-way through the mixing process directly to the ice cream base. I didn't heat it and drizzle as the recipe advised. And, I didn't have to worry about the mint extract, because after the two cups of mint leaves (less than two bunches, it turns out!) had steeped in the milk, I could tell that the flavor would be strong enough. And using light cream and 2% mile made it light and icy, just like I like it.

What is so sublime about this homemade mint chip, though, is the mint flavor. I've never tasted anything like it. To say that it tastes natural is an understatement. I mean, it IS natural. But it actually tastes like being in a garden. Long ago, I forswore mint chip ice cream that had that strange bright green color and only ate Breyer's mint chip. Then Haagen Daaz became the standard. But now? Now I think I'm just going to have to get used to plucking mint leaves to make my own.

Sunday, March 13, 2011

Confetti Cornbread

Sometimes I use a packaged mix. This is a risky admission on a blog that champions slow home cooking and tries to follow, as much as possible, Michael Pollan's suggestion to shop around the perimeter of the supermarket. But sometimes I do. I wanted to make cornbread for an annual chili party that friends of ours on the Upper West Side have every year, and I happened to have three boxes of Jiffy cornbread mix in the cabinet. You can find these little guys for as little as 33 cents in some grocery stores; these were 55 cents at Fairway. The ingredients aren't so bad, and its just so easy: add an egg (in this case three), and a 1/3 cup of milk (in this case one cup) and voila! Tasty cornbread. I dressed it up a bit, of course, with 1/2 cup of corn kernels and about 2 tbsp of chopped red jalapeno and fire-roasted poblano. My cornbread didn't hold up very well on the long walk and subway rides from Brooklyn to the party, but people gobbled them up despite their looks.

Saturday, February 26, 2011

Six of Everything

We finally have six of everything for entertaining: six fancy water glasses, six matching cloth napkins, six salad plates, six dessert plates, six steak knives, six matching chairs at a lovely new table, and matching silverware to boot....so we had to have four of our friends over for a mid-week dinner party. We haven't had a chance to use the lovely tagine that we received as a wedding present, so I decided to prepare a lamb tagine that I made as our very first tagine, which I wrote about here. One of our friends has very specific food aversions, including nuts, chocolate, and aged cheese--three things we discovered we use routinely. So dinner planning was a bit of a challenge, but a welcome one. Finding an appetizer without nuts or aged cheese was the first challenge. Dessert without chocolate was the second. Epicurious came through with flying colors on both fronts. I decided on a goat cheese with roasted yellow pepper and dill for an appetizer, served with lavash crackers from Damascus bakery on Atlantic Avenue in Brooklyn. For dessert, I chose a honey cake called Basboura. The Basboura was a hit; everyone had a second piece.

Basboura

2 cups fine semolina
1 cup dessicated coconut
1/2 cup sugar
1 tsp baking soda
A little less than 2/3 cup melted butter or ghee or semnah
1 cup milk

For the syrup...
1 1/2 cups sugar
1 1/2 cups water
1 tbsp lime juice or 2 tbsp lemon juice
2 tbsp honey

Preheat the oven to 345 degrees F. In a large bowl mix all the dry ingredients, the semolina, coconut, sugar and soda together. Mix in the melted butter and milk and stir until well combined. Pat this mixture into a buttered, shallow medium sized oven proof dish and level the surface with a spatula or a palette knife. Bake for 30 minutes or until golden brown on the top.

In a medium sized sauce pan, place the sugar and water on low heat and stir until the sugar dissolves completely. Increase the heat to medium and then bring the mixture to a vigorous boil and cook until it coats the back of a spoon or reduces by about one-third or until it reaches 220 degree F on a cooking thermometer. Stir in the lime juice and allow to cool. Once cooled or warm, mix in the honey and stir well.

Allow the cake to cool sllightly, for about 10 minutes and then cut it into squares or diamonds. Carefully pour the syrup over the cake. It will look like a lot of syrup, but the cake will absorb all the syrup gradually.

Serve at room temperature. We served ours with a dollop of yogurt mixed with a splash of rose water, and a generous sprinkling of dessicated coconut. The dessert can be served, or baked, with almonds as well.

Goat Cheese and Yellow Pepper Dip

2 yellow peppers, halved, seeded
2 jalapeno peppers, cut in half and de-seeded
2 tablespoons olive oil
8 ounces sharp soft goat cheese
2 tablespoons chopped dill, plus 1 sprig for garnish
1 tablespoon lime juice
Coarse salt and fresh cracked black pepper
Pinch cayenne

Roast peppers over an open flame until soft and a the skin a little charred, about 5-8 minutes. Place them in a plastic bag for about 20 minutes, remove and peel the skin off. Emulsify the peppers in a food processor and add the goat cheese, lime juice, dill, cayenne pepper, black pepper and salt to taste. Pulse until combined well. Serve with flat bread or pita chips.

Saturday, January 8, 2011

Mimicking Muhammara

The last time D and I went to Tanoreen in Bay Ridge, just before Christmas, we asked for a double order of Muhammara. I'd been looking forward to the trip to Tanoreen for weeks, thinking of the slightly crunchy, garlicky sweet mystery. It didn't occur to me until the end of the night, after sopping up the last juicy specks on the dish with a piece of pita, that I could probably learn how to make it at home. If not as good as Tanoreen, I could at least enjoy and entertain others with something like it at home. I vowed I would make it sometime shortly after the New Year.

Epicurious has a great recipe that's simple and ended up being very tasty. I might add more olive oil next time, and try to blend the ingredients in a way that allows it to retain a bit more of the individual ingredients' distinctness, but for a first try, it was very good.

There will never be a substitute to enjoying a warm dish of muhammara with a glass of Lebanese wine surrounded by friends and the warmth of Tanoreen itself, but I'm glad I can whip this up for any occasion.

Muhammara

a 12-ounce jar roasted red peppers, drained
1/2 cup toasted bread crumbs
1/2 cup walnuts, toasted lightly and chopped fine
2 to 4 garlic cloves, minced and mashed to a paste with 1/2 teaspoon salt
1 tablespoon fresh lemon or lime juice, or to taste
2 teaspoons pomegranate molasses
1 teaspoon ground cumin
1/2 teaspoon dried hot red pepper flakes
1/2-3/4 cup extra-virgin olive oil
toasted pita triangles as an accompaniment

In a food processor blend together the peppers, the bread crumbs, the walnuts, the garlic, the lemon juice, the pomegranate molasses, the cumin, the red pepper flakes, and salt to taste until the mixture is the consistency you'd like. Add the oil gradually. Transfer the muhammara to a bowl and serve it at room temperature with the pita triangles.


The original recipe, which I adapted only slightly, from Epicurious can be found here.

Friday, December 24, 2010

Christmas celebration at Tanoreen

It was the night before Christmas Eve, and we'd planned to spend it with friends at Fone of our favorite restaurants, Tanoreen in Bay Ridge. We were seven: two close friends who were headed to Ghana for the holidays, a friend from Florida who'd come to town to house- and dog-sit for them while they were away, and another couple from Jersey. We'd gotten to the neighborhood a little early, so D and I drove to Dyker Heights, a neighborhood where folks try to outdo each other every year in over-the-top lawn decorations. It's really an unbelievable sight: life-sized toy soldiers, Santas, reindeer.....D jokes that Con Ed makes a profit just from this neighborhood every year.

Tanoreen recently moved to a larger location with a liquor license. I was afraid a move like that might kill the spirit of the lovely little restaurant where the chef and owner, Palestinian and Nazareth-born Rawia Bishawa, would come out from the kitchen and check in with guests to make sure they were enjoying their meal. Bishawa still comes out, and the place is even warmer and more festive than its smaller digs down the street. Bishawa and her team cook up an amazing array of food from all over the Middle East. I am so glad that I've outgrown my childish distaste of lamb, because lamb is a huge part of Tanoreen's menu.

One of my favorite dishes is muhamarra, which is a blend of roasted red pepper, walnut, and garlic. I absolutely love it, and have vowed to make it in the New Year. D and I shared the lamb kafta roll, which the menu noted was featured on ABC news, along with the recipe. It was one of the best entrees I have ever had. We ordered several bottles of this Lebanese wine, which D really enjoyed. Our friend told us he can sometimes find it at Red, White, and Bubbly in Park Slope.

Wednesday, October 20, 2010

Pumpkin Muffins!

I thought a little bit of sweetness was needed in my office today, so I decided to bring in pumpkin muffins for our legal department meeting. Last weekend we went to the Harvest Festival in Red Hook, run by Added Value community farm, which works with at-risk youth to teach them urban farming and business skills. Very cool. So we picked Sophie out of the pumpkin patch and brought her home to roast. I have a feeling that one of the secrets to this recipe adaptation is that I used freshly roasted pumpkin puree that had been seasoned with salt AND pepper. Sophie was intended for a soup, not muffins, but I had so much puree left (and still do!) that I just used the soup puree. I think they turned out really well--moist & sweet. All reports confirm my assessment so far (except that D, the real judge, hasn't tried his yet!).

Pumpkin Oat Bran Muffins

2 cups all-purpose flour
1/4 cup oats
1/4 cup bran flakes
1 teaspoon baking soda
1 teaspoon baking powder
1/4 teaspoon salt
1 tsp each of cinnamon, nutmeg, allspice, and ginger
1/2 cup (1 stick) butter, melted
2 large eggs
1 cup granulated sugar
1/2 cup brown sugar
15 oz pumpkin puree
1 teaspoon vanilla extract

Preheat oven to 350 degrees. Grease and flour a 12-cup muffin tin, or line with paper baking liners. In a medium bowl, combine flour, oats, bran, baking soda, baking powder, salt, and spices. Set aside. In a large bowl, mix butter, eggs, sugars, pumpkin, and vanilla until combined. Gradually add dry ingredients to pumpkin mixture, and mix gently until smooth. Spoon batter into prepared muffin pan, filling three-fourths full. You can press a pecan into the top, or you can add 1/2 cup of chopped pecan. I kept a bunch nut-free for a colleague at work I knew would like them, but is allergic to nuts. Bake for 20-25 minutes. Cool in pan for 2 minutes. Remove to wire rack. Makes about 18 nice-sized muffins. I drizzled mine with a cinnamon-sugar glaze made with confectioner's sugar mixed with a little bit of milk and cinnamon, and then tossed some chopped pecans on top.

Monday, June 15, 2009

Naturally Occurring Salad Greens

Last year, my friend took me to a swanky localvore joint just North of the meatpacking district in Manhattan called The Cook Shop (http://www.cookshopny.com) and we had a purslane, goat cheese, and blueberry salad. When the waiter put the plate in front of me, I recognized the greens: I had pulled up and disposed of every single one of them from my balcony garden in Brooklyn because I wrote them off as weeds. I vowed to bring them back and cultivate them this year, and it's working. Just the other day, I was able to harvest a handful and toss them in our salad. Delicious. Check out the nutrition benefits of purslane:

http://landscaping.about.com/cs/weedsdiseases/a/purslane.htm.

This experience definitely made me rethink an article that a friend wrote when we were in college called: Why is a Weed a Weed? I can't wait to have enough purslane on the porch to make my own blueberry and goat cheese salad. I'll be sure to post a photo.

Monday, April 6, 2009

Spring Onions and Snap Peas

The green market in Prospect Park this Saturday was the prettiest yet this season. I didn't have any ideas about what I wanted to get when I went, but I was on the look-out for some snap peas. The Council on the Environment for New York City (CENYC) provides a calendar of what types of veggies are in season in the city's over 45 greenmarkets (http://www.cenyc.org), and April is the month for snap peas. None to be found, sadly, so I had to get them on a later trip to Fairway.

I did pick up some fresh green onions and spinach, and then found some inspiration from a recipe from the January 2004 edition of Bon Appétit. We're trying to eat a few meals every week without any meat, so this is the first one for this week.

Stir-Fried Tofu with Snap Peas, Green Onions, and Spinach

3 tbsp soy sauce
1 tbsp unseasoned rice vinegar
1 tbsp honey
1 tsp sesame oil
1/4 tsp dried crushed red pepper
1 12-ounce package extra-firm tofu, drained, cut into 3/4-inch cubes, patted dry with paper towels
1/4 cup water
1 teaspoon cornstarch

3 tbsp olive oil, divided
1 cup fresh spinach
1 cup fresh snap peas
4 garlic cloves, minced
1 tablespoon minced peeled fresh ginger
1/4 cup spring onion tops
2 scallions

Whisk the first 5 ingredients in a medium bowl to blend. Add the tofu cubes and stir to coat; marinate for one hour, or overnight if you can. Drain, reserving the marinade in a small bowl. Whisk 1/4 cup water and cornstarch into the marinade and set aside. Heat 2 tablespoons of olive oil in large nonstick skillet over high heat until the pan is smoking. Add the tofu and sauté until golden, about 2 minutes. Using a slotted spoon, transfer the tofu to a plate. Add the remaining 1 tablespoon of oil to the skillet and heat again. Add the ginger and garlic and stir continuously until browned. Add the snap peas and stir-fry for 2 minutes or until tender. Add the spinach and stir into the peas until it is wilted. Add the green onions, and return the tofu to the skillet. Drizzle the reserved marinade mixture over the whole thing and stir-fry until the sauce thickens slightly. Season to taste with salt and pepper. Sprinkle with scallions and serve over quinoa or brown rice.

Postscript:  Wow.  I brought this dish to lunch today, and it was even better a day later.  I am just stunned at how tasty the sauce was.  The dish was not expensive either: $1.89 for the tofu, about $3 for the snap peas, about $3 for the spinach, and I guess about $4 for the rest of the ingredients, portions of which I have in my kitchen already.  So maybe all told, a generous estimate of about $12 for the entire meal, and it made four servings.  This recipe is definitely a keeper.

Sunday, April 5, 2009

Stumbling Upon a Tagine

I spent some time in Morocco in 1995 and had a tagine for the first time. A tagine can either be the dish that you eat, or the pot that you cook it in: a shallow dish with a dome cover, most often made of clay. (see: http://en.wikipedia.org/wiki/Tajine) I had tagine with chicken and chick peas made in a super-huge tagine and baked in a clay oven that fed about 50 people in an extended family during a wake in Meknes, and I also had a small, dainty tagine of pigeon in an upscale French-style restaurant in Marrakech--both equally delicious.

I didn't buy a tagine when I was in Morocco because it would have been too difficult to carry home--I already had a set of ceramic tams with me that I carried wrapped in a blanket and fretted over constantly. And while I've thought about asking for one every Christmas since, I know that I just don't have the space in my apartment in Brooklyn. When I visited Kalustyan's a few weeks ago, I stood gape-mouthed at the selection of tagines on display. Surely I could squeeze one of the small ones into my kitchen? I didn't buy one then, promising myself that once we leave the city, I'll get myself a big one.

On a recent trip to Buffalo of all places, though, I stumbled upon a small silicone tagine at a Marshall's discount store. It was $10 and came with a little cookbook. I was traveling home by train, and already had quite a few bags, but I bought it anyway, figuring it could squeeze it into one of the bags because it was bendable and very light. And so I did.

I found this recipe for a lamb tagine on a blog called Five Spice Duck (http://fivespiceduck.blogspot.com/2008/02/moroccan-lamb-tagine-recipe.html) and headed to the green market at Grand Army Plaza in Prospect Park on Saturday morning. I bought a pound of fresh lamb, some carrots, onions, and garlic. Later that day, I stopped at Fairway and picked up some Israeli couscous (ptitim), saffron, dates, and Turkish apricots. I adapted the recipes that I found online and made this dish for our Sunday evening meal.


Honey-Paprika Lamb Tagine

1 pounds lamb pieces, cut for stew
3 cloves garlic, coarsely chopped
1 tablespoon honey
1/4 cup olive oil
3 tablespoons chopped cilantro
Pinch of saffron threads
2 teaspoons paprika
2 teaspoons ground cumin
2 tablespoons sun-dried tomato paste
Salt and pepper
1 carrot, cut into chunks
1 yellow onion, peeled and cut into chunks
1 cup vegetable stock
1 tsp cinnamon
1/2 cup cooked chickpeas
1/4 cup diced apricot

Mix together the garlic, honey, olive oil, cilantro, saffron, paprika, cumin and tomato paste in a large bowl. Add the lamb and toss to coat. Cover and marinate in the refrigerator overnight, or at least for a few hours.

When you're ready to cook, remove the lamb from the fridge and preheat oven to 400 degrees F. Brown the meat in it's marinade in a smoking hot cast iron pan. Pour the stock into the base of the tagine and add the browned meat with it's marinade, the carrots, onions, and cinnamon and stir together. Place the tagine lid on and bake for 1 1/2 hours. Stir the chickpeas and apricots into the tagine and cook for 30 minutes. Remove the lid or foil and cook an additional 30 minutes to brown the vegetables.

Israeli Couscous with Dates

1/2 pound dry Israeli-style couscous

1 large onion chopped

1 tablespoon olive oil

1 1/2 cups chicken broth

1/2 cup dried chopped dates

1/2 cup chopped almonds

In a sauce pot, saute the onion in the oil until tender and just beginning to brown. Toast the couscous by stirring in the couscous and cooking and stirring until pale golden. Cover with the broth and bring to a boil and cook and simmer about 10 minutes or until couscous has absorbed the liquid. Stir in the dates and nuts. Remove from heat and led stand covered 10 minutes. Fluff with fork. Season with salt and pepper.

Serve the stew on top of, or to the side of, the couscous and garnish with chopped cilantro.

Postscript:  More stews to come, for sure.  This tagine is lovely; it cleans up like magic and I really think it makes a difference in how the ingredients steam in it.  I think I'll try chicken thighs or a vegetable stew next time.

Saturday, January 17, 2009

Inauguration Tuesday

I really wanted to be in D.C. for the Inauguration, but the numbers stopped me: 1 portapotty for every 6,000 people; over 4,000 NYPD; below 32 degrees F; 4 friends who bailed on me....so I invited girlfriends and their kids over to celebrate. Spending the day with kids is the best way to watch Obama take the oath; these kids will never know a world where electing a black man to the highest office in the country is not possible. Doesn't mean racism is gone, but Obama's election means that the landscape has changed forever.

I'm making Obama family recipes for the celebration. These come from the web (Southern Cooking and The Huffington Post), I'll update with pictures and modifications when the time comes.

Obama Family Chili Recipe

1 large onion, chopped
1 green pepper, chopped
Several cloves of garlic, chopped
1 tablespoon olive oil
1 pound ground turkey or beef
1/4 teaspoon ground cumin
1/4 teaspoon ground oregano
1/4 teaspoon ground turmeric
1/4 teaspoon ground basil
1 tablespoon chili powder
3 tablespoons red wine vinegar
Several tomatoes, depending on size, chopped
1 can red kidney beans

Saute onions, green pepper and garlic in olive oil until soft. Add ground meat and brown. Combine spices together into a mixture, then add to ground meat. Add red wine vinegar. Add tomatoes and let simmer, until tomatoes cook down. Add kidney beans and cook for a few more minutes. Serve over white or brown rice. Garnish with grated cheddar cheese, onions and sour cream.

Michelle Obama's Apple Cobbler

"I've been making this cobbler for a long time, so I usually just eyeball how much needs to go in. People might want more or less sugar, but this is how our family and friends like it. This recipe makes one cobbler, which is like a double pie." --M.O.

Filling:
8 Granny Smith apples, peeled and sliced [or a bag of frozen peeled apples]
1-1/2 to 2 cups of brown sugar
1-1/2 teaspoons cinnamon
1 teaspoon ground nutmeg
1/2 teaspoon salt
1/4 cup white flour

Mix these ingredients together in a bowl and let it sit in the refrigerator overnight so the spice goes all the way through the apples.

Crust:
3 sheets refrigerated pie crust
1 stick of butter

Preheat oven at 325 degrees. Butter and flour the bottom of a large baking dish. Roll out three pie crusts real thin -- as thin as possible. Layer the bottom of the pan with 1-1/2 of the pie crusts and prick a few holes in it. Pour the apples with the liquid into the pie pan. Dot 3/4 of a stick of butter around the apples. Use the final 1-1/2 pie crusts to cover the apple mixture entirely (let the pie crust overlap the pan). Pinch the edges of the dough around the sides of the pan so the mixture is completely covered. Melt final 1/4 stick of butter and brush all over top of crust. Reduce the oven temperature to 300 degrees. Bake at 300 for up to 3 hours -- that's what makes the crust flaky, like Barack likes it. Put the cobbler in the oven and go for a walk, go to the store, or do whatever you have to do around the house. Start looking at the cobbler after two and a half hours so it doesn't burn.

Sunday, January 11, 2009

Stewing

After overdosing on sugar and alcohol the night before, and considering how chilly it is, a wholesome stew was an appropriate antidote. Using the buffalo sirloin cubes that we got at the farm in Pennsylvania a few weeks ago, I adapted a March 2001 Bon Appétit recipe for Irish Beef Stew. It definitely had a soothing effect, and was super simple to make.

Irish Buffalo Stew

3 tbsp olive oil
1 pound sirloin cubes
1 large onion, coarsely diced
4 large garlic cloves, minced
1 tablespoon fresh chopped thyme
1 tablespoon fresh chopped rosemary
4 cups mushroom-flavored stock
3 diced tomatoes
1 tablespoon sugar
1 tablespoon Worcestershire sauce
1 bay leaf
4 yellow carrots, cut in thin circles
1 diced red bell pepper
3 tablespoons chopped fresh parsley

Chop garlic, thyme and rosemary together so that they mix into one another. Set aside. Heat oil in heavy large pot over medium-high heat. Add chopped onion and sauté until golden, add sirloin cubes and garlic-herb mixture and sauté until the meat is brown on all sides, about 5 minutes. Add mushroom stock, diced tomatoes, sugar, Worcestershire sauce, bay leaf, carrots and red pepper. Stir to combine. Bring mixture to boil. Reduce heat to medium-low, then cover and simmer 1 hour, stirring occasionally. Discard bay leaf. Add half of the parsley to the stew just before serving and cook until wilted. Sprinkle with parsley after stew is dished onto plates.

We had our stew with couscous. I'd like to try whole wheat dumplings the next time I make this.

Cupcake Tree

There's a woman in my office who is the cupcake maven. She brings in delicious cupcakes for a bunch of occasions, and she makes me jealous. In a good way, if that's possible. Anyway, she--and my friend Lara who also makes fabulously beautiful cupcakes--inspired me to start making cupcakes. When my mother read about my forays into cupcake-making on this blog, she decided to get me a cupcake-related gift for Christmas. In order to live up to the expectations of the gift, which was a cupcake tree, I had to make some uber-fabulous cupcakes. These tasted great, but I have some work to do learning how to work with decorative frosting. I made these for our annual Winter ReGifting Party, and appropriate to the occasion, used a recipe from Amy Sedaris, the comedienne. http://www.amysedarisrocks.com/recipes.htm

I made some alterations, though, most notably, using two vanilla beans that I brought back from Mexico months ago. They were a lot of fun to make, and I think people enjoyed eating them. My work colleague and I agreed to collaborate for our next office occasion that calls for cupcakes.

Friday, January 2, 2009

Loaves & Fishes


Cleaning up after the holiday, I was putting away all of the different kinds of flour I'd been using and I just didn't have enough space in my already-cluttered-with-ingredients-and-cooking implements Brooklyn kitchen. The biggest problem with a large bag of rye flour, which I only ever used for one recipe. So I looked up a recipe for rye bread online and decided to give it a go. I was thrilled with the amount of flour it used, because it was going to make it very easy to put smaller bags away. Unfortunately, I didn't read the entire recipe until the end....especially the part where it said that the recipe made 5 LOAVES! It took quite a while, but they turned out pretty nice.

We made an enormous pasta salad with smoked salmon tips over the holidays, and we had a lot of extra salmon. A piece of salmon on some of this bread was very tasty.

Grandma's Rye Bread

2 Tbsp. dry yeast
1/2 cup warm water
1 tsp. sugar

Let set for 10 min.

3 cups rye flour
2 Tbsp. salt
5 cups warm water
3 tbsp caraway seeds

Mix flour, salt, and water well. Stir in yeast mixture. Let stand overnight.

In the morning, mix:

5 cups warm water
12 cups white flour
Add to the first mixture. Knead until dough comes freely from hand. Let rise and then make into round loaves on floured pans.

Let rise until 50% higher. Brush with water, egg whites, or a bit of olive oil and sprinkle some caraway seeks on top. Bake 1 hour at 375 F Makes 5 good sized loaves.

Wednesday, December 24, 2008

It's a Wonderful Life

I know that sounds pretty corny, but I'm actually watching It's a Wonderful Life for the first time in my life.  I can't believe I never saw this before. So complicated and compelling...I always thought it was going to be some simple sentimental movie. What a time.

The calmest night of the year turned into a task-filled evening: I was able to come home early from work but I had to pick up laundry, pack, wrap some presents, and make some things before the morning. I made pureed parsnips, batter for pizzelles, and cinnamon rolls for the morning. I didn't trust myself with the dough, so I enlisted D for some help. When the dough wouldn't rise, we turned on the oven and sat the bowl on top. The dough started to rise almost immediately.

My mother finally shared the recipe for cinnamon rolls that she's been making for the past few years on Christmas morning. I'm trying it for myself this year.

Ingredients

1 cup milk
1/3 cup butter
1 Tablespoon yeast
1/2 cup white sugar
4 1/2 cups all purpose flour
1 t. salt
3 eggs

filling
3/4 cup brown sugar
1 T ground cinnamon
1/2 cup raisins

glaze
1 t. light corn syrup
1/2 t. vanilla extract
1 1/4 cups confectioners sugar
2 T half and half


Heat the milk in a small saucepan until it bubbles, then remove from heat. Add the butter and stir until melted, let cool until lukewarm.

In large mixing bowl, dissolve the yeast in the milk mixture. Add the sugar, 3 cups of flour, salt and eggs. stir well to combine. Add the remaining flour, 1/2 cup at a time, stirring well after each addition. When the dough has pulled together, turn it out onto a lightly floured surface and knead until smooth and supple, about 8 minutes.

Lightly oil a large mixing bowl, place the dough in the bowl and turn to coat with oil. Cover with a damp cloth or saran wrap and let rise in a warm place until doubled in volume, about 1 hour.

Deflate the dough and turn it out onto a lightly floured surface and roll into a 10x14" rectangle. Lightly brush the far edge with water. Brush the dough with melted butter. In a small bowl combine the cinnamon and the brown sugar and sprinkle over the rectangle. Then sprinkle the raisins over the dough. Roll up the dough into a log and seal the seam.

Cut the dough into 12 equal pieces, place the pieces in two greased cake pans or whatever you have to hold all the pieces. Cover with plastic wrap and place in the refrigerator to rise overnight.

The next morning preheat oven to 375 degrees Take the rolls out of the refrigerator and let stand at room temperature for 30 minutes.

Bake the rolls for 25-30 minutes or until golden.

Combine corn syrup with the vanilla in a small bowl. Whisk in the powdered sugar and enough cream to make a thick glaze, set aside. When rolls are done let cool a bit then drizzle the glaze over the rolls and serve warm.

You really don't have to put in the corn syrup for the glaze if you don't have it. and you can also sprinkle on chopped nuts with the raisins if you like. They freeze well. It sounds like a lot to do, but it is really easy.