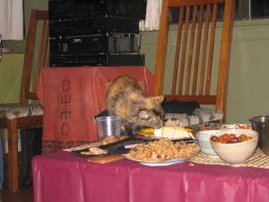
A friend is having a brunch party "When Pigs Fly" in celebration of bacon, Brooklyn, and her birthday this afternoon, and we've all been asked to bring some bacon. I tried to get some bacon from the Flying Pig organic farm at the Farmer's Market on Saturday morning, but the stand was mysteriously not there. So we bought normal bacon at Fairway in Redhook (after an awesome dinner at Hope & Anchor), and this is what I came up with.
Savory Bacon 'n Cheddar Scones
2 cups flour
1 teaspoon salt
1 tablespoon baking powder
2 teaspoons sugar
4 tablespoons (1/2 stick, 2 oz) cold butter
1 cup (4 oz) diced cheddar cheese
1/3 cup fresh chives, or finely diced scallion tops
1/2 pound bacon, cooked, cooled, and crumbled (about 1 cup)
3/4 cup (7 oz) heavy cream, or enough to make the dough cohesive
Preheat the oven to 425° and lightly grease a baking sheet.
Whisk together the flour, salt, baking powder, and sugar.
Work the butter into the flour until the mixture is unevenly crumbly.
Mix in the cheese, chives, and bacon till evenly distributed.
Add ¾ cup of the cream, stirring to combine. Mush the dough together with clean hands. If it won't go together or if it's too dry, add a little bit of cream. Shape the dough into a smooth mound, about 3/4 inch thick. Put the dough onto the baking sheet and cut the mound into 8 wedges, spreading the wedges apart. Brush the scones with some milk or cream and sprinkle with just a hint of sea salt.
Bake for 20-25 minutes, depending on your oven, until they are golden brown.
Serve warm or at room temperature.
Sunday, August 31, 2008
Friday, August 29, 2008
Friday Night Fare
It's been a long week. The convention, house guests, working overtime, the debut of a huge campaign (www.nyclu.org/vote), today's big news from McCain...all ending well with a scrimmage against Crescendo in Prospect Park (big disappointment: I struck out). We needed a simple dinner. I love stopping for chicken wings after a softball game, but we came home (after a margarita at Rachel's) and made a standard Friday night dinner. (Nice Christian girl, fish on Fridays...)
Marinated Salmon & Sauteed Broccoli
(serves 2)
1 lb fresh piece of salmon
Tamari
2 tbsp sugar
pinch of ginger
Salt and pepper
Half a head of broccoli
3 cloves garlic
1/2 cup yogurt
3 scallions
Marinate the salmon in a mixture of tamari, sugar, ginger, salt and pepper for a few hours.
Heat a cast iron pan and sear the salmon in some olive oil. Stick the salmon in a dish in the stove at about 350 degrees.
Sautee some chopped garlic, add broccoli florets and chopped stem. Add 1 1/2 chopped scallions. Season with salt and pepper.
Mix 1 1/2 chopped scallions with yogurt and season with salt and pepper.
Serve a piece of salmon with some broccoli pieces and a dollop of seasoned yogurt. Chomp it up.
Obama Acceptance Speech Celebration Dinner
Since we didn't make it out to one of the group viewings of Obama's speech, I figured we ought to celebrate the way that we usually do at home with an insanely yummy healthy dinner. This sounds like it would be a lot of preparation, but you can do a bunch of stuff ahead of time (over the weekend, for example) that makes it super easy. Everything on the menu was local, most of it organic. I purchased the lamb from one of my favorite meat vendors at the Grand Army Plaza Farmer's Market. I brought the figs back with me directly from Berkeley, California.
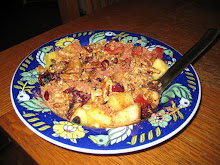
Lamb steak with fig chutney, pureed parsnips, and sauteed dandelion greens
1 1lb lamb steak
1 bunch dandelion greens
3 parsnips
1/4 cup of milk
4 cloves of garlic
salt and pepper
8 oz mission figs
1 small onion
1/4 cup sugar
1/4 cup vinegar
one cinnamon stick
pinch of fresh thyme and rosemary
olive oil
Marinate the lamb steak in olive oil, salt, pepper, and thyme and rosemary. You can freeze it just like that after it's done sitting in the mix for a little while.
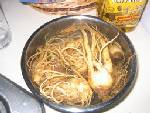
Peel and boil the parsnips until tender. Put in a blender when tepid with 1/4 cup of milk, salt and pepper, and I used a touch of truffle oil, which is not essential, but is super yummy. Puree. You can put that in a freezer-safe container or a freezer bag, too.
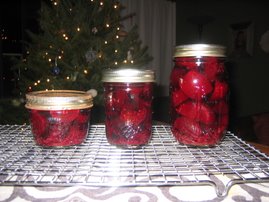
Cut figs into bite sized pieces and boil them in a mixture of chopped onion, sugar, vinegar, and cinnamon stick until jam-like. Put in a jar and refrigerate.
The dandelion greens you can't freeze, so that's what you have to prepare just before the meal. Cut the dandelion greens into bite sized pieces and sautee in olive oil, chopped garlic, and salt and pepper. I added toasted sesame seeds, but again, not essential.
I couldn't resist some sweet, local corn, but it may have overloaded our plates. I definitely felt gluttonous.
Enjoy!
Thursday, August 14, 2008
Pollo en Mole Poblano
This isn't the most appetizing of photos, but let me tell you, mole paste directly from Mexico is no joke. I find it so strange that I couldn't find a good recipe for using it on the web, and even when I tried asking a restaurant chef in Xochimilco how to use it, his advice was sketchy. He leaned in and said, "I'll tell you my secret: I break sweet cookies up into the mixture." I was like, well, thank you, but I am never going to do that. So I brought home a recipe last night for mole negro just to get an idea of proportions, and then I played around with it a bit. This mole, as I mentioned in a previous post, is from Xochimilco, and it was Mole Poblano, which means that it was made with poblano peppers. It cost about $1.70 for 5 ounces of it, which I used in this recipe that serves 4 well.
This is what I came up with, and it was really very delicious.
Pollo en Mole Poblano
4 skinned, boneless chicken breasts
olive oil
salt & pepper
4 medium sized tomatoes
2 cups of chicken stock
5 ounces of mole poblano paste (or any mole negro)
sliced almonds or pepitas
2 cast iron pans and a small food processor or blender for liquifying the roasted tomatoes.
Start out by browning the chicken breasts in a cast iron pan with some olive oil. When they are well browned, but not cooked all the way through, place the entire pan in the oven at about 325 F.
Next, cut the tomatoes into quarters and heat another dry cast iron pan until it is smoking. Fry the tomatoes in the dry pan until the juices have all come out and you get a nice fragrance. Take the tomatoes out of the pan when they are done and set aside in a bowl.
Rinse out the tomato pan and put it back on the fire to dry a bit. Once dry, put some olive oil in the pan and put the mole paste in and quickly break it up into small pieces. Add a bit of stock tot he mixture until the pieces are nearly all broken down. Don't let the mole burn. Turn the heat to low, and turn back to your tomatoes, which should be no longer steaming hot. Place them in the food processor or blender and make a liquid out of the tomatoes. One recipe suggested straining them, but why waste the nice tomato seeds?
Keep heating the mole and adding stock and pureed tomatoes until you get the consistency you want (it should be thick enough to coat the back of a spoon) and the desired heat intensity (mole can be very spicy).
When it is nice and thick and smooth and soupy, take the chicken out of the oven and pour the mole sauce over the four breasts. Place back on the stove and simmer on low until the chicken is tender. I like mine well cooked so that it is nearly falling apart, you can cook your to the degree that you want.
Spoon a bit of the mole onto a plate and then place a chicken breast on top. Then dollop with a little bit more mole sauce. I didn't sprinkle almonds or pepitas on top, but I would like to have. So you should. If you like them. I served the pollo en mole with plain steamed veggies as a nice clean contrast to the complexity of the sauce.
Monday, August 11, 2008
The Long, Hot Labors of Pepper Relish
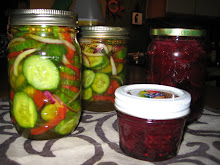
This is the product of my labors on Saturday. Several jars of sweet pickles for a barbeque in San Francisco this coming weekend, several jars of Mexican Pepper Relish, and one experiment in gherkins that I am less than optimistic about.
I didn't keep perfect track of my recipe for the relish, but this is what I remember I did. In addition to the peppers I brought back from Mexico, I shopped at the Grand Army Plaza Farmer's Market for the tomatillos, bell peppers, and onions.
Mexican Hot Pepper Relish
10 hot peppers of various shapes, sizes and colors
2 green bell peppers
1 red bell pepper
1 large onion
5 medium-sized tomatillos
1 cup of sugar
2 cups of vinegar
2 cups of water
3/4 cup of canning salt
Cut the hot peppers with a sharp knife into tiny pieces. Your fingers will be burning, but its better than putting them through a processor...too much juice and you lose too much of the meat of the peppers. Put aside in a small bowl. I suggest putting half of the bell peppers, half of the onions, and all of the tomatillos in a little food chopper and handcutting the rest. Mix them all together in a bowl and sprinkle with 3/4 cup of canning salt. Stir up to ensure that the peppers are covered in the salt, and then cover with boiling water. Let stand for about 2 hours.
When the peppers are brined, rinse them lightly and then drain them (you can save the liquid). If you want, you can substitute some or all of the pepper liquid for the water to make the relish syrup.
Combine the water (or pepper juice), vinegar, and sugar and bring to a boil.
Spoon the pepper mixture into small jars, cover with boiling syrup, and seal the jars. They should be good after three days of setting.
Enjoy some on scrambled eggs, steak, hot dogs . . . and remember to share with your friends!
Saturday, August 9, 2008
I haven't decided on a name for my Mexican pepper relish
Two years ago, I called my first batch of relish hellfire hot pepper relish. My friend Patrick grew scotch bonnets and gave me a few, and I made 12 jars of relish. Last year, my own peppers were either not hot enough, or I added too many other ingredients, so the relish was awesome, but it wasn't very hot.
This year, I've been growing my own peppers--Carribean Reds and Jalapenos--but I also brought these peppers back from Mexico and made a few jars this afternoon. I'll post the recipe soon (its kind of complicated), but for now, I'll just say that my fingers are still burning.
Pan Integral, muy delicioso en Coyoacan
On the way back from Mercado de Coyoacan I found this lovely little organic bakery about 8 blocks from the subway station on a beautiful main street in the town aptly named La Casa del Pan. The waitstaff was friendly, the atmosphere totally relaxed, and the food was terrific--all organic, fresh, and local. I had a cappuccino, a whole wheat roll that was slightly sweet, and a small almond crescent cookie. The wheat roll was just the right kind of crusty and shiny on the outside, the right kind of soft in the middle, and the right kind of sweet throughout. I also bought a roll to make a sandwich for the plane the next day and carried it like an ancient vase all day so that it didn't get crushed.
Besides amazing breads and other baked deliciousness, they served soup, pizza, and sandwiches that were also prepared in a lovely and healthy way. There are more and more places like this in Central America. If you're ever in Mexico City, it's worth a trip to Coyoacan--for the market, but also for lunch at this bakery.
Friday, August 8, 2008
Mexican Fresh Food Markets
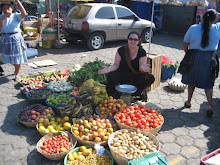
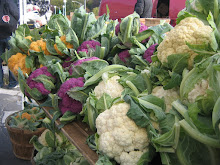
One of the reasons that I agreed to take a few of my remaining vacation days to go to Mexico for two small presentations at the International AIDS Conference was so that I could visit some local fresh food markets and bring back mole and vanilla beans. I posted queries on Chowhound and the Lonely Planet's Thorn Tree Forum to see if people had recommendations about where to go and whether I would have any trouble bringing things back. I didn't get very many responses, and didn't have a clear idea of where to go or what to do when I got there. Luckily, I ran into a friend of a friend of a friend at a breakfast on the first day I was there who is from Mexico City and told me to visit Mercado de Xochimilco and Mercado de Coyoacan.
Public transit in Mexico City is easier than in any other city I've ever visited, so it was easy to get around, even though both of these markets were very far from where I was staying, and from where the conference was being held. I spent time practicing my Spanish, taking pictures, and buying food stuffs to bring home. These are just a few pictures of the produce in these markets. In the coming days, I'll post more about what I've done with some of the ingredients I brought back. First up: mole verde chicken breast.
Monday, August 4, 2008
Street Food in Mexico--it's the best, no lie
I'm just finishing up a four-day trip to Mexico (attending pre-conference activities for the International AIDS conference here), and I have so much to tell. Although people warn about eating street food in Latin America, many who have been here will attest that street food--tacos, to be precise--are better than anything. And after summoning up the courage to approach a vendor with not the least bit of an idea about how to order, or what was in all of those piles of goodness, I'm glad I did it sooner than later. So while my colleagues were probably enjoying restaurant meals costing between $20 and $50 (with drinks), I was able to dine on less than $10 a night by buying a small bottle of wine at the supermarket (about $5), two tacos, an avocado, and a tomato at the market. The tortillas were fresh, and filled with pork, onions, peppers and hot sauce, or beef and cheese. They were amazing. As a single woman in a not-so-great area, I didn't want to eat at the stands myself, so I brought the tacos back to my hotel, cut up the avocado and tomato, put a little salt and lime on the salad, and voila! Almost a home-made dinner away from home. The last night here, I had a "vampiro" to drink as well--a mixture of beet, carrot, and lime juice. Delicious.
I strongly recommend, although I've heard that street food is for the strong of stomach. Be careful.
Subscribe to:
Posts (Atom)