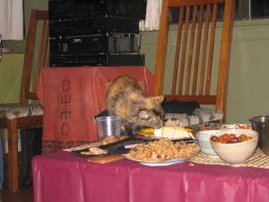
"Sabih" is the name of this dish from the Tamami & Ottolenghi cookbook Jerusalem. It's roots are Iraqi, but it has elements from many Middle Eastern traditions. One thing is for sure--it's delicious.
I adapted the Jerusalem recipe somewhat, and I think it turned out really well.
Sabih
2 medium-sized eggplants
4 plum tomatoes
2 medium orange tomatoes
2 kirby cucumbers (or one large cuke)
handful of parsley
3 green onions/scallions
3 hardboiled eggs
2 tbsp s'chug or zhoug
1 cup tahini
1 cup yogurt
1 tbsp lemon juice
salt, pepper, olive oil
harissa (if the zhoug isn't hot enough for ya)
pomegranate seeds (optional)
quality pitas (3-4)
Slice the eggplant in half and place the halves, innards up, in a baking dish. Spray with olive oil and season with salt and pepper. I added a little bit of ras-al-hanout, but you could also season with paprika or sumac. Roast in an oven at 375 degrees F until the eggplant is tender, but not mushy. Allow to cool. The Jerusalem cookbook wants you to fry the eggplant; I guess that's traditional, but I needed to bake mine.
Hardboil your eggs (best method here) and begin to make the salad by cubing tomatoes & cucumbers and mixing them with good olive oil, chopped scallions, chopped parsley, and salt & pepper. Allow to rest and marinate for 1/2 an hour to an hour.
Make the tahini sauce by combining tahini, yogurt, and lemon juice and a little bit of salt. This mixture should be thin enough to pour, but not watery.
When the eggplant has cooled, peel the skin and roughly chop the eggplant into cubes. Mix the cubes with the s'chug to taste. The Jerusalem cookbook calls it zhoug, which is typical in a bunch of different cuisines. If you pinpoint it, it might be Yemeni. And you can make it from scratch. Mine is from Sabra, yes, of Sabra hummus. I've had this s'chug in the fridge for about a year--I have no idea why I bought it, but it is GOOD. It's existence in the bottom of the fridge is one of the reasons I chose this recipe. Remember, the s'chug is really hot. And if you want the taste of harissa, too, either eliminate or drastically reduce the s'chug.
Toast the pitas in a warm oven until puffy. You can help this along by spraying a bit of olive oil on the pitas. (Unfortunately, we passed up some fresh-made pitas at the bakery today because we had some in a bag in the fridge. This recipe deserves the best pita possible. Just sayin').
On the toasted pitas, begin assembling by pouring a few dollops of tahini sauce on the warm pitas. Place a few spoonfuls of eggplant on each pita, then layer on the slices of hardboiled egg. Top with a bit more tahini sauce, top with the salad, then place some more tahini sauce on top of that. Garnish with some pomegranate seeds.
I don't know how you eat this thing. I guess on the street in Jerusalem you'd get it in a more user-friendly pita wrapped in wax paper and it would be all rolled up. On our plates, we cut the pitas in quarters and ate it greedily with our hands.
You can get most of these ingredients at Sahadi's if you live in Brooklyn (but they also ship now, too), or maybe at Kalustyan's in Manhattan. But mostly everything you can make from scratch--except the tahini.
Showing posts with label Sahadi's. Show all posts
Monday, September 9, 2013
Saturday, February 28, 2009
Figgy Pork
The weather is starting to turn, but I needed one more warm, winter dish before it's all said and done. I got the idea from my new favorite food website: The LoveBite (http://thelovebite.com). There was something I didn't like about their figgy roast piggy, so I went looking for another recipe with the same idea. I'm a big fan of cardamom, so this one was perfect. It was a bit labor- and ingredient-intensive, but good for a Sunday evening meal. And I think it would also be good for a holiday, it's festive enough.Cardamom Pork Roast with Apples and Figs
Roast
3 tablespoons brown sugar
1 teaspoon garlic powder
1 teaspoon ground cumin
1 teaspoon ground cinnamon
1/2 teaspoon salt
1/2 teaspoon ground ginger
1/2 teaspoon freshly ground black pepper
1/4 teaspoon ground cardamom
1/4 teaspoon ground fennel
1 (3-pound) pork loin, trimmed
Cooking spray
2 cups dried figs, halved lengthwise
2 cups dried apples
1/4 cup minced crystallized ginger
3/4 cup pear nectar
1 (14-ounce) can fat-free, less-sodium chicken broth
Sauce
1/2 cup pear nectar
1/2 cup port
2 tablespoons currant jelly
1/4 cup heavy creamPreparation
Preheat oven to 400°.
To prepare the roast, combine the first nine ingredients in a small bowl. Rub mixture over the surface of the roast and place in a shallow roasting pan coated with cooking spray. Place the figs, apples, and crystallized ginger around roast. Pour 3/4 cup nectar and broth over fruit. Bake at 400° for 1 hour and 10 minutes or until meat thermometer registers 145°, stirring the fruit frequently. Remove the roast from the oven and place it on a carving board. Spoon the fruit in a separate bowl using a slotted spoon.
To prepare the sauce, pour any pan juices into a saucepan. Add 1/2 cup pear nectar, port, and jelly; bring to a boil. Cook 4 minutes or until thick enough to lightly coat the back of a spoon. Stir in heavy cream; simmer 2 minutes or until sauce has thickened, stirring occasionally.
Serve thinly sliced roast with a side of some sort (I used mashed cauliflower and garlic), a dollop of fruit, and drizzle with the sauce. Apologies for the picture, the colors on this very colorful dish are a little washed out with all the white (white plate, cauliflower, flash...)
Saturday, January 3, 2009
The Gift of Spice
This year, D and I made spice rub for a few close friends and family. It was the simplest gift, and it was a lot of fun to make. All you need are some empty spice jars, a spice or coffee grinder, the herbs and spices, and a pen, paper, and tape to make labels. We tried some on roasted chicken, empanada fillings, and a roasted squash, and it was terrific. I picked up everything I needed at Sahadi's and the kitchen store right next door.
Yucatan Dry Spice Rub
Two 2 1/2 to 3 inch cinnamon sticks
1/4 cup of dried oregano
2 teaspoons of whole black peppercorns
2 teaspoons of whole allspice berries
1 1/2 teaspoons of whole cloves
1/2 teaspoon of cumin seeds
Place all of the ingredients in a spice grinder and grind until fine.
All you have to do is rub it into meat, or even just sprinkle it on meat before roasting. It's good on poultry, pork, and seafood. I haven't tried it with beef yet.
Friday, November 28, 2008
Ginger Agave Cashews

Every once in a while, I splurge on some seasoned nuts at the farmer's market on 5th Ave & 3rd St. in Brooklyn. There's a stand that sells all kinds of spiced and sweetened roasted nuts--unfortunately, she imports them from somewhere outside NY. I don't know why she's able to have a stand there, but the nuts are sure good! I wanted to try to make them on my own. I tried this recipe, and while the nuts were tasty, it wasn't exactly what I was looking for. I'll keep trying . . .
Ginger Agave Cashews
3 tablespoons agave nectar
1 tsp salt
2 tsp powdered ginger
1 cup cashews
Heat the agave nectar in a cast iron pan on the stove. When it begins to bubble just a bit, add the cashews, salt, and ginger and toss until coated and heated through. Pop the entire pan in the oven at 350, and roast for about 8 minutes, checking once at 4 minutes and stirring to shift cashew positions. Be careful not to let the nuts burn.
Monday, October 13, 2008
Coconut Crusted Salmon with Tamarind Barbeque Sauce
Barbeque Sauce
1 tsp canola oil
1/2 cup chopped shallots
1 tblsp peeled and chopped fresh ginger
2 cloves garlic, minced
1 tblsp tomato paste
1 cup hot water
1 tblsp mirin (sweet cooking wine)
3 tblsp tamarind concentrate
3 tblsp brown sugar
1/4 tsp ground red pepper
1 tblsp tamari
1 tsp toasted sesame oil
Salmon
1 lb nice piece of salmon
3 tblsp panko
3 tblsp flaked coconut*
1/8 tsp ground tumeric
1/2 tsp kosher salt
1/4 tsp ground coriander
1/4 tsp freshly ground black pepper
olive oil cooking spray
To make the barbeque sauce, heat oil in a cast iron pan. Add shallots, sautee 2 minutes; add the ginger and the garlic and sautee for another minute, stirring constantly. They will start to key sticky. Add tomato paste, cook another minute, stirring constantly. Add 1 cup of hot water, tamarind extract, mirin, brown sugar and ground red pepper, bring to a boil. Reduce the heat and simmer for 10 minutes, stirring occasionally. Remove from the heat and then stir in tamari and sesame oil. Set aside or refrigerate.
Preheat the oven to 400 degrees. To prepare the salmon, combine the panko, coconut and tumeric in a shallow bowl. Sprinkle the salmon evenly with salt, coriander, and pepper. Dredge fillets in panko mixture. Heat your cast iron pan again and pour in about 2 tblsp oil. Add salmon to the pan and cook for 2 minutes. Carefully turn the fish over and cook the same on the other side. Stick in the oven for about 6 minutes. Serve with a tblsp of the barbeque sauce and a nice, roasted vegetable (I used cauliflower).
*The recipe called for sweetened coconut. I used 2 tblsp unsweetened coconut and 1 tblsp sweetened coconut.
Saturday, April 26, 2008
Pesto chicken resting on quinoa
Inspired by Barbara Kinsolver's Animal, Vegetable, Miracle, about using local ingredients to store food for the seasons when its not available, last summer I made over 64 ounces of fresh pesto from nuts from Sahadi's and fresh basil from the Farmer's Market. I made traditional pine-nut pesto, but I also made walnut pesto, hazelnut pesto, and pecan pesto. We didn't eat as much of it as I thought we would over the winter because we essentially stopped eating pasta. Every once in a while I get an idea about how to use it again, and here's one of my favorites.
Pesto Chicken Resting on Quinoa
1 cup red quinoa
1 veggie (or chicken) bouillon cube
1/2 cup pesto (I used pecan this time)
2 free-range antibiotic free chicken breasts (not too big)
1/2 onion
salt
pepper
paprika
nice olive oil
Prep time: 1 - 1 1/2 hour (and an overnight soaking)
The night before you're going to make the dish, put 1 cup of dry red quinoa in a bowl with twice as much water and let sit. (You can use regular quinoa, but then you'd have to make it colorful to balance out the dish--maybe chopped seasonal tomatoes or roasted red peppers...hmmm, that WOULD be good!)
Start preparing by draining and rinsing the quinoa. Dry it a little bit and then place in a large saucepan with 1 3/4 cup of water. I added a bouillion cube (vegetable) to this one, but that's optional, salt, pepper, and paprika. Bring to a boil.
While the quinoa is heating, chop coarsely the 1/2 onion and sautee in some nice olive oil until carmellized in a cast-iron pan. Dump the carmelized onions in with the quinoa (you can even wait towards the end, just set the onions aside in a small bowl).
Pour a little bit of water in the cast iron pan and swirl around. Do not clean the pan before the next step!
Take the two chicken breasts and cut diagonal slits (about four per each breast) with a sharp knife. This wil help keep the chicken moist. Sprinkle some salt, pepper and paprika on the breasts. Heat some oil in the pan that still a bit mucky with the onions, and when the oil is hot and begins to smoke a bit, sprinkle some salt, pepper and paprika on the surface of the pan and immediately put the breasts, spice side up, in the pan. Push them around a bit immediately so they don't stick to the pan. Brown the breasts on both sides until they are a nice golden/tan color. If they are thick, turn and cook a bit on the sides as well.
When they are browned (but not necessarily cooked fully on the inside) place them on a oiled baking dish (or you can keep them in the cast iron pan). Spread about 1/4 of a cup of pesto on each breast, coating the top completely. Pop in the oven for 30-45 minutes, depending on the size of the breasts.
When the quinoa is done, so should the chicken breasts. Spoon about 1/2 cup of quinoa on each plate and either slice the breasts attractively to sit on the bed of quinoa, or just put a whole breast on top and serve. Enjoy!
If you're trying to eat less, and everyone (except anorexics) should, cut the portions in half (eat only one half of each breast) and save the rest for tomorrow's lunch.
We served this with a simple green salad with sliced sundried tomatoes, sunflower seeds, and sliced almonds.
Pesto Chicken Resting on Quinoa
1 cup red quinoa
1 veggie (or chicken) bouillon cube
1/2 cup pesto (I used pecan this time)
2 free-range antibiotic free chicken breasts (not too big)
1/2 onion
salt
pepper
paprika
nice olive oil
Prep time: 1 - 1 1/2 hour (and an overnight soaking)
The night before you're going to make the dish, put 1 cup of dry red quinoa in a bowl with twice as much water and let sit. (You can use regular quinoa, but then you'd have to make it colorful to balance out the dish--maybe chopped seasonal tomatoes or roasted red peppers...hmmm, that WOULD be good!)
Start preparing by draining and rinsing the quinoa. Dry it a little bit and then place in a large saucepan with 1 3/4 cup of water. I added a bouillion cube (vegetable) to this one, but that's optional, salt, pepper, and paprika. Bring to a boil.
While the quinoa is heating, chop coarsely the 1/2 onion and sautee in some nice olive oil until carmellized in a cast-iron pan. Dump the carmelized onions in with the quinoa (you can even wait towards the end, just set the onions aside in a small bowl).
Pour a little bit of water in the cast iron pan and swirl around. Do not clean the pan before the next step!
Take the two chicken breasts and cut diagonal slits (about four per each breast) with a sharp knife. This wil help keep the chicken moist. Sprinkle some salt, pepper and paprika on the breasts. Heat some oil in the pan that still a bit mucky with the onions, and when the oil is hot and begins to smoke a bit, sprinkle some salt, pepper and paprika on the surface of the pan and immediately put the breasts, spice side up, in the pan. Push them around a bit immediately so they don't stick to the pan. Brown the breasts on both sides until they are a nice golden/tan color. If they are thick, turn and cook a bit on the sides as well.
When they are browned (but not necessarily cooked fully on the inside) place them on a oiled baking dish (or you can keep them in the cast iron pan). Spread about 1/4 of a cup of pesto on each breast, coating the top completely. Pop in the oven for 30-45 minutes, depending on the size of the breasts.
When the quinoa is done, so should the chicken breasts. Spoon about 1/2 cup of quinoa on each plate and either slice the breasts attractively to sit on the bed of quinoa, or just put a whole breast on top and serve. Enjoy!
If you're trying to eat less, and everyone (except anorexics) should, cut the portions in half (eat only one half of each breast) and save the rest for tomorrow's lunch.
We served this with a simple green salad with sliced sundried tomatoes, sunflower seeds, and sliced almonds.
Sunday, December 10, 2006
Global Warming Extravaganza
My best friend and her partner hosted a party that they called the "Global Warming Extravaganza" in Valley Forge, about 30 minutes outside of Philadelphia. The drive from Brooklyn wasn't too bad, it was only about 2 1/2 hours (not counting the two wrong turns we made!). The best part was when we drove through Valley Forge National Park, full of deer--silouhettes and shadows in the moonlight.
The party was a nice mix of people and generations, classes, cultures. I don't know why they called it the Global Warming Extravaganza; they actually used the occasion to announce their commitment to one another!
But for me, it was the first time my boyfriend met my best friend, which was really important (and went very well, by the way). It was also the first party of the season, so I started looking around for an exciting recipe. Things were a little hectic at my place the day before we left. I was having my guest room painted by a friend, so there was paint and furniture everywhere. Amidst the clutter, I found a recipe online on my laptop for a butternut squash dip. I went to Sahadi's for the ingredients: walnuts, goat cheese, and olive oil. There's a great vegetable place next to Sahadi's where I get fresh spices, squash, veggies, and garlic, too.
Unfortunately, when I got home, I couldn't find the recipe again! I searched Epicurious.com, cookinglight, com, allrecipes.com, and cooking.com to no avail. So I found a recipe that was somewhat similar on the New York magazine website, but it didn't have the goat cheese. So I made this one up and it worked out pretty well. Here's how I made it:
Garlicky Butternut Squash dip with goat cheese and walnuts
1 medium butternut squash
garlic head
6 oz goat cheese
1 cup of toasted walnuts
1 tsp of salt
1 tsp of pepper
2 Tbsp olive oil
1 tsp paprika
Bag of whole wheat pita bread
Preheat your oven to 350 degrees. Cut the butternut squash in half and scoop out the seeds. Place on a baking pan. Wrap the garlic head in aluminum foil and place on the pan with the squash-halves. Bake the squash and garlic.
While these two ingredients bake, place the goat cheese, 1/2 cup of walnuts, salt, pepper, olive oil, and paprika in a medium-sized bowl. No need to mix, as the hot ingredients that you add later will melt the cheese and allow you to mix them more easily.
Check the garlic after about 25 minutes by unwrapping the foil and seeing if the garlic is the consistency of a paste. Pop out the garlic cloves onto the cheese and wait for the butternut squash to get soft. Once you can scoop a tablespoon out of the center of one of the halves, take out the squash. Don't turn the oven off 'cause you'll use it again.
When the squash is cool enough to touch, but still warm, scoop out the insides into the bowl with the cheese mixture. I used a hand mixer, but I suppose you can use a blender, to mix the ingredients. Spoon into a decorative dish, and wait for the mixture to cool.
Toast whole wheat pita bread in the oven and cut into wedges. Once the pita is cool, cut the wedges into a bag and seal.
Pack up a bag of ½ cup of toasted walnuts to sprinkle on top when you get to the party. Sprinkle the walnuts on top of the spread.
I put a sign next to the spread so that people knew what it was, and those that were brave enough to try loved it. I'd definitely make it again!
The party was a nice mix of people and generations, classes, cultures. I don't know why they called it the Global Warming Extravaganza; they actually used the occasion to announce their commitment to one another!
But for me, it was the first time my boyfriend met my best friend, which was really important (and went very well, by the way). It was also the first party of the season, so I started looking around for an exciting recipe. Things were a little hectic at my place the day before we left. I was having my guest room painted by a friend, so there was paint and furniture everywhere. Amidst the clutter, I found a recipe online on my laptop for a butternut squash dip. I went to Sahadi's for the ingredients: walnuts, goat cheese, and olive oil. There's a great vegetable place next to Sahadi's where I get fresh spices, squash, veggies, and garlic, too.
Unfortunately, when I got home, I couldn't find the recipe again! I searched Epicurious.com, cookinglight, com, allrecipes.com, and cooking.com to no avail. So I found a recipe that was somewhat similar on the New York magazine website, but it didn't have the goat cheese. So I made this one up and it worked out pretty well. Here's how I made it:
Garlicky Butternut Squash dip with goat cheese and walnuts
1 medium butternut squash
garlic head
6 oz goat cheese
1 cup of toasted walnuts
1 tsp of salt
1 tsp of pepper
2 Tbsp olive oil
1 tsp paprika
Bag of whole wheat pita bread
Preheat your oven to 350 degrees. Cut the butternut squash in half and scoop out the seeds. Place on a baking pan. Wrap the garlic head in aluminum foil and place on the pan with the squash-halves. Bake the squash and garlic.
While these two ingredients bake, place the goat cheese, 1/2 cup of walnuts, salt, pepper, olive oil, and paprika in a medium-sized bowl. No need to mix, as the hot ingredients that you add later will melt the cheese and allow you to mix them more easily.
Check the garlic after about 25 minutes by unwrapping the foil and seeing if the garlic is the consistency of a paste. Pop out the garlic cloves onto the cheese and wait for the butternut squash to get soft. Once you can scoop a tablespoon out of the center of one of the halves, take out the squash. Don't turn the oven off 'cause you'll use it again.
When the squash is cool enough to touch, but still warm, scoop out the insides into the bowl with the cheese mixture. I used a hand mixer, but I suppose you can use a blender, to mix the ingredients. Spoon into a decorative dish, and wait for the mixture to cool.
Toast whole wheat pita bread in the oven and cut into wedges. Once the pita is cool, cut the wedges into a bag and seal.
Pack up a bag of ½ cup of toasted walnuts to sprinkle on top when you get to the party. Sprinkle the walnuts on top of the spread.
I put a sign next to the spread so that people knew what it was, and those that were brave enough to try loved it. I'd definitely make it again!
Thursday, December 7, 2006
Homemade Christmas presents: Brandied fig compote
Last year during NYC’s transit strike, I was lucky enough to have the kind of job where I didn’t have to actually risk freezing my ass off or being hit by a car in the ungodly crush of traffic that ensued, and I stayed put in Brooklyn. I spent my days doing research, listening to NPR, and making my own Christmas presents for friends and colleagues: brandied fig compote in little 4 oz. jars. I shopped at Sahadi’s for the figs, and fished out a few recipes from the Internet. I stewed cut up and de-stemmed figs in juice and brandy with raisins, and after about an hour, I had a mixture that was the consistency of jam. I’m not really into using pectin, so I called it compote instead. I made little labels for each jar in the shape of holly leaves, decorated them with silver glitter, and brought them to my office’s holiday party. They were a hit.
I’m still using some of the compote myself on crackers and toast. This year, I thought I’d try to teach a workshop on how to do this to some neighbors, but I haven’t had the time to make the hand-made sign that I’d planned. I wanted to advertise my workshop by hanging my signs in Brooklyn’s two Tea Houses, but I took the lazy route and posted an ad about it on Craigslist. Sadly, I haven’t gotten any responses yet. If you’re interested in joining the workshop, leave me a comment with a way to get in touch with you, or visit Craigslist and search under classes and workshops for “homemade” and “fig” and “compote.” A $75 registration fee gets you into the 2-hour workshop, and you’ve leave with the know-how to do it yourself, and 12 4 oz. quilted canning jars filled with fig compote. I provide all of the supplies, except the brandy. You can sauce it up, but it’s BYOB.
Subscribe to:
Posts (Atom)