Showing posts with label entertaining. Show all posts

Sunday, October 20, 2013

Seedy Surprise Pancakes

When serendipitous pancake inspiration hits,  you gotta go with it. Last week, I unearthed a bag of chia seeds from a cabinet that I'd never opened, and shortly thereafter, saw a recipe in the New York Times for Beet & Chia Pancakes. I had to do it. 

We ran into some friends of friends at the farmer's market out in the country on Saturday and invited them to brunch the next morning. Perfect time to debut a new recipe. So I picked up some beets and had a plan: adapt the recipe to use my sourdough. 


Beet 'n Chia Sourdough Pancakes 

1 large or 2 medium beets (enough for 1/2 cup puréed roasted beets)
1 cup whole wheat flour
1/2 cup white flour
2 tsp baking powder
1 tsp baking soda
1/4 tsp salt
1 tbsp honey (or sugar)
1 1/2 cups sourdough starter (or 1 cup yogurt & 1/2 cup milk)
3 tbsp chia seeds
3 tbsp olive oil 

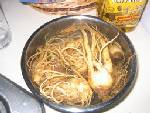
Roast the beets (washed but skin on) in aluminum foil for an hour in a 350 degree oven. When done, puree in a food processor. Mix together all of the other ingredients and when the beet puree is cool, mix it in. Make and garnish as you would normal pancakes with butter and maple syrup.

These pancakes are utterly delicious. They make a nice surprise for guests. Don't take my word for it, though. Make them yourself! 

Sunday, August 11, 2013

Foreign Eggs

We love eggs. I've written about our love of eggs in this blog before. So when I found scotch eggs in London last year--eggs surrounded by spicy pork, rolled in tasty breadcrumbs and baked--I knew it was only a matter of time before I started making them at home.

Actually, I was really impressed with food and drink in London. I don't know why it's the butt of anyone's joke. I regularly order hard cider (my favorite is pear) whenever it's available now. And the bodegas carry Jack Daniels and Coke in a can. Super.
It took about a year to turn my attention back to Scotch Eggs, but here's my first iteration. I made them for a picnic at a Prospect Park concert where hummous is the staple and graces almost every blanket. And I made it vegetarian with Gimme Lean sausage. My favorite part was getting my friends to try and guess what the ball of goodness sitting on the plate was before I cut it in half, revealing the egg. This recipe will make a tasty scotch egg, but I can only imagine what well-seasoned pork would do. I used large eggs, but I could see using medium, small, or even quail eggs to make these--depending on the occasion and whether they will be a meal or an appetizer.

Spicy Baked Scotch Eggs

4 medium hardboiled eggs, peeled
1 14 oz tube of gimme lean sausage
2 cups flour
2 cups bread crumbs
2 tsp harissa
2 tsp cumin
2 tsp coriander
2 tsp chili powder
2 tsp paprika
2 tsp garlic powder
2 tsp salt
2 tsp ground black pepper
1 raw egg, whisked
spray olive oil
baking dish
4 bowls

You'll need four bowls: (1) sausage mixed with 2 tsp harissa; (2) flour with one tsp each of cumin, coriander, chili powder, paprika, garlic powder, salt & pepper; (3) bread crumbs with one tsp each of cumin, coriander, chili powder, paprika, garlic powder, salt & pepper; (4) whisked egg.

Preheat the oven to 400 F. In clean and oiled hands, take 1/4 of the sausage mixture and flatten it evenly in your hand. Place a single hardboiled egg in the center and gently wrap the sausage evenly around the egg. Once all of the egg is covered with sausage, roll the ball in the seasoned flour. Dunk the flour-coated egg into the raw egg and coat. Then carefully roll the eggy-egg in breadcrumbs to coat evenly. Place the large round ball in an olive oil-coated baking dish. Repeat three more times, washing your hands in between each one. Place each round coated egg on an oiled baking dish and pop in the oven for 1/2 hour. Check for golden-brownness and rotate the dish if you need to for a few more minutes. Let cool and eat one on it's own, or serve with any number of condiments: salt & pepper, hot sauce, mayo, horseradish sauce, sriracha....


Saturday, August 3, 2013

Impulse Baking

This morning we went to Barryville, PA's farmer's market. We didn't eat breakfast before we left the house, so the first stall I headed for was the stall with jam-tasting and tiny specks of baked goods to try out. Blueberry-jalapeno jam was on offer, as well as an orange marmalade which I tried on some zucchini bread. Pushing the idea of a blueberry-jalapeno jam experiment out of my mind for a moment, I knew I had to make zucchini bread. Today. 
So I tasked D with picking out a basket of zukes while I got some eggs, and no sooner were we in the house than I started making this zucchini bread. And after an hour when it was out of the oven, it was almost gone. If I had a jar big enough, I would pickle the tiny ones, but I guess that will have to wait until another day. Like the blueberry-jalapeno jam. 

I found a recipe that uses sourdough and of course had to try it. It's delicious.

Cardamom-Zucchini Sourdough Bread

1/2 cup good olive oil
3/4 cup white sugar
3/4 cup sourdough starter
1/2 cup whole milk
1 cup zucchini, grated
2 cups wheat flour
1/2 tsp baking powder
1/2 tsp baking soda
1 tsp cinnamon
1 tsp cardamom
1/2 cup raisins

Mix oil, sugar, starter and milk. Stir and let sit for a few moments. Stir in your grated zucchini (if you like your bread more veggie, use more than a cup. If you like your bread puffy, use an egg in addition to the other wet ingredients, but then decrease your sourdough or milk by about 1/8-1/4 of a cup). In a separate bowl, combine the dry ingredients (flour, powder, soda, spices) well and then add to the wet mixture to blend just enough. Fold in the raisins. (You can use nuts unless someone you love doesn't like them. Walnuts, pecans, almonds...whatever you like). 

Grease a bread pan and pour the mixture in, leaving just a tiny bit in the bowl for you to scoop up with your finger and eat. Bake at 325° for about an hour (test by sticking a toothpick in the densest part and see if it comes out gooey. If it does, it's not done). 

Let it cool for a few minutes and try to restrain your people from attacking it while it sets. If you want to save some for the morning (zucchini french toast, anyone?), you should have made two loaves. 

Saturday, September 15, 2012

Block Party Cubano Tacos

I've lived in the same place for almost 15 years in Brooklyn. Almost every year, our block has a party, but in years' past, I've been too busy to go. Recently, I've attempted to get involved in our newly-formed block association. I attend meetings when I can, but infrequently because of work. This year when the date of the block party was announced, I put it on my calendar and committed to go. Today was the block party, and I have never had more invitations to do different things: my softball team's party, a friend in from out of town, a colleague's birthday party--but I was committed to this block party. And I'm glad I made that decision.

Our block is really unique. There are people who've lived there all their lives, their apartments or houses were passed down through generations. There are entrepreneurs, families, same-sex couples, hipsters. There are people in new apartment buildings (three of them on the block), and some in crumbling brownstones. There's a hot new pie shop on the corner at one end of the block, and a reliable Chinese take-out on the other side that has a ginger and scallion soup that I swear cures the common cold. We have musicians who drum and play guitar on the roof every Saturday night, a motorcycle dude who annoys the hell out of me when he revvs his engine really loud, and the owner and founder of a local brewery. And even though I pass most of them by every day, I don't know very many of them at all.

I decided that I wanted to share my pickles and D's hot sauce this year, and made pernil as the platform. D happened to be away at a concert this weekend, but he cooked up a new batch of sauce and helped me roast the pernil last night. I made some pickles a few weeks ago, and had some pickled onions keeping in the fridge. So I made cubano-tacos: little corn tortilla halves, shredded jack cheese, shredded roast pork, pickle slice, pickled onions, and hot sauce. Folks were grilling with their families in front of their homes, so I went around and introduced myself and asked everyone if they wanted a little taco with some hot sauce.

People were so kind with their compliments and I got to talk to so many of them. My voting rights work, the state of the block's construction, the robust nature of the block association, and what "fracking" means were all little conversations I was able to have all day (D and I have a "no fracking" sign in our third-story window).

If I when I ever launch my pickle business, I'll start my marketing on my own block first.

Sunday, September 2, 2012

Don't Cry Over Spilled Hato Muji

I found this grain--Job's Tears, or hato muji, at the Albany food co-op several months ago. I'd never heard of it before, and it was supremely expensive, so I just had to try it. It is an ancient grain that looks and acts like barley, but isn't. It has all kinds of uses (medicinal, nutritional, artistic), but I planned to use it for a cold summer salad.

Ever since I stopped eating quinoa (here's why) I've been searching for an alternative grain. While hato muji is almost prohibitively expensive, it is really tasty.

I couldn't find a recipe for it anywhere, so I made one up based on a recipe I found for barley salad.

Apricot-Grain Summer Salad

1 1/2 cups hato muji
8 cups water
1 cube bouillion (veggie, mushroom)
[or you can use 2-4 cups of stock in place of the same proportion of water]
1/2 cup sliced dried apricot
1/2 cup shredded carrot
1 cup diced yellow pepper
1 cup finely diced onion
4 cloves diced garlic
1 tbsp diced ginger
2 tbsp olive oil, or toasted sesame oil (or a combination)
1/2 cup sliced toasted almond

Combined water/broth with the hato muji and bring to a boil. Simmer for at least an hour (frequently checking toward the end) until the grain is firm but chewy. While the grain is cooking, sautee in a cast iron pan the onion, garlic, and ginger in olive oil until tender and just beginning to brown. When the grain is done cooking, toss in a large bowl with the sliced apricots, shredded carrot, and the sauteed onion mixture. Quickly sautee over high heat the diced yellow bell pepper until some of the pieces are singed. Toss into the grain. Garnis with toasted sliced or chopped almonds. It's a nice alternative to a potato-based dish for a main dish of pork loin or ribs, or just on it's own.


Sunday, March 4, 2012

The Bee's Knees

Bees are essential for human life. Without bees, we would die. And without honey, we would be extremely unhappy. The honey pie is possibly the quintessential key to ultimate happiness.

D and I went to our first block association meeting a few weeks ago at the corner pie shop, Four and Twenty Blackbirds. (Everyone should have a corner pie shop.) The proprietors very generously provided free pie to the group, but when we got there and looked up at the menu we saw something we couldn't pass up: salted honey pie. We weren't going to take a chance that they'd serve us the honey pie, so D went up prepared to buy a slice to share--they gave it to us on the house. It was one of those foodie moments that actually changes your life. And whenever we have that kind of experience, we leave the restaurant thinking; we've got to make this at home. Four & Twenty made this easy by graciously making their recipe for this divine pie publicly available.

For some reason, D and I started paying a lot of attention to bees. Bees became a theme in our wedding--we had little marzipan bees on our wedding cake, there were bees worked into our wedding invitation, and a friend of D's created a terrific design for wedding-themed frisbees that D gave to his ultimate frisbee friends (pictured here). We even got bee tattoos.

Unfortunately, the honey bee population is in crisis and very few people seem to be paying attention. Check out this documentary, Colony, about the collapse of the honey bee population. Recently, New Yorkers won the right to keep raise bees in the city. I've thought about doing it, but haven't fully assessed whether I have the wherewithall to make that kind of commitment. There's a course offered here at the Beekeeper's Association that I'm thinking about taking.

So what do we do in the meantime? We are careful about the kind of honey we buy and we try to support local honey producers so that they remain profitable and keep doing what they're doing. There's been a raging scandal in the food community about honey that most people don't even know about: the honey that you buy at the supermarket is probably not honey at all. You can read about the scandal here, and take action by seeking out local honey producers. Because you can raise bees just about anywhere, you can even find locally-produced honey in Brooklyn!


You have to make a recipe dozens of times before you get it perfectly right, so D and I have started the process. The recipe we used calls for one ingredient that you may never have heard of, I know I hadn't: vanilla bean paste. It's a bit pricey, but you don't need a lot of it. I found it at my new favorite place, the Albany Food Co-op. Two weeks ago, on our way out to our friends' country house, we decided in the car that we wanted to try to make the honey pie for the first time, but I had left the recently-purchased vanilla bean paste at home. We were prepared to substitute extract, but were delighted to find that our friend stocked vanilla bean paste in his cupboard. (I wonder what he uses it for?) Another key ingredient is salt flakes. Maldon is the best kind of flaked salt; don't try to substitute another kind, it won't work. The last key ingredient is, of course, good honey. We went to the Hamlin Buffalo farm and picked up some locally-produced honey (and some buffalo short ribs!) and made this pie.

Salted Honey Pie

(Makes one 9-inch custard pie)

Preheat oven to 350F. Have prepared one pre-baked pie shell of your choice, the recipe for the Four & Twenty Blackbird pie crust is below.

For filling

1/2 c butter melted
3/4 c white sugar
2 Tbsp white cornmeal
1/4 tsp salt
3/4 c honey
3 eggs
1/2 c cream
2 tsp white vinegar
1 tsp vanilla paste
1 or 2 Tbsp flake sea salt for finishing (Maldon is a good choice)
–
All of the mixing can be done by hand. Melt butter and combine with the sugar, salt and cornmeal to make a thick paste. Add the honey, vanilla and vinegar and mix together. Fold in the eggs, add the cream and blend. Pour the filling into a pre-baked pie shell and bake at 350 F for 45 to 60 minutes. The filling will puff up like a marshmallow and the center will be just slightly wobbly. Once cooled (at least one hour), finish with a sprinkling of flake sea salt. Slice and serve with freshly whipped cream.

Four & Twenty Blackbirds Pie Crust

This recipe makes one double crusted, 9-inch pie (you only need one crust for the honey pie--if you make both, you can freeze the other one).

2 1/2 cups all-purpose unbleached flour
1 teaspoon salt
1 tablespoon sugar
1/2 pound (2 sticks) cold unsalted butter, cut into 1/2-inch pieces
8-10 tablespoons ice water with cider vinegar, or more as needed (combine 1 cup cold water, 1/8 cup cider vinegar and ice)

Whisk the dry ingredients together and blend with a hand-held pastry blender (or a knife and fork or two forks) the chopped, cold butter, being careful not to overwork during this step. The butter should be in pea-sized chunks, not too big, but not completely incorporated. Slowly add the ice water and vinegar mixture and bring the dough completely together by hand, again being careful not to overwork. Aim to create a marbleized effect, so that the butter is still visible. Divide into 2 discs, wrap in plastic and chill 1 hour or more before use. To pre-bake a crust for a custard pie: Roll one disc of crust out to fit a 9-inch pan, about 1/4 inch thick. Place in a buttered pie pan, and crimp the edges as desired. Allow to rest and cool in freezer or fridge for at least 20 minutes. Line the rolled-out crust with tinfoil or unwaxed parchment paper, add pie weights or about a cup of dry beans if you don’t have pie weights. Distribute them evenly. Bake in a 375 F oven for 20 minutes. Allow to cool slightly before filling with custard.

Monday, February 20, 2012

The Sourdough Experiments

People really appreciate freshly-baked bread. You pop a loaf in the oven before guests arrive and the smell wafting from your kitchen will make people feel as welcome as anything. I've been experimenting with sourdough recipes since I brought my first starter back from San Francisco about three years ago. I've had a very hard time finding a recipe for a nice rustic loaf, but this one is the best so far. This recipe is from the King Arthur flour website, and it worked pretty well--it yields a nice crust and a chewy center. The problem that I've had is with the rising. I don't know if its the climate or what, but I rarely ever get the nice air pockets that characterize a good sourdough. I also have a hard time getting the loaves to rise high when I made free-form loaves; my dough seems to expand lengthwise, but not rise up. This time I used additional yeast toward the end of the process, and formed a lip of aluminum foil around the dough to keep it from expanding outward. This experiment makes me think that I ought to search for some spring-form dough ring for my next loaf.

I made two loaves in preparation for weekend guests. We served the freshly-baked loaves with a dinner of pan-seared venison, leeks, and sweet potatoes. The leftovers went well with pea soup for the next day's lunch, and toasted for tuna-salad sandwiches.

Rustic Supper Sourdough

1 cup "fed" sourdough starter
1 1/2 cups lukewarm water
2 teaspoons instant yeast
1 tablespoon sugar
2 1/2 teaspoons salt
5 cups flour

Combine all of the ingredients, kneading to form a smooth dough. Allow the dough to rise, in a covered bowl, until it's doubled in size, about 90 minutes. Gently divide the dough in half; it'll deflate somewhat. Shape the dough into two oval loaves--this is where I deviated from the recipe. I sprinkled a little bit of dried yeast and stretched it through the dough, folding it over and under itself until I had two smooth loaves. Place the loaves on a lightly greased baking sheet. Cover and let rise until very puffy, about 1 hour. Towards the end of the rising time, preheat the oven to 425°F. Spray the loaves with olive oil or lukewarm water. At this point, you can also do an egg wash to make the crust shiny. I didn't do that this time around. Make two fairly deep diagonal slashes in each. Bake the bread for 25 to 30 minutes, until it's a very deep golden brown. Remove it from the oven, and cool on a rack.

Saturday, February 18, 2012

Weekend in the Country

The day after Thanksgiving, D's brother came to visit, and in return for a plate of leftovers, left us with two really nice cuts of freshly butchered venison that he had taken the last time he was out hunting around here. One of them was a loin, the other a backstrap. We prepared them both the same way--marinated in a nice olive oil, salt, pepper and some dried herbs for about a day. Then we pan-seared the meat in a skillet and finished it in a hot oven, ensuring that the meat was cooked but rare. The backstrap was a small piece of meat, but sliced thin and served with an apricot-mustard-brandy sauce alongside braised leeks and smashed sweet potatoes, it made a perfect winter meal for four.

Friday, December 30, 2011

Adapted Arepas

For the past few years, we've spent the week between Christmas and New Years at beautiful country house in Pennsylvania owned by very dear friends of ours. Whenever we're here, we get inspired to cook up some new dish. This year, I found a recipe for arepas with pulled pork and cheese in the Food & Wine magazine that our friends subscribe to. I looked in a few places here in the country for one of the arepas ingredients: masa harina, but couldn't find it. I thought I could substitute corn meal, but it didn't work. We adapted the recipe and instead made little corn cakes with pulled pork in the center. We served is as part of our little New Year's Day spread for a few friends who stopped by. They were delicious topped with sour cream, pickled cabbage, sliced jalapeno and chopped cilantro. We bought the pork from a local German place up here that sources their meat locally and does all their own butchering called the Alpine House.

Corn Fritters with Pulled Pork and Cheddar Cheese

For the fritters:

Milk
1 1/2 c. all-purpose flour
1/4 c. cornmeal
2 tsp. baking powder
1 egg, beaten
olive oil

For the pulled pork filling:

1 nice-sized pork butt
2 stalks of celery
2 carrots
1 medium onion
2 bottles of dark (or dark-ish) beer
a few cups of chicken or veggie stock
hot sauce
salt and pepper
1 cup of cheddar cheese

For the sides:

1 small head of red cabbage
1 medium red onion
2 tbsp red wine vinegar
1 bunch cilantro
1 jar of sliced jalapenos
1 cup sour cream

You can make your pulled pork in a slow cooker by placing all of the ingredients (browned pork butt, sliced onion, carrot and celery, 2 bottles of beer, salt & pepper, and enough broth to fully immerse the pork butt) in the cooker and leave on high for about 8 hours. We cooked ours in a heavy ceramic soup pot on low on the stove all day. It fills the house with a nice aroma. When the pork is very tender, remove from the liquid and let cool for a bit. Shred the pork to your liking. Place in a bowl as much of the pulled pork you need for your fritters (1 1/2 cup) and freeze the rest for pork tacos some other night. To the shredded pork that you've set aside, add 1 cup of shredded cheddar cheese and hot sauce. Mix together.

While your pork is cooking, make the cabbage by finely shredding the red cabbage and onion, placing it in a bowl and covering with the red wine vinegar. Set aside to marinate.

To make your fritters, mix together flour, cornmeal, baking powder, and 1/2 teaspoon salt. Add milk and beaten egg. Stir until moistened. Set aside for a few hours.


To assemble the fritters, drop a heaping tablespoon of the batter into smoking oil in a frying pan. When the batter begins to solidify, drop a ball of the pork-cheese mixture in the center, and top with another tablespoon of the batter. When the "pancake" has some integrity, flip to the other side and fry until golden. Drain on a paper towel.

You can pop a dozen in the oven to keep warm until your guests come. Serve each fritter with a dollop of cream cheese, a pinch of red cabbage, a few sliced jalapenos, and a sprinkling of cilantro leaves.

Saturday, November 19, 2011

Cranberry Pomegranate Relish

This year's cranberry sauce is a little more complex than I've made in years past. I decided to incorporate the flavor du jour: pomegranate, into my recipes. I made two cranberry sides for Thanksgiving dinner this year: a cranberry pomegranate relish and a cranberry pomegranate citrus sauce. The savory relish is my favorite, but I always like to make a sweeter, more traditional version for people who expect that.

Cranberry Pomegranate Relish

2 teaspoons olive oil
1 large shallot, finely chopped
1/4 onion, finely chopped in slivers
1 bag (12 ounces) fresh or frozen cranberries
1 cup pomegranate juice
2 tbsp finely diced ginger
1 diced apple
1/2 cup packed dark-brown sugar
salt, pepper, and cinnamon to taste

Saute shallot and onion in the olive oil until just turning brown. Add the rest of the ingredients and simmer on medium-low heat for about 30-40 minutes, stirring frequently, until the cranberries have all popped and the relish becomes the consistency that you want. You can serve immediately, or spoon the relish into jars and set aside until the tops pop, then store.

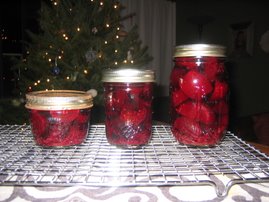
A few weeks ago, I picked up these beautiful canning jars from Housing Works in Brooklyn. I think they must be European; I'd love to get my hands on some more of them. They would be perfect for gifts.

Cranberry Pomegranate Citrus Sauce

1 bag (12 oz) fresh or frozen cranberries
1 3/4 cups pomegranate juice
3/4 cups sugar, more or less to taste
t tbsp finely diced ginger
1 tsp lemon zest
1/2 tsp salt

Combine all ingredients in a medium saucepan and cook over medium-low heat for 20 minutes, stirring occasionally to prevent burning. Mixture will thicken as it cooks, and will thicken more as it cools. Cool in a jar or bowl in the fridge. Serve with Thanksgiving turkey.

Sunday, September 18, 2011

Cupcake Dilemma

Next weekend in upstate New York, a very good friend of mine is getting married. She found this wonderful guy after a long and storied single life and she's so happy. She asked me a few weeks ago whether friendships with your girlfriends change when you get married (in this case, to a man). I said that the friendships don't change, but for me at least, the time that I spend with my girlfriends is less than I used to. You have to work at it; but also, if they're true friends, you won't lose them. I had already been thinking about what to do for her because she didn't want any gifts for the wedding, and because I feel kind of sad that I didn't have a "bridal shower" kind of thing before I got married. All of my bridal party were from out of town--very good old friends who I wanted to make sure came to the wedding from places as distant as Ramallah. So I took the opportunity of that conversation to ask her if I could host a party for her with her closest women-friends. I thought she would say no, but she was touched, and after some coaxing, sent me email addresses for her friends--none of whom, surprisingly, I knew.

I co-hosted the evening with another friend of hers, and she suggested coordinating the food to make sure we had enough of everything. I decided I would make cupcakes--partly because I love using the cupcake tree my mother gave me a few years ago for Christmas. I also think people like having their own mini-cakes. As the evening drew nearer, I realized I didn't have a clue about what kind of desserts my friend likes. I know she likes margaritas. I know she likes Mexican and Middle Eastern food, but I had no idea about sweets. So I turned to her friends, and to her fiance. I came up with a list of cupcakes that I've wanted to make for a long time from a book Cupcakes I got for my own wedding. From that list, her fiance chose a rosewater raspberry cupcake, but her friends almost unanimously wrote back and said that my friend loves chocolate. What to do?

Last weekend, D and I went to the country to visit with two couples we love spending time with. After a few bottles of wine, I posed the dilemma: do I make the cupcake chosen by my friend's chosen life partner? A man she's known for a sliver of time compared to the girlfriends--some of whom she's known for more than 25 years? The question served as a platform for a lively discussion among the six of us, all men but for me. They debated back and forth about what the schism meant, and finally one of them suggested that her chosen life partner may know things about her that she doesn't even know yet herself. He may represent a new direction--one that she didn't even know she wanted to take. The argument for the rosewater raspberry was gaining support. But then someone said that I should stay safe with a cupcake that everyone knows she will like--it's her party after all. I decided to compromise and make them both, and see what happens.

It was the right decision. The cupcakes were pretty and yummy. Our guests liked them both, but the chocolate cupcakes that I chose to make were a real hit. At some point in the evening, my friend came over to me and told me how much she loved the chocolate cupcakes. I asked her if she'd tried the rosewater. She wrinkled her nose a little bit and said no, she had to keep it to one because she had a wedding dress to look good in next weekend. So I told her the story. She agreed to try the rosewater cupcakes and the smile on her face after she took a bite was priceless. She said: "I love tart things. [my fiance] knows that." She herself would never have chosen the rosewater, but she liked it a lot.

Finding the ingredients for these two cupcake recipes was a bit of a challenge. Despite thousands--maybe millions--of Mexican bodegas and supermercados in NYC, I couldn't find Mexican chocolate. So I substituted a Dagoba hot chocolate cocoa called Xocolatl and reduced the sugar in the recipe. The rosewater called for sugared rose petals as a decoration, and I thought I'd be too busy this week to make them on my own, so I found them at Kalustyan's in Kip's Bay. Unfortunately, they weren't as pretty as ones I would have made on my own, and next time I won't shy away from the task.


Mexican Chocolate Cupcakes


1 cup flour
1/2 cup sugar
1/4 cup xocolatl (Mexican drinking chocolate--see above)
3/4 tsp baking soda
1 1/2 tsp cinnamon
1/4 tsp salt
3/4 cup lukewarm water
1/3 cup canola oil
3/4 tsp white vinegar
1/2 cup finely grated semi-sweet chocolate, plus a little extra for garnish
Buttercream frosting

Preheat oven to 350 degrees. Line a 12-cup muffin tin with paper liners. Sift together the flour, sugar, cocoa powder, baking soda, 1 1/2 tsp of cinnamon, and the salt into a bowl. Add the water, oil, and vinegar to the flour mixture, using an electric mixer on medium speed, beat until combined. Add the 1/2 cup of chocolate and beat until well combined.

Divide the batter evenly into the paper liners filling to about 3/4 full. Bake until a toothpick is inserted in the center of a cupcake comes out clean, 24-28 minutes. Let the cupcakes cool in the pan for 5 minutes, then transfer to a wire rack to let cool completely before frosting--about one hour.

Frost with buttercream (I used a chocolate buttercream using the xocolatl again) and garnish with grated chocolate.

Rosewater & Raspberry Cupcakes

1 1/4 cup flour
1 tsp baking powder
1/4 tsp salt
3/4 confectioner's sugar
1/2 cup unsalted butter, at room temp
1 tbsp rosewater
2 large eggs, at room temp
1/2 cup milk
Rosewater glaze
12 raspberries
Sugared rose petals

Preheat oven to 350 degrees; line a muffin tin with paper liners.

Whisk together the flour, baking powder, and salt. In another bowl, with an electric mixer on medium-high speed, beat the confectioner's sugar and butter together until light and fluffy--about 2-3 minutes. Add the rosewater and the eggs, one at a time, beating on low speed until combined after each addition. Add the flour in three additions, alternating with the milk in two. Beat on low speed until well combined.

Divide the batter evenly among the muffin cups, filling each to about 3/4 full. Bake until lightly golden and a toothpick inserted into the center of a cupcake comes out clean, 15-18 minutes. Let the cupcakes cool in the tin for 5 minutes, then transfer to a wire rack and let cool completely for about an hour.

When cooled, spoon a small amount of glaze on each cupcake and garnish with sugared rose petals. Depending on what colors you get with each, you may want to add a raspberry on top. My rose petals were too dark and wouldn't have looked good with the raspberries, so I baked my raspberries into the center of each cupcake. (I did this by filling the muffin cups 1/2 full, pressing a raspberry in the center, and then covering with another dollop of batter).

Wednesday, September 7, 2011

Farewell Cookies

Our office is losing a terrific and well-liked attorney on Friday and I baked these cookies as a fond send-off because I can't make it for the traditional send-off drinks on Friday night. I adapted this recipe from one I found on Epicurious. I hope he likes them.

Chocolate Chip Cookies

2 cups all-purpose flour
1 cup light wheat flour
1 1/2 teaspoons baking soda
1 1/2 teaspoons salt
2 sticks (1 cup) unsalted butter, melted and cooled slightly
1 1/2 cups packed light brown sugar
1 cup granulated sugar
3 large eggs
1 1/2 teaspoons vanilla
10 oz semisweet chocolate chips (or to taste)
3/4 cup chopped walnuts (optional)

Put oven rack in middle position and preheat oven to 375°F. Lightly grease cookie pan. Whisk together flour, baking soda, and salt in a small bowl. Beat together butter and sugars in a large bowl with an electric mixer at high speed until pale and fluffy, 2 to 3 minutes. Lightly beat 1 egg with a fork in a small bowl and add 1 3/4 tablespoons of it plus 2 remaining whole eggs to butter mixture, beating with mixer until creamy, about 1 minute. Beat in vanilla. Reduce speed to low and mix in flour mixture until just blended, then stir in chips. Scoop heaping tablespoon of batter for each cookie, arranging mounds an inch or so apart, on 2 baking sheets. Flatten mounds using moistened palm of your hand. Bake, 1 sheet at a time, until golden for 13 to 15 minutes. Transfer cookies to a rack to cool and continue making cookies in same manner using cooled baking sheets.

Saturday, September 3, 2011

Toasting Summer's End

The swift kick we delivered to summer's ass last night was well-deserved: this summer was, weather-wise, the most miserable one from my perspective in memory. Our second annual Kicking Summer to the Curb party featured a new house specialty: watermelon mojitos. Last weekend, D and I went to a wedding reception where the bride's signature drink was watermelon mojitos and we instantly knew that this drink would be the perfect companion to pernil as a toast to the end of summer. Easy to make, these drinks were a delight and they didn't last long.

Watermelon Mojitos

One ripe, good sized watermelon
1 healthy, fresh bunch of mint
10 limes
honey
1 bottle of selzer water
1 big bottle of rum
crushed ice
lively straws

Blend half the watermelon into a liquidy pulp. Smoosh chunks of the other half of the watermelon into the pulp. Mottle together the lime and the mint and add to the watermelon mixture. Add about 1 tbsp of honey and mix thoroughly. Refrigerate to let the flavors marinate a bit. Serve by filling 1/2 of a 9 oz glass with crushed ice. Pour 1/2 to 1 shot of rum onto the ice (depending on how strong you like your drink), fill to within selter's reach of the cup with the watermelon mixture, top with seltzer water for fizz, and stir. If you want to get all fancy about it, garnish with a sprig of mint, a lime, and a slice of watermelon. Enjoy!


Sunday, August 28, 2011

Hurricane Bars

Last week, everyone from my dad to CNN was warning of the storm of the century. Hurricane Irene was making a bee-line for New York City, and we should all prepare to hunker down with sandbags, flashlights, and bathtubs filled with water for at least a few days, if not more. Most of us felt like the warnings were completely overblown, but echoes of Hurricane Katrina were playing around in my head, so I did everything they told me to do. My go-bag was packed, my cooler was filled with ice, and I was on the verge of taping up the windows. But after some harrowing wind and rain on Saturday night, the worst of the storm was over and when I got up at 6 am Sunday to catch the predicted water surge that would leave all of lower Manhattan under 6-12 feet of water, nothing happened. People in upstate New York suffered tremendously from flooding, but here, I can't even say we had a casualty. In fact, the storm prep motivated us to clean the porch and the fridge. So by Sunday mid-morning, I was feeling quite a bit of post-partum depression. I was all psyched up to sit inside, away from the windows, listening to the howling wind and playing scrabble by lamplight. Now, the sun was shining, birds were singing, and I had no tragedy to focus my energies on. So I decided to make dessert to bring to the home of some friends for dinner that night. I used a recipe from Gourmet magazine from 1999, and while I followed the perfectly good recipe, I would make several modifications to make the bars less sweet and more coconutty the next time around. I used an Epicurious recipe for the shortbread base, but used a light wheat flour instead of white flour. I'll call these chocolate macaroon bars Hurricane Bars probably forever.

Chocolate Macaroon Bars

4 large egg whites
1 cup sugar (I would use 1/2 cup sugar, or the same amount of sugar with a non-sweetened coconut)
1 teaspoon vanilla
1/2 cup light wheat flour
a 7-ounce bag sweetened flaked coconut (about 2 2/3 cups) (I would use 3 - 3 1/2 cups coconut, and perhaps half or all unsweetened coconut)
1 1/2 cups semisweet chocolate chips

Shortbread Base

1 1/2 sticks (3/4 cup) unsalted butter
2 cups light wheat flour
1/2 cup packed light brown sugar
1/2 teaspoon salt

Preheat oven to 350°F.

Cut butter into 1/2-inch pieces. In a food processor process all ingredients until mixture begins to form small lumps. Sprinkle mixture into a 13 x 9 x 2-inch baking pan and with a metal spatula press evenly onto bottom. Bake shortbread in middle of oven until golden, about 20 minutes. While shortbread is baking, prepare topping.

In a bowl whisk together whites, sugar, and vanilla until combined well and stir in flour and coconut. Sprinkle chocolate chips evenly over hot shortbread. Let chips melt and spread evenly over shortbread. Drop small spoonfuls of coconut mixture onto chocolate and with a fork spread evenly. Bake in middle of oven until top is golden, about 30 minutes. Cool completely in pan and cut into 24 bars. We served ours with vanilla gelato.


Tuesday, August 23, 2011

Late Summer Harvest

Assembling fresh tomato, mozzarella, and basil takes just moments, but when the ingredients are just right, there's nothing better in the dog days of summer. (I know the Dog Days (of Summer) Are Over as of August 11th, but it sounded good). I picked up these lovely tomatoes and basil at the farmer's market on Sunday, and used them on Tuesday night. I stored the basil incorrectly, so very few of the leaves were worth using after two days in the fridge, but luckily enough leaves to accompany the tomato slices. The mozzarella was fresh-made at Fairway. Drizzle some quality salt, cracked black pepper, and a good deep green olive oil and you're good to go. Serve it on a pretty dish and you'll make you dining partner or dinner guests swoon. (This is served on one of a set of owl plates our friend Jess gave us as a wedding gift.) Next time, I would serve with a side of nice crusty/chewy bread to sop up the excess oil. Yum.

Sunday, March 13, 2011

Confetti Cornbread

Sometimes I use a packaged mix. This is a risky admission on a blog that champions slow home cooking and tries to follow, as much as possible, Michael Pollan's suggestion to shop around the perimeter of the supermarket. But sometimes I do. I wanted to make cornbread for an annual chili party that friends of ours on the Upper West Side have every year, and I happened to have three boxes of Jiffy cornbread mix in the cabinet. You can find these little guys for as little as 33 cents in some grocery stores; these were 55 cents at Fairway. The ingredients aren't so bad, and its just so easy: add an egg (in this case three), and a 1/3 cup of milk (in this case one cup) and voila! Tasty cornbread. I dressed it up a bit, of course, with 1/2 cup of corn kernels and about 2 tbsp of chopped red jalapeno and fire-roasted poblano. My cornbread didn't hold up very well on the long walk and subway rides from Brooklyn to the party, but people gobbled them up despite their looks.

Saturday, February 26, 2011

Six of Everything

We finally have six of everything for entertaining: six fancy water glasses, six matching cloth napkins, six salad plates, six dessert plates, six steak knives, six matching chairs at a lovely new table, and matching silverware to boot....so we had to have four of our friends over for a mid-week dinner party. We haven't had a chance to use the lovely tagine that we received as a wedding present, so I decided to prepare a lamb tagine that I made as our very first tagine, which I wrote about here. One of our friends has very specific food aversions, including nuts, chocolate, and aged cheese--three things we discovered we use routinely. So dinner planning was a bit of a challenge, but a welcome one. Finding an appetizer without nuts or aged cheese was the first challenge. Dessert without chocolate was the second. Epicurious came through with flying colors on both fronts. I decided on a goat cheese with roasted yellow pepper and dill for an appetizer, served with lavash crackers from Damascus bakery on Atlantic Avenue in Brooklyn. For dessert, I chose a honey cake called Basboura. The Basboura was a hit; everyone had a second piece.

Basboura

2 cups fine semolina
1 cup dessicated coconut
1/2 cup sugar
1 tsp baking soda
A little less than 2/3 cup melted butter or ghee or semnah
1 cup milk

For the syrup...
1 1/2 cups sugar
1 1/2 cups water
1 tbsp lime juice or 2 tbsp lemon juice
2 tbsp honey

Preheat the oven to 345 degrees F. In a large bowl mix all the dry ingredients, the semolina, coconut, sugar and soda together. Mix in the melted butter and milk and stir until well combined. Pat this mixture into a buttered, shallow medium sized oven proof dish and level the surface with a spatula or a palette knife. Bake for 30 minutes or until golden brown on the top.

In a medium sized sauce pan, place the sugar and water on low heat and stir until the sugar dissolves completely. Increase the heat to medium and then bring the mixture to a vigorous boil and cook until it coats the back of a spoon or reduces by about one-third or until it reaches 220 degree F on a cooking thermometer. Stir in the lime juice and allow to cool. Once cooled or warm, mix in the honey and stir well.

Allow the cake to cool sllightly, for about 10 minutes and then cut it into squares or diamonds. Carefully pour the syrup over the cake. It will look like a lot of syrup, but the cake will absorb all the syrup gradually.

Serve at room temperature. We served ours with a dollop of yogurt mixed with a splash of rose water, and a generous sprinkling of dessicated coconut. The dessert can be served, or baked, with almonds as well.

Goat Cheese and Yellow Pepper Dip

2 yellow peppers, halved, seeded
2 jalapeno peppers, cut in half and de-seeded
2 tablespoons olive oil
8 ounces sharp soft goat cheese
2 tablespoons chopped dill, plus 1 sprig for garnish
1 tablespoon lime juice
Coarse salt and fresh cracked black pepper
Pinch cayenne

Roast peppers over an open flame until soft and a the skin a little charred, about 5-8 minutes. Place them in a plastic bag for about 20 minutes, remove and peel the skin off. Emulsify the peppers in a food processor and add the goat cheese, lime juice, dill, cayenne pepper, black pepper and salt to taste. Pulse until combined well. Serve with flat bread or pita chips.

Monday, February 21, 2011

Finally! Perfectly Risen Sourdough Loaf

If you know me, or have read this blog at all over the past year, you know that I've been working with sourdough since December 2009, baking at least two loaves of bread nearly every weekend. Maybe you've even been the recipient of one of my experiments. One of the most mysterious things about this process is that I haven't been able to find one good recipe for a rustic sourdough loaf that has the classic hard crunchy outer crust, and the spongy, fragrant inner bread. I've also had a hell of time getting my white breads to rise beyond bloated flatbread shapes. I finally stumbled upon a good recipe that produced a nice loaf with a strong rise. I served this bread at a chili party/meeting I hosted for my softball team and it got rave reviews.

Sourdough Olive Bread

2 cups lukewarm water (110°F)
2 cups white sourdough starter, room temperature
2 teaspoons active dry instant yeast
1/2 teaspoon diastatic malt**
7 to 8 cups bread flour***
1 tablespoon salt
2 tablespoons finely-minced fresh rosemary
2 tablespoons olive oil
2 cups Kalamata olives, pitted and coarsely chopped
Semolina flour, for dusting

** Diastatic malt is powdered malted grain, usually barley, but wheat, and rice may also be malted It breaks down the starch in dough to yield sugars on which the yeast can feed.

*** The thickness of your sourdough starter can determine how much flour needs to be used. If you think the dough is too moist, add additional flour (a tablespoon at a time). The same is true if the dough is looking dry and gnarly. Add warm water (a tablespoon at a time). Your dough should not be sticky but should form a nice elastic ball. I usually have to add extra flour.

Combine water, sourdough starter, yeast, and diastatic malt in the bowl of a mixer; stir with a rubber spatula or wooden spoon, just to moisten. Add flour, salt, rosemary, and olive oil; mix the dough until it snaps back quickly. Turn the dough onto a lightly floured board; add olives and knead by hand for several turns to be sure the olives are well incorporated and the dough is smooth, adding additional flour if needed. NOTE: Knead dough by pulling the dough towards you and then pushing down and forward with the palms of your hands (kneading gives the bread the elasticity and lets it rise).

Place the dough in a lightly oiled large bowl. Cover the bowl with plastic wrap Let rise until it doubles in volume (when you can put your finger in the dough and it leaves and indentation and doesn't spring back out) approximately 4 to 8 hours (depending on the temperature and the starter used, the rising time can vary as much as 2 hours).

Punch dough down and knead it on a floured board to feed it one more time before baking. Divide dough in half and shape each dough ball into a loaf or round shape (boule); place each loaf into a pan (I used both a loaf pan and a round spring-form cake pan). Cover with plastic wrap and place in a warm spot to rise until doubled in size, approximately 1 to 3 hours.

Oven Bread Rising: Sometimes I use my oven for the rising. Turn the oven on for a minute or so, then turn it off again. This will warm the oven and make it a great environment for rising bread. If you can't comfortably press your hand against the inside of the oven door, the oven is too hot. Let it stand open to cool a bit. Sourdough rises more slowly than yeast bread; Always remember, the longer the rise time, the more sourdough flavor.

Cool or Refrigerator Bread Rise: If I don't have the time to wait for the rise to finish or I know that I will be interrupted before the completed rise, I do a cool rise. A cool rise is when the dough is place in the refrigerator and left to rise slowly over night approximately 8 to 12 hours. I usually do this after the first rise and the dough has been shaped into a loaf. As this is a longer rise time, it improves the sourdough flavor in your finished bread.

Preheat oven to 450 degrees F. After the bread has risen, slash the bread with a bread razor or a very sharp knife making three 1/2-inch deep diagonal slashes. Brush or spray the top of the bread with cold water. Slide the trays in the oven. Spray the oven with a spray bottle full of water and close the oven door. Thirty seconds later, open the oven door and mist the oven again. Repeat this two more times, then turn the oven temperature down to 400 degrees F. and let the bread bake for 15 minutes.

After 15 minutes, turn the bread around 180 degrees so it can brown evenly; bake another 10 minutes or until nicely browned. NOTE: A good check is to use an digital thermometer to test your bread. The temperature should be between 200 and 210 degrees F.

Remove from oven and place bread on a wire rack to cool. Let the loaves cool for 30 minutes before cutting (this is because the bread is still cooking while it is cooling).

Sunday, February 6, 2011

Last Minute Brownies

We had a few friends over to watch the Superbowl, and after setting out all of the dips and veggies and popping the chicken wings in the oven, D asked me if we had anything sweet. We didn't, but I offered to whip up a quick batch of brownies. I was lucky enough to have just enough organic cocoa from Trader Joe's left. The recipe only made about 10 decent sized brownies, but that was perfect. They were chocolatey and chewy...but they would have been better with some Ghiardelli chips.

Epicurious Best Cocoa Brownies

10 tablespoons (1 1/4 sticks) unsalted butter
1 1/4 cups sugar
3/4 cup plus 2 tablespoons unsweetened cocoa powder
1/4 teaspoon salt
1/2 teaspoon pure vanilla extract
2 cold large eggs
1/2 cup all-purpose flour
2/3 cup walnut

Preheat the oven to 350°F. Spray your baking pan (8" square) with olive oil. Combine the butter, sugar, cocoa, and salt in a medium heatproof bowl and set the bowl in a pot of water so that it fits, and bring to a simmer. Stir from time to time until the butter is melted and the mixture is smooth and hot enough that you want to remove your finger fairly quickly after dipping it in to test. Remove the bowl from the skillet and set aside briefly until the mixture is only warm, not hot. Stir in the vanilla with a wooden spoon. Add the eggs one at a time, stirring vigorously after each one. When the batter looks thick, shiny, and well blended, add the flour and stir until you cannot see it any longer, then beat vigorously for 40 strokes with the wooden spoon or a rubber spatula. Stir in the nuts. Spread evenly in the pan. Bake until a toothpick plunged into the center emerges slightly moist with batter, about 30 minutes. Let cool before attempting to cut, but not too much. These brownies are delicious warm.

Saturday, January 8, 2011

Mimicking Muhammara

The last time D and I went to Tanoreen in Bay Ridge, just before Christmas, we asked for a double order of Muhammara. I'd been looking forward to the trip to Tanoreen for weeks, thinking of the slightly crunchy, garlicky sweet mystery. It didn't occur to me until the end of the night, after sopping up the last juicy specks on the dish with a piece of pita, that I could probably learn how to make it at home. If not as good as Tanoreen, I could at least enjoy and entertain others with something like it at home. I vowed I would make it sometime shortly after the New Year.

Epicurious has a great recipe that's simple and ended up being very tasty. I might add more olive oil next time, and try to blend the ingredients in a way that allows it to retain a bit more of the individual ingredients' distinctness, but for a first try, it was very good.

There will never be a substitute to enjoying a warm dish of muhammara with a glass of Lebanese wine surrounded by friends and the warmth of Tanoreen itself, but I'm glad I can whip this up for any occasion.

Muhammara

a 12-ounce jar roasted red peppers, drained
1/2 cup toasted bread crumbs
1/2 cup walnuts, toasted lightly and chopped fine
2 to 4 garlic cloves, minced and mashed to a paste with 1/2 teaspoon salt
1 tablespoon fresh lemon or lime juice, or to taste
2 teaspoons pomegranate molasses
1 teaspoon ground cumin
1/2 teaspoon dried hot red pepper flakes
1/2-3/4 cup extra-virgin olive oil
toasted pita triangles as an accompaniment

In a food processor blend together the peppers, the bread crumbs, the walnuts, the garlic, the lemon juice, the pomegranate molasses, the cumin, the red pepper flakes, and salt to taste until the mixture is the consistency you'd like. Add the oil gradually. Transfer the muhammara to a bowl and serve it at room temperature with the pita triangles.


The original recipe, which I adapted only slightly, from Epicurious can be found here.