Showing posts with label garlic. Show all posts

Sunday, September 2, 2012

Don't Cry Over Spilled Hato Muji

I found this grain--Job's Tears, or hato muji, at the Albany food co-op several months ago. I'd never heard of it before, and it was supremely expensive, so I just had to try it. It is an ancient grain that looks and acts like barley, but isn't. It has all kinds of uses (medicinal, nutritional, artistic), but I planned to use it for a cold summer salad.

Ever since I stopped eating quinoa (here's why) I've been searching for an alternative grain. While hato muji is almost prohibitively expensive, it is really tasty.

I couldn't find a recipe for it anywhere, so I made one up based on a recipe I found for barley salad.

Apricot-Grain Summer Salad

1 1/2 cups hato muji
8 cups water
1 cube bouillion (veggie, mushroom)
[or you can use 2-4 cups of stock in place of the same proportion of water]
1/2 cup sliced dried apricot
1/2 cup shredded carrot
1 cup diced yellow pepper
1 cup finely diced onion
4 cloves diced garlic
1 tbsp diced ginger
2 tbsp olive oil, or toasted sesame oil (or a combination)
1/2 cup sliced toasted almond

Combined water/broth with the hato muji and bring to a boil. Simmer for at least an hour (frequently checking toward the end) until the grain is firm but chewy. While the grain is cooking, sautee in a cast iron pan the onion, garlic, and ginger in olive oil until tender and just beginning to brown. When the grain is done cooking, toss in a large bowl with the sliced apricots, shredded carrot, and the sauteed onion mixture. Quickly sautee over high heat the diced yellow bell pepper until some of the pieces are singed. Toss into the grain. Garnis with toasted sliced or chopped almonds. It's a nice alternative to a potato-based dish for a main dish of pork loin or ribs, or just on it's own.


Sunday, June 24, 2012

Alternative Pesto


Have you noticed how expensive pine nuts are? Oh my god. The last time I checked, they were well over $20 a pound. If you love pesto the way that I do, you will love this substitute that allows you to use a less expensive nut: walnuts. You can actually make pesto with hazelnuts and pecans, too (probably more, but I haven't tried any others). This is a delicious alternative to pine nut pesto. The next few weeks will be the best times to get fresh basil at the farmer's market. Make sure you pick up a bunch--if you make this recipe, you can freeze enough to keep yourself in fresh pesto through the winter.

Fresh Basil-Walnut Pesto

5 cups clean fresh basil leaves
1 1/2 - 2 cups parmesan cheese
2 cups walnuts
6 cloves of garlic
salt & pepper
1 - 1 1/2 cup olive oil
1/2 cup lemon or lime juice

Make sure your basil is washed thoroughly. I wash it, place the leaves in a bowl of cold water, and then stick it in the fridge til I'm ready to make the pesto. Start by placing about 1/4 of your basil leaves in a food processor along with about 1/4 cup of walnuts and 1-2 cloves of garlic. Once that has blended down, keep adding those three ingredients until they are all blended. Slowly add your oil until the mixture is a little loose; then start adding the cheese a portion at a time. Finish off with lemon or lime juice and salt & pepper to taste. Note: this is a really malleable recipe. You can use more or less of any of the above ingredients to taste. Just keep tasting your pesto until you get it just the way you like it.

Serve over your favorite pasta. We paired ours with some browned chicken breast, cherry tomato, and a lovely Long Island rose.


Friday, December 30, 2011

Festivus Feast

For the past few years, I've been feeling like we need to go on a total cleanse diet after the holidays because we eat so much rich food between Halloween and the New Year. This year, we've been trying to celebrate in moderation to varying degrees of success. Kale is one of those restorative super foods (I've written about it here before), and has been looking pretty good at the farmer's markets this year. I've been trying to incorporate kale into a lot of the meals we eat for both of those reasons. Because I like to celebrate the hell out of every holiday, this is the meal we made for Festivus this year.

Tofu Stir Fry with Kale & Sweet Potato

1 8 oz package of firm tofu
1 sweet potato
A bunch of kale
4 large cloves
1 onion
1/4 of a head of green cabbage
1 small zucchini
olive oil
salt & pepper

Dry and gently squeeze the water out of the tofu and cut into bite-sized cubes. In a cast-iron skillet, heat some olive oil until smoking. Saute the onion and garlic until soft; add the cabbage and sweet potato and saute until tender. Then add the zucchini and kale until just wilted. Season with salt and pepper. Remove from the pan to a bowl and set aside. Heat a bit more oil in the pan and slowly brown the tofu cubes. When they are a nice golden color, add the vegetables back to the pan and heat through. We served this over Israeli couscous tossed with scallion, and a healthy side of kimchi.

Thursday, July 28, 2011

Summer Pasta

I got the idea for this recipe from a Martha Stewart Living magazine in my doctor's office. I didn't copy the details; I just remembered the picture. Aside from steaming up the kitchen with two burners, this was a great summer dish.

Papardelle with Summer Squash, Oyster Mushrooms, Basil and Pecorino

12 oz papardelle pasta
1/2 cup of pecorino romano cheese
handful of basil
two yellow squashes
1 cup oyster mushrooms, roughly chopped
a few broccoli florets
small eggplant
half a medium onion
3 tomatoes
olive oil
salt & pepper
1/2 stick of butter
4-5 roasted garlic cloves

Put on a big pot of boiling water, add olive oil and salt to the water. Sautee onion; when carmelized, add chopped eggplant, squash and mushrooms, as well as salt and pepper. Sautee until soft. Place the veggies in a bowl and set aside. Add the pasta to boiling water. Saute chopped tomatoes (seasoned with salt and pepper) in the hot pan (I used a wok) until soft. When the pasta is NEARLY done, add the broccoli florets to the water. When the pasta and broccoli are done to taste, drain in a collander. Return to pan and add pieces of roasted garlic, butter, plus the tomatoes and the set-aside vegetables. Toss over a low flame; do not overmix--the vegetables need to retain their distinctness. Just before serving, add basil and some cheese. Stir, and serve with extra cheese.

Monday, June 20, 2011

Lemongrass Quest

Sometimes a recipe that appears on the yahoo home page catches my eye and I print it out, set it aside, and vow to make it at some later date. I saw this recipe from Better Homes and Gardens one day and always wanted to cook with lemongrass, so into the recipe folder it went. I asked all around to see where I could find lemongrass, and a colleague suggested a Thai grocery in Manhattan. I knew it would be months before I could make the excursion because I've been so busy at work, so I thought this recipe would have to wait. To my surprise, this weekend, we found some lemongrass at Fairway. It looks like an old and stiff scallion, and I was skeptical. But I trusted D, he knows what he's doing. I knew we had leftover pineapple in the fridge, and the rest of the ingredients were light enough for a summer meal so I was ready to go. I feel a little bad about this recipe because pineapple is far from local, but it is so delicious. I added basil to the recipe because my plants were growing so strong on the porch and I needed to trim them back. I made some adjustments, and would make some more if I made it again. Adjustments and suggestions are included below.

Thai Pineapple Lemongrass Chicken Stir Fry

3 tbsp fish sauce (nam pla)
2 tbsp lime juice
1 tbsp rice vinegar
3 tsp minced fresh lemongrass (or 2 tsp finely shredded lime or lemon peel)
olive oil
1 medium red onion, halved lengthwise and sliced
3 garlic cloves, minced
1 cucumber, cut into thin bite-sized strips (about one cup)
1/4 of a pineapple, cut into bite sized pieces
2 fresh jalapeno chile peppers, seeded and finely chopped
12 oz skinless, boneless chicken cut into thin bite-sized strips
1 cup sugar snap pea pods, trimmed
1/2 sliced red bell pepper
about 10 large basil leaves, chopped into thin strips
handful of chopped cilantro
3 cups rice (jasmine, brown, or basmati)

Make the sauce by combining the lemongrass with the lime juice, fish sauce, and rice vinegar; set aside. Saute sliced red onion and garlic in a wok with some olive oil. Add cucumber, pineapple, and chile peppers. Cook until the pineapple begins to brown/sear. Remove the wok from the heat and dump the vegetables in a bowl; set aside. Add the chicken to the hot wok and cook through. Add the onion/vegetable mixture and the sauce. Cook until heated through. Add the basil strips and stir until the flesh is wilted. Serve immediately over hot cooked rice. Sprinkle and garnish with cilantro.

Monday, April 18, 2011

Gypsytized Chicken Piccata

Chicken piccata was on the menu tonite, but I defrosted bone-in chicken breasts instead of boneless, and D told me that if I used bone-in chicken breasts, it wouldn't be chicken piccata. So all day, I was thinking about what I could do with these chicken breasts that would be piccata-like. I already knew I wanted to use olives and mushrooms, so this is how I made it. Several epicurious recipes for chicken piccata inspired this, but I didn't use a recipe while I was cooking.

Chicken Piccata Gypsy-Style

2 bone-in chicken breasts
1 lemon
10 cloves garlic
1 medium onion
1 jalapeno pepper
10 olives
10 cremini mushrooms
1 cup chicken broth
1/2 cup white wine
1/4 cup lemon juice
2 tsp cornstarch
handful of capers
2 tbsp parsley
salt and pepper
olive oil

Coat chicken breasts with olive oil and season with salt and pepper. Slice the lemon into thin slices and secure three slices with a garlic clove on top of each one with toothpicks. Bake in the oven at about 350 degrees for about a half an hour to 45 minutes, or until done.

While the chicken breasts are cooking, slice the onion into thin slices, and finely chop the garlic and jalapeno. Sautee these three ingredients in olive oil until starting to brown; add sliced creminis and halved pitted olives (I used green and a few black ones). Make your broth and mix with 2 tsp cornstarch. When everything is nice and browned, add the liquids (broth combined with cornstarch, wine, lemon juice) and reduce until the sauce is nice and thick.

When the chicken breasts are cooked through, remove the chicken from the bone and shred into the sauce (truth be told, the breasts were so big--no laughing--that I only used the meat from one of them and froze the other). The garlic was just for show--and a quick snack. We just ate the roasted garlic right off the lemon slices when the chicken came out of the oven. Finish the sauce with a handful of rinsed capers and parsley. I served this over spinach pasta. It was outrageously delicious.

Monday, March 14, 2011

Ancho Shrimp

My office is holding a chili cook-off this week, and I prepared an ancho chile puree to use in my beef and black bean chili. I had some puree leftover, so we used it for our delicious Sunday night shrimp dinner. We paired the ancho chile shrimp with spaghetti squash, spinach, and black rice. I adapted this from a recipe on eHow.

Ancho chile puree

4 cloves roasted garlic
4 dried whole ancho chiles
1 tsp. fresh cracked black pepper
1 tsp. salt
1/4 c cider vinegar

Soak the whole chiles in warm water for at least 30 minutes, turning to make sure that the floaters are coated for at least 15 minutes on all sides. Remove the stems and the seedpods from the chiles. Cut them in half, and roast them in a dry cast iron skillet over high heat. Slip the garlic cloves out of their skins and place them in the bowl of a food processor along with the salt and pepper, vinegar and the roasted chiles. Pulse the machine a few times to begin the puree. Scrape down the sides and continue pulsing the machine and adding small amounts of water until the puree is as thick as possible but still allows the machine to run smoothly. Scrape down the sides as necessary and puree to a fine paste. Use a rubber spatula to force the puree through a strainer to extract skin and seed fragments.*

*I was too lazy to actually perform this last step, although I should have.

Monday, February 21, 2011

Kimchi's Best Friend

I started buying packaged bulgogi from Trader Joe's about a year ago and it has become one of our favorite go-to dinners. We love kimchi so much, and pile it high on the plate alongside a modest amount of the seasoned beef and white rice. I swear we could go through a few pounds of kimchi every week without even trying. We've tried to find other kinds of bulgogi in different Asian shops, but haven't been able to find an alternative to Trader Joe's (which is kind of expensive) that doesn't have high fructose corn syrup. D kept suggesting that we could probably make it ourselves, and I don't know why I was so intimidated. Not only was it easy, it was actually deeply satisfying to make. Rubbing the meat with brown sugar and then mushy kiwi was an almost sensual experience. Even now as I write, I can still smell the sesame oil and garlic on my fingers.

I found this recipe on Epicurious, of course. That website never lets me down. The following is an adaptation of the recipe, which unmodified is probably very good.


Homemade Bulgogi

1 1/4 lb skirt steak, cut into 2 inch pieces
2 tablepoons tamari
2 teaspoons sesame oil
2 teaspoons crushed garlic
2 tablespoons brown sugar
1 tablespoon rice wine (sake)
Pinch of black pepper
1/2 tbsp sesame seeds
1 fresh kiwi, juiced in a blender

Juice the kiwi--it's okay if its just in little pieces. It's probably better if it's not completely juiced. Trim the fat off the beef with a sharp knife. Rub the sugar evenly into each piece of the beef. Allow beef to sit for at least 10 minutes. In a separate bowl, mix together the soy sauce, sesame oil, garlic, sesame seeds, sake, and black pepper. Put aside. Massage the beef with the kiwi using your hands. The kiwi works as a tenderizer. Add the soy sauce mixture and mix. Allow the beef to marinate for 10 minutes, and then pack closely into a plastic bag. Pop it in the fridge and it will be awesome in a day or so. When you're ready to prepare it, just heat up a wok or a cast iron pan with oil until smoking. Cook the meat directly from the bag quickly until browned, being careful not to overcook. Serve either over or to the side of white rice, with a generous side of kimchi. We've found that pickled mangoes on the side are a nice accompaniment, too.

Squid Memories

Seafood was not big in our house when I was a kid, so when I started hanging out with my late friend Jon Paul , I was constantly fascinated with the seafood stir frys, stews, and soups that he and his partner Wende would dish up for us after a night of street outreach for the needle exchange program that we worked with in Philadelphia. Tentacles, legs, sometimes even eyes would be floating around in the bowls he would hand me; the food they prepared was always delicious. I rarely work with that kind of seafood, but I picked up some fresh Long Island calamari at the farmer's market this weekend, and tried this recipe. JP passed away a few months ago, and this dish brought back fond memories of him.

Thai Calamari with Chili

1 pound calamari (squid)
1 medium onion
1 1/2 teaspoons chopped garlic
3 fresh red chilies, seeded and chopped
3 tablespoons vegetable oil
2 tablespoons Thai fish sauce
1 tablespoon rice vinegar
2 tablespoons palm sugar or brown sugar
2 tablespoons water
1 teaspoon cornstarch

Cut the calamari into chunks; leave the tentacled ones the way they are. Slice onion from top to bottom to form curved strips. in a skillet cook onion, garlic, and chilies in oil till onion is almost tender. Add calamari and cook for a few minutes or till they curl and become tender. In a bowl stir together fish sauce, vinegar, sugar, water, and cornstarch. Add to skillet. Cook and stir till thickened and bubbly. Cook and stir 2 minutes more.

Poor Man's Fish

It's been so long since I've been to the Grand Army Plaza Farmer's Market, things have just been too busy. But yesterday, despite the violent wind, I took a walk through the neighborhood to the farmer's market with a short shopping list in mind: fresh fish, butternut squash, and kale. It's hit or miss at the fish market, and if you don't get there early, some of the fish is sold out and the line is always long. But this Saturday, I was lucky. The wind was so bitter and strong that there weren't that many people out, and instead of the regular fish stand, there was a new one with only two or three people on line. The poor woman who was staffing the table was rosy red with cold and her hands looked like they were on the verge of frostbite. I watched her "fish" out a big slab of cod and a squirmy-looking handful of calamari for the woman in front of me, and so I got the same. The cod looked beautiful--it was a thick, white, meaty 2 1/4 lbs coming in at a whopping $29, but it was Long Island line-fished, never frozen, and we hadn't eaten fish for so so long.

When I brought it home, D was shocked at the price. He told me that codfish used to be known as the "poor man's fish," they used to make fish sticks out of cod. But to me, it's political. We spend too little on food in this country, and we get what we pay for. Fishing off the Long Island coast is probably no easy matter in this weather, and fishermen have to make a living (not to mention the freezing cold fish monger!) I'd rather splurge on a nice piece of cod once a month, than pick up some cheap fish every friday night from Chinatown like we used to do. God knows where that fish comes from, and you can totally tell it'd been frozen. Unfortunately, I violated the complicated fish rules in terms of sustainability. The sustainability issue, as well as the health-related issues surrounding fish, are one of the reasons we hardly eat fish anymore. I still can't quite figure out the rules, but when I consulted one of my food experts, Mark Bittman, while writing this entry, I learned that cod is overfished. : (

We found this spice mix that must have been part of a gift basket at one point, and decided we'd use it on the fish. It is amazing, just check out the ingredients: ginger, roasted garlic, sea salt, caraway seeds, sugar, roasted sesame seeds, cumin, paprika, cassia, chillies, coriander, blackpepper, turmeric, mint, nutmeg, grains of paradise, rose petals, and saffron. D loves roasted cauliflower, so we decided to use that with some sauteed spinach to accompany the fish. D's the king of fish, so he's the one who pulled this meal together. He just asked me to make a tahini sauce like the kind we get at Tanoreen. I can't compare my cooking to that of the chef at Tanoreen, but I think the sauce came out pretty well. We suspect that Tanoreen fries their cauliflower, and nothing beats the taste of fried cauliflower, no matter what the sauce.

This is the recipe I used:

Tahini Lemon Sauce with Pomegranate Molasses

2 tbsp tahini
1 tbsp lebne
2 tbsp plain yogurt (low-fat, for texture)
1 tsp cumin
1 tsp salt
2 tsp minced and mashed garlic
1 tsp fresh ground black pepper
1 1/2 tbsp lemon juice
1 1/2 tsp pomegranate molasses

Combine all and stir vigorously with a fork until it's really smooth. This sauce should be poured over the cauliflower and just thick enough to stick on the vegetables; it shouldn't be the consistency of a dip or a liquid.

We sauteed small pieces of cauliflower with some salt and pepper and when it was nicely browned, it was done. We served it alongside the fish with the sauce drizzled over the cauliflower with a drizzling of additional pomegranate molasses--both for taste and for decoration.

For the cod, D marinated the fish with olive and lemon with salt and pepper, and let it sit for three hours in the fridge. When we took it out to prepare dinner, he coated it generously with the spice rub and patted it into the fish with his hands. He sauteed it on one side for three minutes, flipped it, put a handful of spinach on top, splashed it with some white wine, and some butter and covered it to let it steam for about 7 or 8 minutes at a simmer.

Saturday, January 8, 2011

Mimicking Muhammara

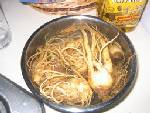
The last time D and I went to Tanoreen in Bay Ridge, just before Christmas, we asked for a double order of Muhammara. I'd been looking forward to the trip to Tanoreen for weeks, thinking of the slightly crunchy, garlicky sweet mystery. It didn't occur to me until the end of the night, after sopping up the last juicy specks on the dish with a piece of pita, that I could probably learn how to make it at home. If not as good as Tanoreen, I could at least enjoy and entertain others with something like it at home. I vowed I would make it sometime shortly after the New Year.

Epicurious has a great recipe that's simple and ended up being very tasty. I might add more olive oil next time, and try to blend the ingredients in a way that allows it to retain a bit more of the individual ingredients' distinctness, but for a first try, it was very good.

There will never be a substitute to enjoying a warm dish of muhammara with a glass of Lebanese wine surrounded by friends and the warmth of Tanoreen itself, but I'm glad I can whip this up for any occasion.
Muhammara

a 12-ounce jar roasted red peppers, drained
1/2 cup toasted bread crumbs
1/2 cup walnuts, toasted lightly and chopped fine
2 to 4 garlic cloves, minced and mashed to a paste with 1/2 teaspoon salt
1 tablespoon fresh lemon or lime juice, or to taste
2 teaspoons pomegranate molasses
1 teaspoon ground cumin
1/2 teaspoon dried hot red pepper flakes
1/2-3/4 cup extra-virgin olive oil
toasted pita triangles as an accompaniment

In a food processor blend together the peppers, the bread crumbs, the walnuts, the garlic, the lemon juice, the pomegranate molasses, the cumin, the red pepper flakes, and salt to taste until the mixture is the consistency you'd like. Add the oil gradually. Transfer the muhammara to a bowl and serve it at room temperature with the pita triangles.


The original recipe, which I adapted only slightly, from Epicurious can be found here.

Monday, November 29, 2010

Late Brunch on the First Cold Day


After snacking on sourdough muesli bread upon rising late on the first cold day in the country, none of us was particularly hungry for breakfast. Around 2 pm, though, knowing that dinner was a good five hours away, we started getting antsy. I had brought some red Russian kale with us from home that I'd gotten at the farmer's marktet because it looked so good, and I knew we had eggs and cheese in the house, so I wondered if I could make a quiche. I'd never made a quiche before, so I consulted our friends' extensive library and found a book by Julia Child basically describing how to cook everything. Our friend volunteered a frozen pie crust leftover from some other time, and it was on. My first quiche-making experience commenced.

What follows is a tasty adaptation of the spinach-swiss quiche in the Julia Child book.

Red Russian Kale, Cheddar, Bacon and Roasted Onion Quiche

3 tbsp chopped roasted onion
2 tbsp butter
10 oz stemmed, washed, chopped, and stir fried kale
3 cloves garlic, chopped
6 large eggs
2 cups milk or cream (or one cup of each)
1 cup grated cheddar
3 strips bacon, cooked, chopped
seasonings: salt, pepper, nutmeg
9 inch pie shell

Bake the pie crust. Best to place pie weights in the bottom and cover the side crust-tops with either aluminum foil, or by placing a cookie sheet on the top rack over the pie shell. You can brush the bottom with egg white to form a kind of seal. Bake at 250. If you don't bake the pie crust first, the quiche will be mushy.

Cook the bacon in a pan and remove the slices, chop and set aside.

Saute garlic and kale in the remaining bacon fat and butter, set aside to cool.

Sprinkle half the grated cheese on the bottom of the cooled pie crust.

Blend eggs and cream (or milk) with the roasted chopped onion, bacon bits, seasonings, and cooked kale.

Pour over the sprinkled cheese into the pie crust. Top the custard with remaining cheese, evenly distributed.

Season the top of the pie with salt and pepper (don't use too much salt!) and bake for 35 minutes at 350.

Slice and enjoy!

Monday, October 11, 2010

Excess Phyllo Dough

Cleaning out the freezer, I realized we have two packages of frozen phyllo dough just hanging out in there. I decided to make one of our favorite dishes: Green Lentil Kulbyaka. It's D's birthday this week, so I decided to spruce it up a bit and make the lentils a little spicer, and add spinach to the mix. Unfortunately, I forgot to defrost the phyllo in time, so I had to buy yet a third package. I'll have to make this dish again soon.

Lentil-Spinach-Mushroom Kulbyaka

1 cup lentils
2 bay leaves
2 onions, sliced
5 cups chicken stock
3/4 cup butter
1 1/4 cup long grain rice
salt and black pepper
paprika
cumin
dash of cayenne pepper
4 tbsp parsley
4 tbsp dill
1 beaten egg
8 oz sliced mushrooms
4 hardboiled eggs
1 cup cooked spinach
8 sheets of phyllo
4 cloves of garlic

Soak the lentils for about 30 minutes; drain and simmer with bay leaves, one chopped onion, and half the stock for 25 minutes or until cooked and thick. Season well, and set aside.

Sautee the remaining chopped onion in another saucepan with some butter for about 5 minutes. Stir in the rice and the rest of the stock. Season, bring to a boil, and then cover and cook gently until it's no longer crunchy. Leave stand uncovered once cooked for about 5 minutes before stirring in the fresh herbs. Cool, then beat in the raw egg.

Sautee the mushrooms in butter until they are just soft. Set aside to cool.

Sautee spinach with chopped garlic until just soft. Set aside to cool.

Chop the four hardboiled eggs and set aside.

Brush the inside of a large round ovenproof dish with more butter. Lay the sheets of phyllo in it, covering the base and making sure that enough of the pastry overhangs the sides so that you can fold it over the center. Brush well with butter in between overlapping the pastry. Use no less than 8 sheets of phyllo.

Into the pastry lining, layer rice, lentil, egg, spinach, and mushrooms at least twice.

Bring sheets of pastry over the filling, scrunching the top into attractive folds. Brush all over with the rest of the butter and set aside to chill and firm up.

Preheat oven to 375 degrees. When ready, bake kulbyaka for about 45 minuts until golden and crisp. Allow to stand for 10 minutes before you cut and serve it.

We serve ours with a yogurt sauce seasoned with salt, pepper, cumin and chopped herbs.

Wednesday, September 29, 2010

Kicking Summer to the Curb


D and I recently hosted a "Kicking Summer to the Curb" party. It didn't work--we've still had too many hot and humid days here in New York. But the food was good, the company excellent.

Inspired by a wonderful dinner party we went to in the country last weekend, we made a slow-roasted pork shoulder, a Puerto Rican dish called "pernil." People raved about it, we loved it, and we had plenty of leftovers. Here's how we made it.

Pernil

1 pork shoulder (about 10 pounds), with the skin on
15 garlic cloves
2 tbsp dried oregano
2 tbsp kosher salt
2 tbsp coarsely ground black pepper
4 tbsp olive oil
1 tbsp white wine or champagne vinegar

The first thing you want to do is brine the pork shoulder about two days before you need to eat it. Place the raw pork shoulder in a pot, bag, or bin of water mixed with salt, pepper, sugar, and garlic. I recommend 4 tbsp of each. Submerge the shoulder in the water and keep for 12 to 24 hours in the fridge. This will make it really juicy.

Put the garlic, oregano, salt, and pepper in a mini chopper and chop chop until it forms a kind of paste. Remove from the chopper and place in a bowl. Stir in the olive oil and vinegar.

Take a knife and separate the skin and fat from the meat, leaving it attached so you can fold it back over the meat. Stab the meat with a sharp knife in 1/2 inch incisions, 1 inch deep so that the paste can penetrate the meat. Rub the garlic paste on the meat, and cover the coated meat with the skin again, securing with a skewer so that it doesn't pull away while cooking.

Cover the pork and let marinate for at least three to six hours. Depending on how long you let it sit, and how warm it is out, you might want to consider refrigerating it. Make sure you allow enough time to let it sit out at room temperature for 30 minutes before you roast it.

Preheat the oven to 350 and roast for about 10-12 hours. Some recipes will tell you to roast it at different temperatures for a shorter amount of time, but this length of time worked for us and we had nicely falling-off-the-bone pork, which is how I like it. If you want to get the skin crispy brown at the end, you can put it back in the oven and roast it for about 20-30 minutes at 450.

Let the meat rest on a cutting board for 20 minutes before slicing.

I used a recipe from epicurious, found here.

We served this on a big platter with pico de gallo, corn tortillas, rice, and beans, with a cilantro-lime-garlic viniagrette dressing to drizzle on top. I also froze about three sandwich bags full to make pork tacos at some point in the future. Tonite, we're having leftovers of this pork cooked with some BBQ sauce.

Wednesday, September 8, 2010

Excess Tomatoes

Tim and Peter's neighbor in the country brought them over a big bag of tomatoes from her garden. They didn't have time to use them, so they gave them to me. This is what I did with them.

Fresh Tomato-Basil Sauce

3 lbs off-the-vine tomatoes
6 cloves garlic
2 medium onions
3 tbsp olive oil
salt & pepper to taste
handful of basil

Saute chopped garlic and onion in olive oil until browning and fragrant. Chop tomatoes into small cubes and add to the garlic and onions. Bring to a boil and then simmer for up to an hour as it thickens. Season it anytime you want with the salt and pepper. Add chopped basil at the end.

We served it over some angel hair pasta with more chopped basil, fresh ground pepper, and parmesan cheese.

Tuesday, June 29, 2010

Tasty Eight Balls

This used to mean something else at a different time in my life, but tonite, it meant delicious 8-ball zucchini stuffed with quinoa, onions, garlic, toasted walnuts and herbs and spices. It seems labor intensive, but it's not. You'll have some of the quinoa mixture leftover, which is good all on its own. You can mix some seasoned tofu into this, which is how I had meant to make it but forgot. It was fine on it's own. The spices you use will really make this dish special.

Toasted Walnut & Quinoa Stuffed Eight Ball Zucchini

4 Eight Ball Zucchinis
1 cup quinoa
1 cup vegetable broth
olive oil
1/4 cup toasted walnuts
1/4 cup currants
3 tbsp chopped parsley
3 tbsp chopped basil
1 medium onion
4 garlic cloves, chopped
spice mix (I used a Yucatan Spice mix described here; but you can use cumin, paprika, cinnamon . . .)

Cut the zucchini heads off like you were cutting out a pumpkin for Halloween. Scrape out the insides, chop them up into little pieces, and set them aside. Set the empty zucchinis into a baking dish with a bit of broth on the bottom.

Toast the quinoa in a cast iron pan and then cook with one cup of water and one cup of broth. Season with salt and pepper.

Sautee the onion and garlic in a cast iron pan. Once the onion starts to brown, add the zucchini and sautee until tender. Add half of the chopped herbs, the currants, and the walnuts. Once everything is mixed and heated through, add to the quinoa with the rest of the fresh herbs. Mix thoroughly. Spoon into each of the eight ball zucchinis and bake at 400 F for about 30-45 minutes.

We served this with a dollop of lebne and a bit of sriracha sauce on the side (you could substitute plain yogurt or sour cream and hot sauce), and a Middle Eastern Beet Salad with parsley, toasted walnuts, and rosewater.

Thursday, March 11, 2010

An Orgasm of Flavors

"It's wednesday . . . I know what you're trying to say girl. You're trying to say oh yeah, It's business time." --Jemaine, Flight of the Conchords

A couple of years ago, I started cooking really nice meals in celebration of American Idol-watching. That tradition has kind of fallen off with wedding planning, trying to go to the gym more, and just general busy-ness at work, but last night was an exception. I found a recipe I wanted to try from the March 2010 edition of Saveur magazine, and made it this Wednesday night. D said it was "an orgasm of flavors." I think that's a good description.

Moroccan Chicken with Carrot Puree

4 boneless skinless chicken breasts
olive oil
2 cups chicken broth
2 lbs carrots
1 large white onion
4 large garlic cloves
1 1/2 cup orange guice
4 tbsp unsalted butter
2 peeled and seeded oranges, segmented
3/4 cup harissa*
2 tsp sherry or champagne vinegar
2 cups salad greens
1/2 cup pitted, oil-cured black olives, roughly chopped
2 shallots, thinly sliced

*Harissa is a North African pepper paste. I'm a very lucky person, as my friend S brought a jar of homemade Tunisian harissa over last month. This is the first I've had a chance to use it. (Clicking on "harissa" above will bring you to the Wikipedia page describing it).

Start by boiling roughly chopped carrots until soft in order to make the puree. I started this the night before, and while the carrots were boiling, I placed the chicken breasts in a container with olive oil, salt and pepper to sit overnight. I then sauteed the onions and garlic until carmelized, added the carrots and sauteed until they started to carmelize as well. Then I put the mixture in a food processor and made the puree. I set that aside for the next day.

The next day, I browned the chicken in a pan with olive oil and then placed them in the oven topped with most of the harissa at about 400 degrees F. While the chicken was finishing, I made the orange sauce by reducing 1 1/2 cups of orange juice in a pan, adding 4 tbsp butter, salt and pepper. As the mixture started to thicken, I added the orange segments.

I then tossed the greens with olive oil, vinegar, shallots and chopped olives.

I heated up the carrot puree, and plated the dish by putting a dollop of carrot puree on the side of the plate, and arranging the greens on top. I then placed one chicken breast on the bed of greens and topped the whole thing with orange sauce.

The whole thing was both festive looking and delicious.

Monday, June 1, 2009

camping

Blog-productivity has suffered this summer because D and I have been traveling so much. There's not much to say about this meal in terms of preparation, but it can't go unrecorded. We drove to Letchworth State Park a few weeks ago--about an 8-hour drive from Brooklyn. I was on a work trip and D came to meet me on the train. We drove from where I was staying about 3 hours to Letchworth, and then broke the trip up on the way back by stopping at my parents. Letchworth is known as the Grand Canyon of the East, and it was simply beautiful.

See: http://en.wikipedia.org/wiki/Letchworth_State_Park

On the way to the campground, we stopped at a supermarket and picked up a grass-fed beef steak, fresh ears of corn, asparagus, and heirloom tomatoes. When we got to the campsite, we set up the tent, made some margaritas, and chopped up some garlic and spices to marinate the steak in (with olive oil, salt, and pepper). A friend brought back some spices in a little decorative container from Zanzibar, and we just used those--saffron, sesame, cumin, and I think some sort of red pepper spice. We put the marinating steak in a plastic bag and tucked it away in the cooler and headed off for a hike.

When we returned, D sparked up the fire, set up the grill, and we laid it all out. One flip on the grill, and voila. Shortly before sundown, we were enjoying this lovely meal under the trees.

Wednesday, May 20, 2009

Frozen Salmon Dilemma

We read an article recently about the dangers and disadvantages of farmed fish; afterward, we vowed to only eat wild-caught fish. Unfortunately, wild fish are expensive, and there's still the problem with overfishing.... What to do if you love fish? I'm not sure. I guess all things in moderation. I was at Trader Joe's a few weeks ago and saw Wild Alaskan Salmon on sale. I called D and asked if I should pick a few packages up, and I think he was distracted and work and said: "why not?" Well, frozen fish is simply just not something he does, having worked at a fish restaurant in the past, so he was not pleased with the purchase when he saw it: there was freezer burn, the color wasn't right, the texture wasn't right.... Back into the freezer went those fish, and I spent some time thinking about what to do with them. I ate one piece when he was out of town (it tasted fine to me), but then found this recipe from Eating Well (Winter 2004). I modified it a little bit, and the results were delicious.

Salmon Cakes with Creamy Yogurt-Dill Sauce

1 lb salmon
1 medium onion, finely chopped
3 minced garlic cloves
1.4 cup chopped fresh parsley
1 large egg, lightly beaten
2 tbsp teaspoons Dijon mustard
1 cup fresh whole-wheat or unseasoned breadcrumbs
1 teaspoon freshly ground pepper
olive oil
Creamy Dill Sauce (recipe follows)
1 lemon, cut into wedges

Preheat oven to 350 degrees and spread or spray a light coating of olive oil on a baking sheet. Set aside. Heat olive oil in a cast iron frying pan and saute the onions and garlic until the begin to brown. Remove them from the heat. Flake the salmon into small pieces with a fork. Mix in parsley, mustard, egg, and pepper. When the onions have cooled a bit, mix those in and add the breadcrumbs. Shape the mixture into 8 equally-sized patties. Heat some more olive oil in the pan over medium heat. Add 4 patties and cook until the undersides are golden, 2 to 3 minutes. Using a wide spatula, turn them over onto the prepared baking sheet. Repeat with the remaining patties. Bake the salmon cakes until golden on top and heated through, 15 to 20 minutes. Meanwhile, prepare Creamy Dill Sauce. Serve salmon cakes with sauce and lemon wedges. We served ours on a bed of wilted baby spinach, pan-fried tomatoes, and a half an ear of corn.

Creamy Yogurt-Dill Sauce

1 cup yogurt
2 tbsp mayonnaise (optional)
3 diced garlic cloves
3 tbsp chopped fresh dill
season with salt and pepper

Mix together, chill, and serve over salmon cakes.

Tuesday, May 19, 2009

Hmmm, seitan? No thanks.

D and I are flirting with the idea of a raw diet cleanse, but at the very least, cutting down on our meat consumption which has admittedly been really extravagant of late. I picked up some seitan (wheat gluten) at Fairway last week to use as a meat-substitute in my tagine. The flavor was okay, but that's because seitan really picks up the flavor of whatever you cook it in. I'm not crazy about the texture of seitan cubes, and D thinks that its too processed and doesn't fit into our ethos of cooking with whole, unadulterated foods. I suppose we could make it at home, but why? Seitan is a good protein source for those who have entirely given up meat (and apparently, a good substitute particularly for duck meat), and it's low in fat and calories, but there aren't really too many other benefits that make it worth doing this again. Check out some info on seitan here: http://en.wikipedia.org/wiki/Wheat_gluten_(food)

Here's the recipe I used, though. I made it up.

Ginger-Seitan Tagine

1 lb package of seitan
3 tbsp sliced ginger (I used matchsticks)
2 tbsp diced garlic
1 tbsp diced jalapeno
2 small onions, or one medium one (sauteed until browned)
1/2 cup garbanzo beans/chick peas
1/2 cup diced tomato
1/4 cup currants
1/4 cup olive oil
2 tbsp honey
1 cup vegetable broth
squeeze of lime juice
salt, pepper, paprika

Even though the seitan is pre-cooked, I decided to marinate it anyway in the olive oil, honey, lime juice, salt, pepper, paprika, ginger, garlic and jalapeno. It sat in that mix for a few hours, and then about an hour and a half before dinner, I combined the entire mix with the browned onion, chick peas, tomato, currants, and vegetable broth and placed in the base of the tagine. 400 degrees, an hour and a half later = yummy tagine. I served it over couscous cooked with parsley and scallion, seasoned with only salt and pepper.