Showing posts with label chocolate. Show all posts

Tuesday, September 24, 2013

Don't Look a Gift Cookie in the Mouth

It's people's birthdays and I am short on cash and time to go out and shop. What do I do? I bake some cookies. Smitten Kitchen has an amazing recipe for oat, chocolate chip, and pecan cookies that includes orange zest, but I needed to pare down the extravagance so I adapted it a little bit. They are addictive: crispy all around, chewy in the center, and salty-sweet. Definitely a keeper.

Sweet & Salty Chocolate Chip Oat Walnut Cookies

8 tablespoons unsalted butter, at room temperature
3/4 cup sugar (half white sugar, half turbinado)
1 cup light brown sugar, firmly packed
1 1/2 teaspoon coarse sea salt
1 1/2 teaspoon vanilla extract
2 large eggs
1 1/2 cups flour
1 teaspoon baking soda
1/2 teaspoon ground cinnamon
1/4 teaspoon ground nutmeg
1 cup oats
1 cup chopped walnuts
3 tsp grated coconut (optional)
12 ounces semisweet chocolate chips

Preheat oven to 350°F.

Whip the butter in a large mixing bowl and then add the sugars, salt, and vanilla, and beat until well mixed, about three minutes. Stir in eggs, one at a time. Sift together the flour, baking soda, cinnamon and nutmeg in a separate bowl. Carefully mix the flour into the butter mixture a bit at a time, and then stir in the oats, walnuts, chocolate chips, and coconut if you like. Using a small cookie scoop, plop the dough onto a greased cookie sheet 2" apart and bake for 8 to 10 minutes or until golden. Remove from the oven and cool the cookies on a rack. Store at room temperature in a cookie jar or other airtight container.

Sunday, September 18, 2011

Cupcake Dilemma

Next weekend in upstate New York, a very good friend of mine is getting married. She found this wonderful guy after a long and storied single life and she's so happy. She asked me a few weeks ago whether friendships with your girlfriends change when you get married (in this case, to a man). I said that the friendships don't change, but for me at least, the time that I spend with my girlfriends is less than I used to. You have to work at it; but also, if they're true friends, you won't lose them. I had already been thinking about what to do for her because she didn't want any gifts for the wedding, and because I feel kind of sad that I didn't have a "bridal shower" kind of thing before I got married. All of my bridal party were from out of town--very good old friends who I wanted to make sure came to the wedding from places as distant as Ramallah. So I took the opportunity of that conversation to ask her if I could host a party for her with her closest women-friends. I thought she would say no, but she was touched, and after some coaxing, sent me email addresses for her friends--none of whom, surprisingly, I knew.

I co-hosted the evening with another friend of hers, and she suggested coordinating the food to make sure we had enough of everything. I decided I would make cupcakes--partly because I love using the cupcake tree my mother gave me a few years ago for Christmas. I also think people like having their own mini-cakes. As the evening drew nearer, I realized I didn't have a clue about what kind of desserts my friend likes. I know she likes margaritas. I know she likes Mexican and Middle Eastern food, but I had no idea about sweets. So I turned to her friends, and to her fiance. I came up with a list of cupcakes that I've wanted to make for a long time from a book Cupcakes I got for my own wedding. From that list, her fiance chose a rosewater raspberry cupcake, but her friends almost unanimously wrote back and said that my friend loves chocolate. What to do?

Last weekend, D and I went to the country to visit with two couples we love spending time with. After a few bottles of wine, I posed the dilemma: do I make the cupcake chosen by my friend's chosen life partner? A man she's known for a sliver of time compared to the girlfriends--some of whom she's known for more than 25 years? The question served as a platform for a lively discussion among the six of us, all men but for me. They debated back and forth about what the schism meant, and finally one of them suggested that her chosen life partner may know things about her that she doesn't even know yet herself. He may represent a new direction--one that she didn't even know she wanted to take. The argument for the rosewater raspberry was gaining support. But then someone said that I should stay safe with a cupcake that everyone knows she will like--it's her party after all. I decided to compromise and make them both, and see what happens.

It was the right decision. The cupcakes were pretty and yummy. Our guests liked them both, but the chocolate cupcakes that I chose to make were a real hit. At some point in the evening, my friend came over to me and told me how much she loved the chocolate cupcakes. I asked her if she'd tried the rosewater. She wrinkled her nose a little bit and said no, she had to keep it to one because she had a wedding dress to look good in next weekend. So I told her the story. She agreed to try the rosewater cupcakes and the smile on her face after she took a bite was priceless. She said: "I love tart things. [my fiance] knows that." She herself would never have chosen the rosewater, but she liked it a lot.

Finding the ingredients for these two cupcake recipes was a bit of a challenge. Despite thousands--maybe millions--of Mexican bodegas and supermercados in NYC, I couldn't find Mexican chocolate. So I substituted a Dagoba hot chocolate cocoa called Xocolatl and reduced the sugar in the recipe. The rosewater called for sugared rose petals as a decoration, and I thought I'd be too busy this week to make them on my own, so I found them at Kalustyan's in Kip's Bay. Unfortunately, they weren't as pretty as ones I would have made on my own, and next time I won't shy away from the task.


Mexican Chocolate Cupcakes


1 cup flour
1/2 cup sugar
1/4 cup xocolatl (Mexican drinking chocolate--see above)
3/4 tsp baking soda
1 1/2 tsp cinnamon
1/4 tsp salt
3/4 cup lukewarm water
1/3 cup canola oil
3/4 tsp white vinegar
1/2 cup finely grated semi-sweet chocolate, plus a little extra for garnish
Buttercream frosting

Preheat oven to 350 degrees. Line a 12-cup muffin tin with paper liners. Sift together the flour, sugar, cocoa powder, baking soda, 1 1/2 tsp of cinnamon, and the salt into a bowl. Add the water, oil, and vinegar to the flour mixture, using an electric mixer on medium speed, beat until combined. Add the 1/2 cup of chocolate and beat until well combined.

Divide the batter evenly into the paper liners filling to about 3/4 full. Bake until a toothpick is inserted in the center of a cupcake comes out clean, 24-28 minutes. Let the cupcakes cool in the pan for 5 minutes, then transfer to a wire rack to let cool completely before frosting--about one hour.

Frost with buttercream (I used a chocolate buttercream using the xocolatl again) and garnish with grated chocolate.

Rosewater & Raspberry Cupcakes

1 1/4 cup flour
1 tsp baking powder
1/4 tsp salt
3/4 confectioner's sugar
1/2 cup unsalted butter, at room temp
1 tbsp rosewater
2 large eggs, at room temp
1/2 cup milk
Rosewater glaze
12 raspberries
Sugared rose petals

Preheat oven to 350 degrees; line a muffin tin with paper liners.

Whisk together the flour, baking powder, and salt. In another bowl, with an electric mixer on medium-high speed, beat the confectioner's sugar and butter together until light and fluffy--about 2-3 minutes. Add the rosewater and the eggs, one at a time, beating on low speed until combined after each addition. Add the flour in three additions, alternating with the milk in two. Beat on low speed until well combined.

Divide the batter evenly among the muffin cups, filling each to about 3/4 full. Bake until lightly golden and a toothpick inserted into the center of a cupcake comes out clean, 15-18 minutes. Let the cupcakes cool in the tin for 5 minutes, then transfer to a wire rack and let cool completely for about an hour.

When cooled, spoon a small amount of glaze on each cupcake and garnish with sugared rose petals. Depending on what colors you get with each, you may want to add a raspberry on top. My rose petals were too dark and wouldn't have looked good with the raspberries, so I baked my raspberries into the center of each cupcake. (I did this by filling the muffin cups 1/2 full, pressing a raspberry in the center, and then covering with another dollop of batter).

Thursday, September 8, 2011

Favorite. Ice Cream. Ever.

When my close friend and roommate left me eight years ago to move in with his wonderful boyfriend just down the street, he left me a lot of things. His boyfriend was a well-provisioned adult, and I was barely scraping by, so the hand-me-downs were welcome. One of the things he left was an ice cream maker. Every once in a while, I would contemplate the idea of making ice cream but I never did.

Eight years went by and the ice cream maker collected dust. Last year, my husband and I pulled it out and considered selling it at the yard sale my friend and his boyfriend were holding down the street--they were moving to a smaller apartment two neighborhoods away. We didn't sell it; instead, we dusted it off and put it in a new storage place. We vowed to use it soon. We didn't.

Another year went by, but I recently took it out. I experimented first with a simple vanilla ice cream, using some vanilla beans that I foraged in a Mexican market a few years ago. It turned out alright--though a little too fatty for my taste. It was kind of buttery. I served it over a fresh peach pie. My second experiment was with peach ice cream. D had bought a basket of peaches at a roadside green market in Pennsylvania and we couldn't possibly eat them all. This second batch was a little less buttery, but still a bit too creamy for me.

This week I decided to throw myself into the ring all the way and make my favorite ice cream of all time: mint chip. A colleague from work turned me on to a blog by David Lebovitz who writes, among other things, about making ice cream. I printed out the recipe for mint chip and headed to the market. I had no idea how many bunches of mint would make two cups, so I overbought. Then for good measure, I threw a bottle of mint extract in the cart. Instead of heavy cream, I bought light. And instead of whole milk, I bought two percent. In addition to those two ingredient changes, I also added my chopped chips in half-way through the mixing process directly to the ice cream base. I didn't heat it and drizzle as the recipe advised. And, I didn't have to worry about the mint extract, because after the two cups of mint leaves (less than two bunches, it turns out!) had steeped in the milk, I could tell that the flavor would be strong enough. And using light cream and 2% mile made it light and icy, just like I like it.

What is so sublime about this homemade mint chip, though, is the mint flavor. I've never tasted anything like it. To say that it tastes natural is an understatement. I mean, it IS natural. But it actually tastes like being in a garden. Long ago, I forswore mint chip ice cream that had that strange bright green color and only ate Breyer's mint chip. Then Haagen Daaz became the standard. But now? Now I think I'm just going to have to get used to plucking mint leaves to make my own.

Wednesday, September 7, 2011

Farewell Cookies

Our office is losing a terrific and well-liked attorney on Friday and I baked these cookies as a fond send-off because I can't make it for the traditional send-off drinks on Friday night. I adapted this recipe from one I found on Epicurious. I hope he likes them.

Chocolate Chip Cookies

2 cups all-purpose flour
1 cup light wheat flour
1 1/2 teaspoons baking soda
1 1/2 teaspoons salt
2 sticks (1 cup) unsalted butter, melted and cooled slightly
1 1/2 cups packed light brown sugar
1 cup granulated sugar
3 large eggs
1 1/2 teaspoons vanilla
10 oz semisweet chocolate chips (or to taste)
3/4 cup chopped walnuts (optional)

Put oven rack in middle position and preheat oven to 375°F. Lightly grease cookie pan. Whisk together flour, baking soda, and salt in a small bowl. Beat together butter and sugars in a large bowl with an electric mixer at high speed until pale and fluffy, 2 to 3 minutes. Lightly beat 1 egg with a fork in a small bowl and add 1 3/4 tablespoons of it plus 2 remaining whole eggs to butter mixture, beating with mixer until creamy, about 1 minute. Beat in vanilla. Reduce speed to low and mix in flour mixture until just blended, then stir in chips. Scoop heaping tablespoon of batter for each cookie, arranging mounds an inch or so apart, on 2 baking sheets. Flatten mounds using moistened palm of your hand. Bake, 1 sheet at a time, until golden for 13 to 15 minutes. Transfer cookies to a rack to cool and continue making cookies in same manner using cooled baking sheets.

Sunday, August 28, 2011

Hurricane Bars

Last week, everyone from my dad to CNN was warning of the storm of the century. Hurricane Irene was making a bee-line for New York City, and we should all prepare to hunker down with sandbags, flashlights, and bathtubs filled with water for at least a few days, if not more. Most of us felt like the warnings were completely overblown, but echoes of Hurricane Katrina were playing around in my head, so I did everything they told me to do. My go-bag was packed, my cooler was filled with ice, and I was on the verge of taping up the windows. But after some harrowing wind and rain on Saturday night, the worst of the storm was over and when I got up at 6 am Sunday to catch the predicted water surge that would leave all of lower Manhattan under 6-12 feet of water, nothing happened. People in upstate New York suffered tremendously from flooding, but here, I can't even say we had a casualty. In fact, the storm prep motivated us to clean the porch and the fridge. So by Sunday mid-morning, I was feeling quite a bit of post-partum depression. I was all psyched up to sit inside, away from the windows, listening to the howling wind and playing scrabble by lamplight. Now, the sun was shining, birds were singing, and I had no tragedy to focus my energies on. So I decided to make dessert to bring to the home of some friends for dinner that night. I used a recipe from Gourmet magazine from 1999, and while I followed the perfectly good recipe, I would make several modifications to make the bars less sweet and more coconutty the next time around. I used an Epicurious recipe for the shortbread base, but used a light wheat flour instead of white flour. I'll call these chocolate macaroon bars Hurricane Bars probably forever.

Chocolate Macaroon Bars

4 large egg whites
1 cup sugar (I would use 1/2 cup sugar, or the same amount of sugar with a non-sweetened coconut)
1 teaspoon vanilla
1/2 cup light wheat flour
a 7-ounce bag sweetened flaked coconut (about 2 2/3 cups) (I would use 3 - 3 1/2 cups coconut, and perhaps half or all unsweetened coconut)
1 1/2 cups semisweet chocolate chips

Shortbread Base

1 1/2 sticks (3/4 cup) unsalted butter
2 cups light wheat flour
1/2 cup packed light brown sugar
1/2 teaspoon salt

Preheat oven to 350°F.

Cut butter into 1/2-inch pieces. In a food processor process all ingredients until mixture begins to form small lumps. Sprinkle mixture into a 13 x 9 x 2-inch baking pan and with a metal spatula press evenly onto bottom. Bake shortbread in middle of oven until golden, about 20 minutes. While shortbread is baking, prepare topping.

In a bowl whisk together whites, sugar, and vanilla until combined well and stir in flour and coconut. Sprinkle chocolate chips evenly over hot shortbread. Let chips melt and spread evenly over shortbread. Drop small spoonfuls of coconut mixture onto chocolate and with a fork spread evenly. Bake in middle of oven until top is golden, about 30 minutes. Cool completely in pan and cut into 24 bars. We served ours with vanilla gelato.


Saturday, February 26, 2011

Six of Everything

We finally have six of everything for entertaining: six fancy water glasses, six matching cloth napkins, six salad plates, six dessert plates, six steak knives, six matching chairs at a lovely new table, and matching silverware to boot....so we had to have four of our friends over for a mid-week dinner party. We haven't had a chance to use the lovely tagine that we received as a wedding present, so I decided to prepare a lamb tagine that I made as our very first tagine, which I wrote about here. One of our friends has very specific food aversions, including nuts, chocolate, and aged cheese--three things we discovered we use routinely. So dinner planning was a bit of a challenge, but a welcome one. Finding an appetizer without nuts or aged cheese was the first challenge. Dessert without chocolate was the second. Epicurious came through with flying colors on both fronts. I decided on a goat cheese with roasted yellow pepper and dill for an appetizer, served with lavash crackers from Damascus bakery on Atlantic Avenue in Brooklyn. For dessert, I chose a honey cake called Basboura. The Basboura was a hit; everyone had a second piece.

Basboura

2 cups fine semolina
1 cup dessicated coconut
1/2 cup sugar
1 tsp baking soda
A little less than 2/3 cup melted butter or ghee or semnah
1 cup milk

For the syrup...
1 1/2 cups sugar
1 1/2 cups water
1 tbsp lime juice or 2 tbsp lemon juice
2 tbsp honey

Preheat the oven to 345 degrees F. In a large bowl mix all the dry ingredients, the semolina, coconut, sugar and soda together. Mix in the melted butter and milk and stir until well combined. Pat this mixture into a buttered, shallow medium sized oven proof dish and level the surface with a spatula or a palette knife. Bake for 30 minutes or until golden brown on the top.

In a medium sized sauce pan, place the sugar and water on low heat and stir until the sugar dissolves completely. Increase the heat to medium and then bring the mixture to a vigorous boil and cook until it coats the back of a spoon or reduces by about one-third or until it reaches 220 degree F on a cooking thermometer. Stir in the lime juice and allow to cool. Once cooled or warm, mix in the honey and stir well.

Allow the cake to cool sllightly, for about 10 minutes and then cut it into squares or diamonds. Carefully pour the syrup over the cake. It will look like a lot of syrup, but the cake will absorb all the syrup gradually.

Serve at room temperature. We served ours with a dollop of yogurt mixed with a splash of rose water, and a generous sprinkling of dessicated coconut. The dessert can be served, or baked, with almonds as well.

Goat Cheese and Yellow Pepper Dip

2 yellow peppers, halved, seeded
2 jalapeno peppers, cut in half and de-seeded
2 tablespoons olive oil
8 ounces sharp soft goat cheese
2 tablespoons chopped dill, plus 1 sprig for garnish
1 tablespoon lime juice
Coarse salt and fresh cracked black pepper
Pinch cayenne

Roast peppers over an open flame until soft and a the skin a little charred, about 5-8 minutes. Place them in a plastic bag for about 20 minutes, remove and peel the skin off. Emulsify the peppers in a food processor and add the goat cheese, lime juice, dill, cayenne pepper, black pepper and salt to taste. Pulse until combined well. Serve with flat bread or pita chips.

Sunday, February 6, 2011

Last Minute Brownies

We had a few friends over to watch the Superbowl, and after setting out all of the dips and veggies and popping the chicken wings in the oven, D asked me if we had anything sweet. We didn't, but I offered to whip up a quick batch of brownies. I was lucky enough to have just enough organic cocoa from Trader Joe's left. The recipe only made about 10 decent sized brownies, but that was perfect. They were chocolatey and chewy...but they would have been better with some Ghiardelli chips.

Epicurious Best Cocoa Brownies

10 tablespoons (1 1/4 sticks) unsalted butter
1 1/4 cups sugar
3/4 cup plus 2 tablespoons unsweetened cocoa powder
1/4 teaspoon salt
1/2 teaspoon pure vanilla extract
2 cold large eggs
1/2 cup all-purpose flour
2/3 cup walnut

Preheat the oven to 350°F. Spray your baking pan (8" square) with olive oil. Combine the butter, sugar, cocoa, and salt in a medium heatproof bowl and set the bowl in a pot of water so that it fits, and bring to a simmer. Stir from time to time until the butter is melted and the mixture is smooth and hot enough that you want to remove your finger fairly quickly after dipping it in to test. Remove the bowl from the skillet and set aside briefly until the mixture is only warm, not hot. Stir in the vanilla with a wooden spoon. Add the eggs one at a time, stirring vigorously after each one. When the batter looks thick, shiny, and well blended, add the flour and stir until you cannot see it any longer, then beat vigorously for 40 strokes with the wooden spoon or a rubber spatula. Stir in the nuts. Spread evenly in the pan. Bake until a toothpick plunged into the center emerges slightly moist with batter, about 30 minutes. Let cool before attempting to cut, but not too much. These brownies are delicious warm.

Tuesday, March 24, 2009

Black Bean Dessert?

The New York Times magazine's recipe page had an article about a father's learning how to cook for his son, who seemed to be allergic to everything. The article was about perfect chocolate cupcakes for just about everyone: http://www.nytimes.com/2009/03/08/magazine/08food-t-000.html (those allergic to flour couldn't enjoy them, for example). I'm unfortunately impatient with allergies, but reading this article reminded me of an old recipe that a friend used to make for black bean brownies. I decided to try them again to serve to D's sister and her husband this weekend. This recipe appeals to me because it uses agave nectar instead of sugar. We like to use agave for all sorts of things: on pancakes with cinnamon and butter as an alternative to syrup, in oatmeal, on granola and yogurt. Agave is a syrup produced in Mexico from an agave cactus: http://en.wikipedia.org/wiki/Agave_syrup If you're allergic to flour, or if you just don't want to cook with granulated sugar, these brownies are for you. You have to have people eat them first, then tell them the brownies are made with black beans.

Black Bean Brownies

4 ounces unsweetened chocolate
1 cup unsalted butter
2 cups black beans, cooked
1 cup walnuts, chopped
1 tablespoon vanilla extract
¼ cup instant coffee
¼ teaspoon sea salt
4 large eggs
1½ cups light agave nectar

Preheat the oven to 325°F. Line an 11- by 18-inch baking pan (for thin brownies) or an 8 ½ x 11-inch pan (for thicker brownies) with parchment paper and coat with oil.

Melt the chocolate and butter in a pan. Place the beans, 1/2 cup of the walnuts, the vanilla extract, and a couple of spoonfuls of the melted chocolate mixture into the bowl of a food processor. Blend about 2 minutes, or until smooth. The batter should be thick and the beans smooth. Set aside.

In a large bowl, mix together the remaining 1/2 cup walnuts, remaining melted chocolate mixture, coffee substitute, and salt. Mix well and set aside.

In a separate bowl, with an electric mixer beat the eggs until light and creamy, about 1 minute. Add the agave nectar and beat well. Set aside.

Add the bean/chocolate mixture to the coffee/chocolate mixture. Stir until blended well.

Add the egg mixture, reserving about 1/2 cup. Mix well. Pour the batter into the prepared pan. Using an electric mixer, beat the remaining 1/2 cup egg mixture until light and fluffy. Drizzle over the brownie batter. Use a wooden toothpick to pull the egg mixture through the batter, creating a marbled effect. Bake for 30 to 40 minutes, until the brownies are set. Let cool in the pan completely before cutting into squares. It's better if you refrigerate for about an hour before cutting.

I made this batch with the bigger, shallow pan; the next time I make them, I will make thicker brownies. And serve them with vanilla ice cream. Yum.

Sunday, February 8, 2009

Sexy Cake

Last night we had friends over for dinner and I found this cake on The LoveBite, my new favorite website: http://thelovebite.com. It was a little dry, but whipped cream on top made it delicious. Poking the top a few times with a toothpick and drizzling whiskey might be a way to make this a favorite. The recipe is simple and surprising: Extra Stout Guinness Beer is the secret.

Chocolate Guinness Cake

1 stick unsalted butter
9oz brown sugar (one ounce over one cup)
2 eggs
3/4 cup guinness
1/4 cup of cocoa
1 1/2 cups flour
2 tsp baking powder
1 tsp vanilla
handful of semisweet chocolate chunks
small carton of heavy cream
a piece of dark chocolate for decorative shaving

Soften the butter and cream it with brown sugar, then beat in 2 eggs, one at a time. Mix 3/4 cup Guinness with the cocoa and some vanilla (the cocoa won't dissolve, so don't try too hard). In a separate bowl, combine 1 1/2 cups flour, 2 tsp baking powder and a pinch of salt. Add 1/3 guinness mix and 1/3 flour mix to creamed butter and sugar, mix. add more flour and Guinness, mix, add remaining flour and Guinness. Pour the mix into a buttered 9 inch cake pan. Press a handful of semi-sweet chocolate chunks into the batter. Bake in a pre heated oven (375f) for 40 minutes. Cool for 5 minutes in the pan, then invert cake onto a wire rack and let it cool.


We sprinkled a pattern of confectioner's sugar on it and served it with homemade whipped cream and chocolate shavings, but you could also glaze it or frost it, pour some ganache on it, soak it in whiskey....so many ways. The unique taste is what sets this cake apart.

Sunday, January 11, 2009

Cupcake Tree

There's a woman in my office who is the cupcake maven. She brings in delicious cupcakes for a bunch of occasions, and she makes me jealous. In a good way, if that's possible. Anyway, she--and my friend Lara who also makes fabulously beautiful cupcakes--inspired me to start making cupcakes. When my mother read about my forays into cupcake-making on this blog, she decided to get me a cupcake-related gift for Christmas. In order to live up to the expectations of the gift, which was a cupcake tree, I had to make some uber-fabulous cupcakes. These tasted great, but I have some work to do learning how to work with decorative frosting. I made these for our annual Winter ReGifting Party, and appropriate to the occasion, used a recipe from Amy Sedaris, the comedienne. http://www.amysedarisrocks.com/recipes.htm

I made some alterations, though, most notably, using two vanilla beans that I brought back from Mexico months ago. They were a lot of fun to make, and I think people enjoyed eating them. My work colleague and I agreed to collaborate for our next office occasion that calls for cupcakes.

Monday, December 29, 2008

Rugelach wassailing

He'd been keeping it a secret from me since we met that he knows how to make rugelach, but D revealed it to me before this Christmas vacation. So we packed up the ingredients and made some here at our friend's country house in Lackawaxen. We were going to visit friends of our friends who are an artist and a caterer by trade (but many more things than that), and we decided to bring some rugelach with us for the visit. Hence, rugelach wassailing. Wassailing is defined in some texts as visiting-while-carolling, so we went rugelach wassailing over to Hawley and got a tour of the incredible toll house that they've made into a beautiful home.

Here's how we made the rugelach.

Rugelach

2 cups all-purpose flour
1/4 teaspoon salt
1 cup unsalted butter
1 (8 ounce) package cream cheese
1/3 cup sour cream
1/2 cup white sugar
1 tablespoon ground cinnamon
1 cup finely chopped walnuts
1/2 cup raisins

Cut cold butter or margarine and cream cheese into bits. In food processor pulse flour, salt, butter or margarine, cream cheese and sour cream until crumbly. Shape crumbly mixture into four equal disks...wrap each disk and chill 2 hours or up to 2 days.

Roll each disk into a 9 inch round keeping other disks chilled until ready to roll them.

Combine sugar, cinnamon, chopped walnuts, and finely chopped raisins (may substitute miniature chocolate chips for raisins).

Roll each disk into a 9 inch round keeping other disks chilled until ready to roll them. Sprinkle round with sugar/nut mixture. Press lightly into dough. With chefs knife or pizza cutter, cut each round into 12 wedges. Roll wedges from wide to narrow, you will end up with point on outside of cookie. Place on ungreased baking sheets and chill rugelach 20 minutes before baking.

Preheat oven to 350 degrees F (180 degrees C).

After rugelach are chilled, bake them in the center rack of your oven 22 minutes until lightly golden. Cool on wire racks.


If you wrap them up in some plastic wrap and tie them with a bow, they make nice house-calling gifts.

Friday, November 7, 2008

Autumn Birthday Treats

My dear friends Tim and Brownie had birthdays this week, and I decided to surprise them with these cupcakes for their birthday when we met friends for after-work cocktails this Friday. We met at a dark, sultry lounge in the East Village, and had to beg the image-conscious boys at the bar to eat our leftover cupcakes. Transporting the cupcakes from home to work to bar was the most complicated part of the whole endeavor.

Chocolate Cupcakes

1 1/3 cups all-purpose flour
1/4 teaspoon baking soda
2 teaspoons baking powder
3/4 cup unsweetened cocoa
1/8 teaspoon salt
4 tablespoons of butter, softened
1 1/2 cups white sugar
2 eggs
1 teaspoon vanilla
1/2 cup milk
1 cup yogurt (plain or vanilla)

Preheat oven to 350. Line a muffin pan with paper liners, and then spray or coat with butter. Sift together the flour, baking soda, baking powder, cocoa, and salt. Set aside. In a large bowl, cream together the butter and the sugar until light and fluffy. Add the eggs one at a time, beating well with each addition, then stir in the vanilla. Add the flour mixture alternately with the yogurt and the milk, and beat well. Fill the muffin cups 3/4 full. Bake for 15-20 minutes, or until a toothpick inserted into the center of a cupcake comes out clean. Frost with a buttercream frosting when cool.


Serve to some of your best friends. And some strangers.

Monday, October 13, 2008

Crazy Birthday Cake

This was the funniest birthday cake I've ever made. Chocolate cake made from unsweetened chocolate from Guatemala, kahlua, buttercream with vanilla from beans I brought back from Mexico, ganache, and white chocolate from Whole Foods. I was looking around for about a month for the recipe I wanted and just couldn't find one. I cobbled and adapted until I got what I wanted. It wasn't pretty, and there were some issues with the cake, but it sure is tasty.

The night before I made the cake, I had to buy another cake for my uncle's birthday at Whole Foods. I asked them to write "Happy Birthday" on the cake, and when they showed it to me, I asked the guy whether he had to pass a calligraphy test to get the job. He said, "You can do it, too," but I found his instructions (buy some parchment paper, melt white chocolate, build a tube, pour the chocolate in, work some magic to make it into a writing instrument...) too much to handle. I asked if he'd sell me one of his. He called his manager over and they just gave me the tube of white chocolate. So nice.

Chocolate Layer Cake with Vanilla Buttercream Frosting and
Dark Chocolate Ganache


Cake

3 oz. unsweetened or bittersweet chocolate
½ cup water
½ cup butter
1 ½ cup sugar
3 eggs
1 ½ tsp. vanilla
1 cup sour cream
2 cups flour
1 1/4 teaspoons soda
½ teaspoon salt

Preheat the oven to 350°. Grease two 8-inch cake pans. Melt the chocolate in water over low heat and set aside to cool. Mix the butter and sugar together until light and fluffy. Add eggs to butter and sugar one at a time, beating well after each egg is added. Fold in the cooled chocolate and the vanilla. Combine the flour, baking soda, and salt. Add the dry ingredients alternating with the sour cream, beating after each addition. Bake at 350° for 30-35 minutes until the cake center springs back to the touch. Cool for 10 minutes before removing from pans. Allow to cool completely before adding the frosting.

Vanilla Bean Buttercream Frosting


1 cup (2 sticks) unsalted butter
softened
1 vanilla bean, scraped

1 tsp. vanilla extract

1/2 tsp. salt

1/3 cup milk
3 cups confectioner's sugar
1/2 cup whipping cream

Cream the butter in a medium-size bowl until very smooth. Stir in the vanilla-bean seeds until they're evenly distributed. Add the salt, milk and vanilla extract, and stir until combined. Sift the sugar over the butter mixture and stir the mixture until it's perfectly smooth. If the frosting is too loose, add a few more tablespoons of confectioner's sugar, and stir until smooth. Add whipping cream and beat until really smooth. Cover with plastic wrap until you're ready to use; mix well just before using.

Ganache

8 ounces (227 grams) semisweet or bittersweet chocolate, cut into small pieces
3/4 cup (180 ml) heavy whipping cream
2 tablespoons (28 grams) unsalted butter

Place the chopped chocolate in a medium sized stainless steel bowl. Set aside. Heat the cream and butter in a medium sized saucepan over medium heat. Bring just to a boil. Immediately pour the boiling cream over the chocolate and allow to stand for 5 minutes. Stir with a whisk until smooth. If desired, add the liqueur.

Makes enough ganache to cover a 9 inch (23 cm) cake or torte.

Now, to assemble: Cut each of the round cakes in half to make four equal rounds. Frost the top of the bottom layer with the buttercream, place the next round on top. Then frost the next top layer, and place the third layer on top. Now, here you have a choice: you can take the fourth round and set it aside to eat all by yourself, or you can make a fourth layer...and a really tall cake! Once the layers are assembled, spread the buttercream all over the cake and smooth out with a metal spatula. Pop it in the fridge and let it sit for an hour or so. When you've made the ganache, cool it down a bit, and then pour some over the top of the buttercream frosted cake. Smooth out with a clean spatula to make a nice, shiny top. Let it sit for a bit and harden, and then decorate with a tube of icing. I used white chocolate. The advice I got from the Whole Foods guy? Don't do it as though you are writing with the icing, think of it as laying the icing down in script.

Thursday, August 14, 2008

Pollo en Mole Poblano

This isn't the most appetizing of photos, but let me tell you, mole paste directly from Mexico is no joke. I find it so strange that I couldn't find a good recipe for using it on the web, and even when I tried asking a restaurant chef in Xochimilco how to use it, his advice was sketchy. He leaned in and said, "I'll tell you my secret: I break sweet cookies up into the mixture." I was like, well, thank you, but I am never going to do that. So I brought home a recipe last night for mole negro just to get an idea of proportions, and then I played around with it a bit. This mole, as I mentioned in a previous post, is from Xochimilco, and it was Mole Poblano, which means that it was made with poblano peppers. It cost about $1.70 for 5 ounces of it, which I used in this recipe that serves 4 well.

This is what I came up with, and it was really very delicious.

Pollo en Mole Poblano

4 skinned, boneless chicken breasts
olive oil
salt & pepper
4 medium sized tomatoes
2 cups of chicken stock
5 ounces of mole poblano paste (or any mole negro)
sliced almonds or pepitas

2 cast iron pans and a small food processor or blender for liquifying the roasted tomatoes.

Start out by browning the chicken breasts in a cast iron pan with some olive oil. When they are well browned, but not cooked all the way through, place the entire pan in the oven at about 325 F.

Next, cut the tomatoes into quarters and heat another dry cast iron pan until it is smoking. Fry the tomatoes in the dry pan until the juices have all come out and you get a nice fragrance. Take the tomatoes out of the pan when they are done and set aside in a bowl.

Rinse out the tomato pan and put it back on the fire to dry a bit. Once dry, put some olive oil in the pan and put the mole paste in and quickly break it up into small pieces. Add a bit of stock tot he mixture until the pieces are nearly all broken down. Don't let the mole burn. Turn the heat to low, and turn back to your tomatoes, which should be no longer steaming hot. Place them in the food processor or blender and make a liquid out of the tomatoes. One recipe suggested straining them, but why waste the nice tomato seeds?

Keep heating the mole and adding stock and pureed tomatoes until you get the consistency you want (it should be thick enough to coat the back of a spoon) and the desired heat intensity (mole can be very spicy).

When it is nice and thick and smooth and soupy, take the chicken out of the oven and pour the mole sauce over the four breasts. Place back on the stove and simmer on low until the chicken is tender. I like mine well cooked so that it is nearly falling apart, you can cook your to the degree that you want.

Spoon a bit of the mole onto a plate and then place a chicken breast on top. Then dollop with a little bit more mole sauce. I didn't sprinkle almonds or pepitas on top, but I would like to have. So you should. If you like them. I served the pollo en mole with plain steamed veggies as a nice clean contrast to the complexity of the sauce.

Monday, April 14, 2008

Searching for great food in Guatemala

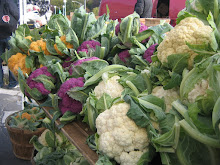
I haven't written for so long because its been a rough winter, and we were planning a big trip to Guatemala. The picture on the side is of me at a vegetable market in Antigua. I persuaded the seller to let me sit on her crate and pretend to sell vegetables just for the picture. I love Central American food, but I have to say we were infrequently impressed with the food. We stayed at an amazing place on Lake Atitlan near Panajachel--Casa del Mundo http://lacasadelmundo.com/ -- and they had very good food, but not very original and not really Guatemalan. They used fresh ingredients, though, and the setting is unreal (check out the photos on their website or on my facebook page).

The best idea we took from there was a breakfast of fresh fruit (papaya, mango, pineapple, apple) with yogurt, honey, and homemade granola (made with fresh pepitas that are ubiquitous in the country). We'll definitely be looking up some recipes for granola and sharing them here.

Two other notable dishes: a honey-and-sesame-glazed carrot dish with olives in the middle; and an amazing black bean soup at Cafe No Se, a place that took me in years ago as a volunteer helper when they first opened and I was desperate to not return to the U.S. You can read about the founder and the cafe here, but I'll post photos of the place on a slide show once I figure out how to use it.

http://antiguadailyphoto.com/2008/02/06/the-hippie-hole-high-priest-of-cafe-no-se/

The dish? Black bean soup. I know, it sounds basic, but they used just the right amount of fried tortilla strips and cheese, the consistency was wonderful, and there was a bowl of fresh avocado on the side. Yum. The setting was also lovely.

We got some other ideas (cardamom dishes, chocolate panqueques, and chicken stews...) but they'll take some development, and we've both been so busy with our jobs, I don't know when we'll get a chance.

Thursday, December 14, 2006

Eating Out is No Good For You

So the past two nights I've eaten out, I haven't posted to my blog, and I'm out over $100. I also haven't gone running, and I probably gained 10 pounds. So I'm deducing that eating out is no good for you. In an effort to remedy at least one of these things right now, I'll just say a word about where we ate.

A friend was visiting from out of town, and we went to a seminar on HIV and Incarceration in the West Village. Afterwards, a group of us went to Cafe de Bruxelles, a restaurant right around the corner from the Venue. The space specializes in Belgian beer and mussels, so that's what we had. We started with Duvel beer, which was surprisingly good, and then the waiter made the mistake of bringing a basket of bread, which we all inhaled immediately, and which was immediately after that filled again, and so on....The bread was really meant to sop up the juice from the mussels, but it was yummy all on it's own. One of my friends and I ordered curried mussels, and they were very good. I'm not big on shellfish, especially the kind I have to extract directly from it's shell, but this stuff was good. We must have each eaten a loaf of bread between us sopping up the yummy sauce. The mussels came with pomme frites ("Freedom Fries," as our French waiter told us), and they too were yummy and really bad for you. All in all, very tasty, great company, terrific service. Cost: $40 each, with an additional $15 for the cab fare back to Brooklyn. (Too much beer = reluctance to take the train)

The next night, D. and I wanted to try Max Brenner's Chocolate by the Bald Man that opened about 6 months ago at Union Square. We decided to go after seeing Happy Feet at the Regal theatre across the street. We really wanted to go because of the amazing chocolate desserts, so we shouldn't really have ordered dinner. The food was okay--we shared a prosciutto sandwich with cheddar cheese and a spinach and asparagus crepe--but we were both too full and fed up with the service to really want dessert. Instead, we went back to Brooklyn, shared a piece of dark chocolate, and decorated the tree. I don't think we'll go back to Max Brenner's....too trendy, and the prices weren't that great.