Saturday, August 31, 2013

Scotch Bonnet Hot Pickle Relish


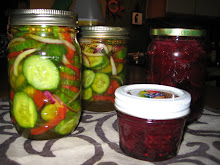
My end-of-summer scotch bonnet yield was a neat dozen. I made the third version of hot pepper relish of the season: a sweet hot pickle relish. I hope this one makes us holler.

Scotch Bonnet Pickle Relish

1 large white onion
1 large green bell pepper
4 kirbys
12 scotch bonnet peppers
1 cup cider vinegar
1 cup white vinegar
1 1/2 cups sugar
1 1/2 tsp salt

To prepare, put a pot of water up to boil and fill with your jars & lids. For this amount of veggies, I used four small jars. In another pot on the stove, place your vinegars, sugar, and salt. Turn the heat on the vinegar mixture once your veggies are almost finished with the chopping. Next, in a food processor, pulse the white onion a few times and then add the scotch bonnets.

After those are chopped finely, add the green bell pepper and three of the kirbys. It may take a bit of arranging to get stuff chopped uniformly. Because I like a chunkier relish, I diced the last kirby by hand. Once the vinegar mixture has heated, add the chopped veggies to the liquid and bring to a boil. Boil for about two minutes. Strain the relish, reserving the liquid.

Take the boiled jars out of the pot and place on a clean surface. Spoon very wet relish into each jar. If you like your relish a little more liquidy, you can add some of the strained pickle juice. Seal the jars quickly and set to rest until you hear a "pop." That means the jars are sealed and you can put them up. You can eat the relish right away, but it's best in about a week.

Sunday, August 25, 2013

Chermoula Eggplant

The Ottolenghi-Tamimi book Jerusalem is all the rage with my group of friends these days. I read the introduction when friends brought the book out to the country, and knew I had to have it when I found this recipe: Chermoula Eggplant with Bulghur & Yogurt. I adapted the recipe from the book just a bit. Here it is, with all credit to Otto & Tami:


Chermoula Eggplant with Herbed Bulghur & Yogurt

2 medium eggplants
1 cup coarse bulghur
2 crushed and chopped garlic cloves
2 tsp cumin
2 tsp ground coriander
1 tsp chile flakes
2 tsp sweet or smoked paprika
2 tbsp chopped preserved lemons
2/3 cup olive oil
2/3 cup boiling water
1/2 cup golden raisins
4 tbsp warm water
1 oz chopped cilantro
1/2 oz chopped mint
1/2 cup pitted and chopped green olives
1/3 cup toasted slivered almonds
3 green onions, chopped
1 1/2 tbsp fresh squeezed lemon juice
1/2 cup green yogurt
salt & pepper to taste
1 tbsp harissa

Wash and halve the eggplants, and then score diagonally one direction and then the next without reaching the outside skin and breaking it so that you've got nice diced shaped crosses that will soak up the chermoula. Mix together the chopped garlic, lemons, cumin, coriander, chile, paprika, and olive oil into a paste and spread over the eggplant halves, making sure that the paste gets between the cuts. Place the eggplant halves on a greased baking sheet and bake for about 40 minutes at 350 degrees F. 

About 10 minutes before the eggplant is finished roasting, place the cup of bulghur in a bowl and generously sprinkle with salt and pepper. If you like your bulghur a little more spicy, season with some more paprika, chile, or whatever. Pour a speck of olive oil into the bulghur and stir so that the bulghur is coated with a little bit of oil so that the bulghur won't stick when you pour the boiling water over, which you should do next. Just cover the bulghur with boiling water, cover with a plate, and let sit until the water is absorbed. When ready, add the raisins, chopped cilantro (except the bit you'll use to garnish the top of the dish), mint, olives, almonds, green onions and lemon juice. 

When the eggplant is finished roasting, arrange halves on plates, generously pile on the herbed bulghur, artfully slap on some yogurt, drizzle the harissa (which is hot, so be carefully and arrange on top to taste), and then toss some cilantro on top and serve. Delicious.


Sunday, August 11, 2013

It's a cupcake, bitch


Two days before the season finale, I started to panic. I needed to find some way to mark the end of the series and I was terrified that the baking supply store would be all out of blue sugar crystals. Surely, everyone would be making Breaking Bad cupcakes, right?  "No worries," the store clerk said. "We won't be selling out of the crystals. We have plenty." I asked her to put one aside for me anyway, just in case. 


Breaking Bad Walter White Cupcakes

Cupcakes

1 2/3 cup white flour
½ tsp baking powder
¼ tsp baking soda
½ tsp salt
1 cup granulated sugar
½ cup melted butter
2 egg whites
¼ cup greek yogurt
¾ cup milk (or almond milk)
2 tsp vanilla extract
seeds scraped from ½ split vanilla bean

1 jar of blue sugar crystals, coarse

Frosting
1/2 cup butter, softened
4 cups Caster Superfine Sugar
1 teaspoons Pure Maple Extract
1/4 cup milk
seeds scraped from ½ split vanilla bean
salt

In a mixing bowl, cream the butter and beat in the caster sugar and pure maple extract. Add milk until the frosting reaches the desired consistency. 

Preheat the oven to 350F degrees. If your mother bought you a stuffed-cupcake pan like mine did, you're in luck. Take it out of storage and clean it up. Grease the cups. 

Mix together flour, baking powder, baking soda, and salt. Set aside. Mix sugar with melted butter in a separate bowl. Stir in egg whites, yogurt, milk, and vanilla extract until combined. Scrape vanilla beans into batter. Mix dry ingredients into wet until there are no lumps. The batter will be thick. Divide the batter among the cupcake liners and bake for 20 minutes until a toothpick comes out clean. Fill with blue crystals, and frost when cool, garnishing with more sprinkles. 

Serve with Breaking Bad Blue Margaritas!


Hot (Pepper) Mess

Porch peppers beckon, even when you're not feeling well. When they're ripe, they're ripe and you gotta use them or they'll rot. So this weekend was time to make hot pepper relish. Only the red hot peppers were ready; in a week or so, the scotch bonnets will be ready. Those are a whole nother level of hot. I didn't use gloves this time and my hands are burning right now. I can't neglect to use them for the scotch bonnets.

I scavenged all of the old jars that people returned to me after our wedding (jars of hot pepper relish were the wedding favors), washed them in steaming hot water and got started. I rarely write down my relish recipes, but this time I did.


Hot Pepper Relish

One dozen hot red peppers
2 green bell peppers
1 red bell pepper
1 yellow bell pepper
1 large white onion
6 tomatillos
1 tbsp kosher or canning salt
3/4 cup sugar
1 1/4 cup cider vinegar
large saucepan
hot boiling water

Carefully handle the red peppers to cut off the stems and de-seed them.


Chop the vegetables in manageable pieces and in thirds, distribute the veggies & peppers into the food processor. Process until finely chopped. Place in a large saucepot. Sprinkle with 1 tbsp kosher/canning salt and then pour boiling water on top. Let sit for about 5 minutes.

After 5 minutes is up, drain the water from the peppers and place back on the stove. Pour in cider vinegar and sugar, and bring to a boil again. Turn the heat off after the boil begins, then spoon the finished relish into jars and quickly secure the lids.

They should indicate that they're sealed if they pop within an hour or so. If they don't pop, you'll have to refrigerate them. They'll be ready to use in 2-3 weeks.

Foreign Eggs

We love eggs. I've written about our love of eggs in this blog before. So when I found scotch eggs in London last year--eggs surrounded by spicy pork, rolled in tasty breadcrumbs and baked--I knew it was only a matter of time before I started making them at home.

Actually, I was really impressed with food and drink in London. I don't know why it's the butt of anyone's joke. I regularly order hard cider (my favorite is pear) whenever it's available now. And the bodegas carry Jack Daniels and Coke in a can. Super.
It took about a year to turn my attention back to Scotch Eggs, but here's my first iteration. I made them for a picnic at a Prospect Park concert where hummous is the staple and graces almost every blanket. And I made it vegetarian with Gimme Lean sausage. My favorite part was getting my friends to try and guess what the ball of goodness sitting on the plate was before I cut it in half, revealing the egg. This recipe will make a tasty scotch egg, but I can only imagine what well-seasoned pork would do. I used large eggs, but I could see using medium, small, or even quail eggs to make these--depending on the occasion and whether they will be a meal or an appetizer.

Spicy Baked Scotch Eggs

4 medium hardboiled eggs, peeled
1 14 oz tube of gimme lean sausage
2 cups flour
2 cups bread crumbs
2 tsp harissa
2 tsp cumin
2 tsp coriander
2 tsp chili powder
2 tsp paprika
2 tsp garlic powder
2 tsp salt
2 tsp ground black pepper
1 raw egg, whisked
spray olive oil
baking dish
4 bowls

You'll need four bowls: (1) sausage mixed with 2 tsp harissa; (2) flour with one tsp each of cumin, coriander, chili powder, paprika, garlic powder, salt & pepper; (3) bread crumbs with one tsp each of cumin, coriander, chili powder, paprika, garlic powder, salt & pepper; (4) whisked egg.

Preheat the oven to 400 F. In clean and oiled hands, take 1/4 of the sausage mixture and flatten it evenly in your hand. Place a single hardboiled egg in the center and gently wrap the sausage evenly around the egg. Once all of the egg is covered with sausage, roll the ball in the seasoned flour. Dunk the flour-coated egg into the raw egg and coat. Then carefully roll the eggy-egg in breadcrumbs to coat evenly. Place the large round ball in an olive oil-coated baking dish. Repeat three more times, washing your hands in between each one. Place each round coated egg on an oiled baking dish and pop in the oven for 1/2 hour. Check for golden-brownness and rotate the dish if you need to for a few more minutes. Let cool and eat one on it's own, or serve with any number of condiments: salt & pepper, hot sauce, mayo, horseradish sauce, sriracha....


Saturday, August 10, 2013

Herby Leftover Eggs

 Some Saturday mornings, the havoc wrought by the week on the fridge is unbearable and I despair.  Tiny bits of leftover thiss and thats from home-cooked weekday meals scattered throughout the fridge, taking up space and messing up the order of things. On other Saturdays, I make lemons out of lemonade and make herby-leftover eggs.

This morning, I pruned the herbs on the porch and chopped them up with the leftovers I scrounged from the fridge: a few pieces of steak, ½ of a baked red potato, kimchee, a few errant olives,  some garlic, and 2 slices of swiss cheese. I’m more a scramble than an omelet person, so I sautéed the chopped up potato, garlic, and steak, then added the eggs. I carefully stirred them around to avoid browning them, and then folded in the herbs, kimchee, and swiss. Delicioso.

Sunday, August 4, 2013

Pick a Peck of Pickled Pattypans

Dilemma #314: Too many pattypans. 

When you are in the country for the weekend, and you buy too many pattypan squashes at the local farmer's market, and you've already made zucchini bread and you've already roasted a bunch for pasta primavera and you've already cut up a bunch of them for a big Sunday night salad, and you've already put some on your packed lunch for Monday morning, you can pickle the leftovers. Here's how:

Lemon-Pickled Pattypans

One large mason jar
8-10 tiny pattypans (or however many fit)
1 cup water
1 cup cider vinegar
1 cup white vinegar
1/2 cup sugar
1 heaping tablespoon pickling salt
1/2 lemon
1 tsp coriander seeds
1 tsp white peppercorns
1 tsp black peppercorns
1 tsp mustard seeds
dash of red pepper flakes
bay leaves or tarragon leaves

Pack sliced pattypans in a mason jar that's been washed out with soap and hot water. Alternate the pattypans with some round-sliced lemons. Boil the remaining ingredients and pour over the pattypans. Seal up the mason jar and let sit for 2-3 weeks. Serve on a summer table set for guests.


Saturday, August 3, 2013

Impulse Baking

This morning we went to Barryville, PA's farmer's market. We didn't eat breakfast before we left the house, so the first stall I headed for was the stall with jam-tasting and tiny specks of baked goods to try out. Blueberry-jalapeno jam was on offer, as well as an orange marmalade which I tried on some zucchini bread. Pushing the idea of a blueberry-jalapeno jam experiment out of my mind for a moment, I knew I had to make zucchini bread. Today. 
So I tasked D with picking out a basket of zukes while I got some eggs, and no sooner were we in the house than I started making this zucchini bread. And after an hour when it was out of the oven, it was almost gone. If I had a jar big enough, I would pickle the tiny ones, but I guess that will have to wait until another day. Like the blueberry-jalapeno jam. 

I found a recipe that uses sourdough and of course had to try it. It's delicious.

Cardamom-Zucchini Sourdough Bread

1/2 cup good olive oil
3/4 cup white sugar
3/4 cup sourdough starter
1/2 cup whole milk
1 cup zucchini, grated
2 cups wheat flour
1/2 tsp baking powder
1/2 tsp baking soda
1 tsp cinnamon
1 tsp cardamom
1/2 cup raisins

Mix oil, sugar, starter and milk. Stir and let sit for a few moments. Stir in your grated zucchini (if you like your bread more veggie, use more than a cup. If you like your bread puffy, use an egg in addition to the other wet ingredients, but then decrease your sourdough or milk by about 1/8-1/4 of a cup). In a separate bowl, combine the dry ingredients (flour, powder, soda, spices) well and then add to the wet mixture to blend just enough. Fold in the raisins. (You can use nuts unless someone you love doesn't like them. Walnuts, pecans, almonds...whatever you like). 

Grease a bread pan and pour the mixture in, leaving just a tiny bit in the bowl for you to scoop up with your finger and eat. Bake at 325° for about an hour (test by sticking a toothpick in the densest part and see if it comes out gooey. If it does, it's not done). 

Let it cool for a few minutes and try to restrain your people from attacking it while it sets. If you want to save some for the morning (zucchini french toast, anyone?), you should have made two loaves. 

Sunday, July 28, 2013

Pickling Berries


A few weeks ago, the wife of one of my softball teammates told me that she saw a recipe for pickled berries that she was interested in trying. She sent me the image of the recipe a few days later, and so when I saw these gorgeous red currants at the farmer's market this morning, I knew I had to try pickling them.
I found a Danish recipe, but it contained a preservative that I neither had nor wanted to use. And then I found an Alice Waters recipe adaptation which sounded more my style. I'm not sure yet what I'll do with them, but I have a few ideas. I could put them on a salad, serve them with some cheese and bread (Danish-style), but I'll most likely serve them alongside a venison and spaetzle.

Here's how I did it.

Pickled Red Currants
  
1 pint fresh red currants
1 cup champagne vinegar
1/8 cup sugar
10 each of juniper & allspice berries
1 stick of cinnamon
1 tsp pickling spices

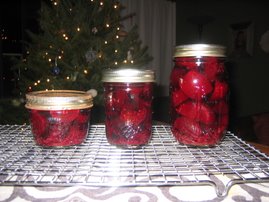
Wash the jars out thoroughly with hot water, including the lids and place them near the stove. Wash your currants and place them carefully in the jars. Most of them will come off the stems, but leave some on the stems as they'll make a nice garnish in bunches. Chop your juniper and allspice berries on a cutting board. Add a bit of pickling spice to each jar. Bring the champagne vinegar, sugar, crushed berries, and cinnamon to a boil. (I added a dash of salt, too). Quickly pour the boiling liquid into the jars so that the berries are covered. Leave them to pickle for a few weeks before trying them in a dish.

Thursday, July 11, 2013

Of Kitchens & Meth Labs


Have you ever made freshly prepared horseradish? All you need is some horseradish root, vinegar, water, a little salt.....and a gas mask. Seriously, fresh horseradish preparation is NO JOKE. I bought two gnarly looking roots at a farmer's market in the Hamptons back in May, and they stayed dormant in a brown bag in the fridge's veggie drawer for almost a month before I had the time to prepare it. I roughly followed this recipe, but it was literally: peel the horseradish, chop it into manageable pieces, run it around in a food processor until it is broken up into small chips, and then stuff it into a glass jar. I think I stuffed it too tight because I don't think that the white vinegar I covered it with really suffused the root overnight, but people seemed to love it, so it was probably okay to pack it tight. Then you pour white vinegar over it (enough to cover it, and a little more), cover the jar, and leave it for 24 hours. Then drain the excess vinegar into a bowl, add a little bit of salt, and reserve it. Return the suffused horseradish to the food processor and process away until the pieces are pretty fine.

If you're familiar with horseradish, then you'll know what consistency you want. If you're not, they should be little tiny pieces that resemble bulghur wheat or coarse breadcrumbs. Return the horseradish pieces to the jar, and then stir in the reserved vinegar until you get a wet consistency. Cover the jar and refrigerate.

Back to the gas mask part: Seriously. This stuff is potent. If your eyes water when you peel an onion, be prepared to weep. But it's more than that. It's actually hard to breathe in a closed space with so much horseradish. Even two or three rooms away, people will be affected. It was summertime when I made this, hot in our small Brooklyn apartment, and I feel like I seriously endangered our health by not taking precautions. Hence the title of the post: you should really think of your kitchen as a kind of meth lab during this endeavor. Gloves and a little paper gas/infectious disease mask are really a must for this process. I think you can get one of those paper masks at a well-stocked pharmacy. I plan to make a lot more of this next year, and I will definitely plan in advance.

It's really ready to use pretty soon after you return it to the jar. And look at all the things you can do with it! About a month after I prepared it, I used it to make horseradish pickles, bloody marys, and cocktail sauce with peeled shrimp. Next up: horseradish sauce for turkey sandwiches!


Wednesday, July 10, 2013

Global Babyfoods!

I totally think I hit on a niche market: baby food from around the world! I joined friends for an amazing dinner at Brooklyn Commune for a family-style vegetarian meal one night a few weeks ago. One of the dishes they served was a quinoa salad with grilled portobello mushrooms slathered in a creamy carrot sauce. Of course I asked the chef for the ingredients, and they were graciously provided by our server: carrots, tomato, cardamom, ginger, and coconut milk. I haven't mastered the proportions yet, so I won't post a recipe, but I served it this past weekend at a Fourth of July BBQ and guess who loved it more than me? THIS BABY RIGHT HERE! Actually one of the cutest and fun babies ever. She just couldn't get enough of it. I spiced up the recipe with a generous amount of pepper, garlic, and onion, but that was no problem for Allissa. Thanks, Erica and Allan for such a great addition to the world. And the inspiration for my new company: Global Babyfoods!

Saturday, June 15, 2013

Where's the bun?

sourdough brioche hamburger buns
When you have buffalo patties, homemade bread & butter pickles, and homemade pickled onions, why would you settle for buns-in-a-bag? Especially when there's active sourdough starter sitting right there in your fridge? So don't settle! Start baking so you can have them fresh for dinner tonite.

Sourdough Brioche Seeded Buns

2/3 cup of warm milk
¾ cup sourdough starter, primed
½ cup sugar (maybe a little less)
2 large eggs (plus 1 more for egg wash)
3 cups of flour (1 more cup for shaping)
2 tsp salt (more course grain to sprinkle on top)
¼ cup melter butter (maybe a little more)
2 tsp yeast
black & white sesame seeds to top

If you have the time, the evening before (8 - 12 hours), take one cup of sourdough starter from your fridge and combine with one half cup warm water, one half cup white flour. Mix well and let sit overnight.

Place all of the ingredients in the mixing bowl and mix until well combined (some use a 
paddle or spiral mixer: you can do this with a wooden spoon). The dough should be supple and soft, with a high gluten development.

Transfer the dough to a slightly oiled container (I use olive oil spray), cover and leave for 1 hour. 

When the dough has risen, divide it gently into 6 pieces and loosely shape into bun-shapes. Preheat your oven to 460 Farenheit.  Brush your buns with an egg wash, sprinkle them with sesame seeds (and maybe a little course salt if you want), and let the buns rest for 15 minutes.

(The blog where I got this recipe has some interesting ideas about how to turn your oven into a steam room for the buns, but I don’t usually have time for all that.)

When the oven is hot and the buns are rested, pop them in the oven for 20 minutes, watching to make sure they get to the just the right shade of golden brown on top. Let the loaves cool completely on a wire rack. Enjoy with your favorite burger and toppings!

Sunday, June 9, 2013

Leftover bananas


What do you do when you have two leftover soggy bananas? Make banana bread! This is a simple and tasty recipe. Do it next time you think about putting those slimy bananas in the freezer.

Banana Nut Bread

Ingredients

1/2 cup butter
3/4 cup white sugar
2 eggs
1 cup mashed bananas
1 tsp vanilla extract
1 1/2 cups flour
1/2 tsp baking soda
1/2 tsp salt
1/2 cup oats
1/2 cup chopped walnuts, plus some more for the top

Preheat oven to 350 and lightly grease a 9 x 5 inch loaf pan. In a large bowl, cream together the butter and the sugar. Add the eggs, one at a time. Then stir in the banana and vanilla. Sift into the banana mixture the flour, baking soda, and salt. Mix thoroughly, then stir in the oats and nuts. Pour into the prepared pan and bake for about an hour. Check to see if it's done by inserting a toothpick into the center. If it comes out clean, it's done!

Sunday, May 12, 2013

Edge of Summer Roast Pork

On the edge of summer, just before the temperature rises, you can make this tasty dish without breaking a sweat. I usually make pork in either a crock pot, or roasted for many hours in a hot oven. This time, I tried an abbreviated version of the oven-roasted pork. I made a pernil paste with garlic, salt & pepper, oregano, vinegar, and oil, coated a pork shoulder (bone-in) with the paste and refrigerated it overnight. The next morning, I placed the coated pork shoulder into a roasting pan with about 2 cups of vegetable broth. I covered the pork with plastic wrap and then aluminum foil and popped it in the oven for about 5 hours at 300 degrees. We served it with white rice, black beans, cilantro, sauteed spinach, and sliced avocado--a nice change from the pulled pork tacos we usually make. It was so moist it didn't even need any sauce. But later this week, I think a nice juicy pulled pork sandwich on a potato roll is in order.

Easy Oven-Roasted Pork

1 3/4 - 2 lb pork shoulder
16-20 garlic cloves
3 tbsp oregano
3 tbsp fresh ground pepper
3 tbsp salt
1 tbsp champagne vinegar
2 tbsp olive oil
2 cups vegetable broth

Chop garlic cloves in a mini-chopper with black pepper, salt, and oregano. Once its chopped into a nice paste, add the vinegar and oil. Coat the shoulder with the paste, and refrigerate overnight in an air-tight plastic bag. The next morning, rest the shoulder in a roasting pan atop 2 cups of vegetable broth. Cover tightly with plastic wrap and then tightly with aluminum foil. Pop in an oven at 300 degrees Farenheit. Leave it without looking for about 5 hours.

You can serve as roast pork by itself, chopped into empanadas, or shredded in tacos or on a sandwich.

Saturday, March 16, 2013

Late Winter Venison Pie

This winter, we received gifts of venison from some really good people in our lives. I've tried to do something interesting with each cut of meat. To celebrate St. Patrick's Day weekend, I wanted to make a shepherd's pie for one of our hunter-friends who was coming over to help with an outdoor task. I thought it would be nice to surprise him when he and D came in from the cold with a steaming dish of his own venison cooked in a tasty pie. I found my inspiration for this adapted recipe from a blog called Food for Hunters. Instead of a plain old mashed potato crust, I decided to add some parsnips we had hanging out in the fridge from a few weekends ago. It makes the crust a little sweeter, but because I used beer instead of wine for the stew, the crust will be a nice compliment to a more bitter-savory stew.

Venison Shepherd's Pie

Stew
 pound venison cubes (stew meat)
1 medium onion
4 garlic cloves
(2 tbsp bacon fat)
olive oil
1 large carrot
1 medium turnip
2 stalks of celery
1 cup mushrooms (any kind)
3/4 cup or about 20 green beans
2 tbsp rosemary
1 bottle of beer (the darker the better)
1 3/4 cup veggie or beef stock
2 tbsp tomato paste
2 tbsp flour

Potato Topping
2 medium parsnips
2 large white or red potatoes
3 oz cheddar cheese, shredded
4 tbsp butter
1 egg, lightly beaten
salt and pepper to taste

Start by peeling the parsnips and potatoes, chopping them into cubes and immersing them in boiling water with a little bit of salt. Let cook until the cubes are tender.

In the meantime, chop your onions and garlic. Set aside. Then chop your venison into small bite-sized pieces.

[Check your potatoes at this point. If they are tender and done, add 4 tbsp butter and 3 oz of shredded cheese along with some salt and pepper and mash. Set aside to cool down.]

Heat the olive oil (or, alternatively, bacon fat) in a cast iron pot that is about the size of your pie pan. Saute the onion and garlic until they become soft and are beginning to brown. Add the venison pieces and season with a little bit of salt and pepper. Sautee until the meat begins to brown and then transfer to a bowl off to the side.

De-glaze the cast iron pan by pouring into it (while it's hot) the bottle of beer. Add 2 tsp or a cube or two of beef stock concentrate along with the tomato paste. Stir the onion-and-venison leavings from the pan into the liquid. After a few minutes, add finely chopped rosemary and let simmer for a little while. Pour the liquid into the bowl with the venison.

Add a bit more olive oil to the pan and add your chopped vegetables. Season with a little bit of salt and pepper. When the veggies are soft, add the venison mixture back into the pan and stir until combined. Add 2 tbsp of flour into the meat mixture and stir to thicken the sauce.

At this point, pre-heat your oven to 400 degrees F.

Turn your attention to the now-warm-to-cool parsnip-potato mix. Mix in your beaten egg.

Spoon the venison mixture into a pie pan. Add dollops of your potato mixture on top of the venison, starting from the outside and moving in until the entire "pie" is topped. Fluff a bit with the fork to make it look nicey-nice, sprinkle fresh ground black pepper on top, and drizzle with olive oil.

It's ready to go in the oven! Bake for 20-25 minutes, or until the potato crust is golden brown and the innards are bubbling.

Serve to your loved ones and enjoy!


Saturday, February 9, 2013

Strawberry Shortcake Cream on Top

We spent the weekend in the country with two other couples, and food was a central part of the gathering. We made elaborate dinners and full lunches, it seemed like we were cooking and eating constantly. My friend Holly pulled out some strawberries, shortcake, and balsamic vinegar. I couldn't understand what the balsamic had to do with anything. She cut up the strawberries a few hours before dinner, and marinated them in the balsamic vinegar and a little bit of sugar. After dinner, she spooned the strawberry mixture onto the cakes, and we topped it with some hand-whipped cream with some rum. It was amazing. You could taste the balsamic vinegar, and it perfectly complemented the tart sweetness of the berries. I will definitely make this again.