Wednesday, April 13, 2011

A Bronx Find

The organization I work for hosted a series of lunches for defense attorneys in four different cities across New York State to discuss the implementation of a drug law reform measure that passed in 2009. I wanted the luncheons to be something special, but defense attorneys in Buffalo and Rochester weren't very imaginative; we had sandwiches from a (nice) deli in Buffalo, but the Rochester lawyers opted for simple pepperoni pizza. When the luncheon for the Bronx lawyers came up, I posted a request on my Facebook page for some suggestions for a good restaurant nearby. Almost immediately, a friend responded by putting me in touch with a lawyer who happened to work for the organization I was visiting (but in a different department). He said: hands down, Coqui Mexicano. I visited the website and could tell from the menu that this place was a winner.

After agonizing over the menu, and deciding that I'd have to pitch in some bucks for extra food so I could bring home dinner, I called Diego and explained the plan. I was a little worried when he said that their catering menu was different, but not posted on the web, but ultimately, I just told him what I wanted in general and the amount of money that I wanted to spend.

It just so happened that D and I were traveling in the same direction the day of the luncheon, and so we decided to drive up to the Bronx and have a quick lunch together before the luncheon. (I knew that because I was speaking and asking a bunch of questions and taking notes during the luncheon that I wouldn't be able to eat during the meeting.) When we arrived, Diego seemed a bit frazzled, and worried aloud that the avocados weren't really ripe enough yet. The place was not very busy, just a few folks talking leisurely over some food in the brightly-colored dining room. Diego suggested the beef stew, which D ordered--but I knew I wanted a Cubano. I'm not a big Cubano fan, but for some reason, I wanted to try his. I'm so glad I did. Thinly sliced ham, pernil, pickle, and mayo, and a very tasty cheese on a soft roll. He conversed with us while we ate, asking if everything was alright ("some people make crusty Cubanos, I like mine like this. You like it?" I did.)

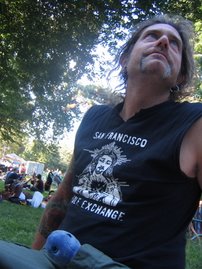
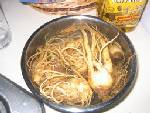
After giving the avocados a few more squeezes, he excused himself and set off at a quick trot down the street and around the corner--presumably in search of more ripe avocados for the guacamole we'd ordered for the luncheon. Watching him run down the street, I noticed an amazingly ornate, but run-down, building across the street--it was the old Bronx County Courthouse. Now covered in unartistic graffiti and grime, it appeared to be a sad symbol of a neighborhood in decline. But D told me that the owner recently sold it to a charter school, so (notwithstanding concerns about charter schools!) maybe someday soon, the beautiful architecture will shine on the block again. You can see the building in the background of the picture above, but some dude actually took photos of the inside and outside of the building and posted them on his blog, Satan's Laundromat.

Before D and I left to head over to the luncheon, I ordered a piece of Budin de Maiz, a sweet cornbread pudding with raisins, cinnamon, & grated coconut for a snack later that day. It was delicious. As the menu said, it's great for breakfast with coffee, or a dessert. I'll have it anytime, thank you.

When Diego delivered the spread for the luncheon a half an hour later, the lawyers greeted him like an old friend. I didn't know until later that about a year ago, when Coqui was struggling in the neighborhood, the legal services office organized a fundraiser to keep them in business. The bonds are tight between the organization and the restaurant. This article explains the story of Coqui Mexicano and why it's so special in the neighborhood.

I ordered a taco platter with pernil, warm corn tortillas, ricanized couscous salad, guacamole, escabeche de gandules, and five Cubanos. Diego apologized because he didn't bring as much as I ordered because he didn't want to use the under-ripe avocados, which was VERY COOL. He brought the chayote salad as a substitute--I have to admit, I didn't order it because I didn't know what it would be like, but it was outstanding. The lawyers enjoyed the food, the meeting was a success, and I brought some leftovers home so that D and I could taste the whole range of food from the place. I owe Diego a big, warm thank you for his thoughtful preparation of the food. I only wish I had more occasion to go to the Bronx--this would be my go-to place.

Photos courtesy of Welcome2Melrose blog, and The Daily News.

Sunday, April 10, 2011

A Few of Our Favorite Things

Jess and I hadn't seen each other since my wedding nearly nine months before, so when she made the suggestion out of the blue that we meet for a light dinner at a new Moroccan restaurant on the Lower East Side because she'd purchased a Groupon for it, I readily agreed. We went to Zerza in the East Village and I ordered merguez sausage in a tomato sauce with poached eggs that was absolutely delicious. Two of D's favorite things are eggs and merguez, so I knew he would love this dish. I found this recipe from a blog called Food52 for the dish and made it at home. We served it with a side of sauteed dandelion greens. The bitter of the greens was tempered by really nice olive oil and garlic, and it was perfect with the spicy tomato sauce. I had two types of harissa on hand: one from our friend Samir who is originally from Tunisia, the other (less hot) from a local Middle Eastern restaurant. If the sauce is spicy enough, you won't even want to use the harissa. The cilantro is really key, though, to cut the heat.

Moroccan Merguez Ragout with Poached Eggs

1/2 cup extra virgin olive oil
1 large onion, small dice
4 large garlic cloves, peeled and minced
1 pound merguez sausage, sliced 1/2-inch thick
1 tablespoon ras el hanout*
1 teaspoon Spanish sweet smoked paprika
1 teaspoon kosher salt
2 15-ounce cans fire-roasted tomatoes, preferably Muir Glen
8 extra-large eggs
1/2 cup roughly chopped cilantro, stems included
2 tablespoons harissa, see note above
warm crusty bread, for serving

Heat the olive oil in a large frying pan over medium heat. Add the onion and sauté until golden. Toss in the garlic and cook another 2 minutes. Add the merguez and sauté until almost cooked through, about 3 minutes. Lower the heat to medium-low and add the ras el hanout, Spanish smoked paprika and salt. Stir to combine and cook for a minute to lightly toast the spices. Add the tomatoes. Turn up the heat to medium and cook until the mixture has thickened slightly, about 5 minutes. Crack the eggs over the mixture, cover and cook until the whites set, but the yolks are still soft. Divide the eggs and ragout among four warm bowls using a large spoon. Top with a sprinkling of cilantro and a teaspoon of Harissa. Serve immediately with crusty bread.

Ras el Hanout is totally simple to assemble if you have all of the spices. Layering the spices into the jar, the end result looks like a North African desert bathed in a sunset. I shook it to combine the spices before using it in the recipe.


Ras El Hanout

2 teaspoons ground nutmeg
2 teaspoons ground coriander
2 teaspoons ground cumin
2 teaspoons ground ginger
2 teaspoons turmeric
2 teaspoons salt
2 teaspoons cinnamon
2 teaspoons paprika
1 1/2 teaspoons sugar
1 1/2 teaspoons ground black pepper
1 teaspoon cayenne pepper
1 teaspoon cardamom powder
1/2 teaspoon ground allspice
1/4 teaspoon ground cloves

Sunday, March 27, 2011

The Incredible Edible Egg

I used to consider my husband to be an egg fanatic. When I met him, it was disconcerting to me how often he ate eggs. I was never a regular breakfast eater, but every morning after I'd stayed at his house, he'd make us fried eggs, half a bagel, and some coffee. I kind of liked the routine, but when we started living together, I was worried about eating so many eggs every week. "High cholesterol!" I'd exclaim. Some nights when I worked late or went out with friends, I'd find the tell-tale signs of fried eggs in the pan. "Did you eat fried eggs again?" I would ask, accusingly. Depending on his mood, he'd reply sheepishly that he'd been caught, or he would lodge a defense of eggs. In the lean years, he explained, he'd eat mai fun noodles from the corner Chinese place almost every evening for dinner--with a fried egg on top. He plays sports and swears that oatmeal with a fried egg on top is the perfect breakfast before a game.

Years have passed, both of our cholesterol levels are just fine (I insisted he have his checked!), and I feel differently about eggs. There've been conflicting studies about the effect of egg consumption in healthy adults. Some have even called it the perfect food because of it's nutritional properties. According to wikipedia: "They supply all essential amino acids for humans,[21] and provide several vitamins and minerals, including vitamin A, riboflavin (vitamin B2), folic acid (vitamin B9), vitamin B6, vitamin B12, choline, iron, calcium, phosphorus and potassium. They are also a single-food source of protein."

And you know what? I love eggs, too. I love omelets (which we make at least once a week), scrambled eggs, egg-drop soup, poached eggs (which I never even knew about until I went to London), eggs in fried rice, egg custard, deviled eggs, and hard boiled eggs at easter time with a little bit of mayonnaise and salt. In fact, I like hard boiled eggs all the time. A friend of mine was traveling in Africa once and packed a dozen eggs with her for snacks on the road. I actually don't know whether hard boiled eggs would keep while you're hiking in the heat for a week, but she swore that they survived the journey well and provided quick and easy energy.

These days, I especially love the eggs that my husband cooks perfectly and puts on top of the flax-oat sourdough bread that I make, with a few strips of smoked salmon. But I use hard boiled eggs a lot, too--both as a good travel breakfast on the train when I'm totally busy or chopped up on salads for lunch. We've started buying cage-free eggs (organic and/or from local farms when we can afford it) because of all of the horror stories about egg production. I still don't know whether to trust the "cage-free" label on the eggs we get at Fairway or Trader Joe's, but I have to think they're somewhat better than the 99 cent eggs in the styrofoam container. There have been a few articles about the topic, but I haven't quite figured it out yet.

Unfortunately, I've found that the better the egg, the harder time I've had peeling them. I used to be an expert egg peeler at Eastertime, but these days, I'm lucky if I get 3/4 of the egg I started with after peeling away strips of rubbery egginess with the shell. I found this recipe for cooking eggs to perfection, and I hope my egg-wasting days are over. The recipe recommends using eggs that are not fresh, 3-5 days old are the best. In contravention to everything I've ever thought, the recipe also tells you to not add salt to water, explaining that the salt will raise the boiling point of the water making the egg whites rubber.

How To Correctly Cook Hard-Cooked (Hard-Boiled) Eggs

Bring your eggs to room temperature before cooking. If the egg has been stored in the refrigerator, it can be warmed gently under a flowing hot tap water or sit at room temperature for 20 to 30 minutes. By bringing the eggs to room temperature, they're much less likely to crack in the hot water. Also the temperature of the egg at the start of the cooking process will affect the cooking time.

Choose the right size pot to cook your eggs in: The eggs must not be stacked but be in one (1) layer only. Gently place the eggs in a single layer in a pan with enough cold water to cover eggs completely (approximately by 1 inch of water over the top of the eggs).

Over high heat, bring water JUST to a rapid boil. As soon as the water reaches a rapid boil, remove pan from heat and cover egg pan tightly with a lid.

Set timer for 17 minutes for large eggs or 20 minutes for jumbo eggs. After 17 or 20 minutes (depending on size of your eggs), remove lid and drain off water from the eggs.

Watch the time when cooking the eggs carefully. Overcooking causes a green layer to form around the yolk. This layer is caused by a reaction between the iron in the yolk and the sulfur in the white. Heat speeds up this reaction, so the longer your eggs cook, the greater the chance of discoloration.

IMPORTANT - Stop the cooking process - Residual Heat or "Carry Over Heat."

After the eggs are removed from the heat, some cooking will continue, particularly the yolk of the egg. This is due to residual heat called “carry over cooking,” For this reason, transfer the eggs to the bowl of ice cubes and/or cold water. While they're in the cold water, a layer of steam develops between the shell and the egg white. The steam helps make peeling an egg much easier.

Let eggs cool at least 10 minutes in cold water, then drain. Either store in refrigerator or peel the eggs.

Tuesday, March 22, 2011

Can't Let Organic Buttermilk Go to Waste

For this year's St. Patrick's Day soda bread, I used an outrageously expensive quart of buttermilk ($4.99). I had at least two cups of it left a few days later and didn't want to waste it. I also happened to have set aside a bowl of sourdough sponge two days ago, and it was nice and bubbly. I found the following recipe on Cooks.com, and we adapted it to make a pancake recipe that's an absolute keeper.

Sourdough Buttermilk Cornmeal Pancakes

1 c. flour
1 c. cornmeal
1 1/2 tsp. baking powder
1/2 tsp. baking soda
1/2 tsp. salt
2 tbsp. sugar
1 1/3 c. buttermilk
1 c. Sourdough Starter (at room temp.)
1 egg, beaten
2 tbsp. vegetable oil

Combine first 6 ingredients in a non-metal bowl; stir well. Add buttermilk, Sourdough Starter and egg; beat just until large lumps disappear. For each pancake, pour about 1/4 cup batter onto a hot, lightly greased griddle. Turn pancakes when tops are covered with bubbles and edges look cooked.

For these, I don't think I would combine them with fruit. Just too much going on.

Monday, March 14, 2011

Ancho Shrimp

My office is holding a chili cook-off this week, and I prepared an ancho chile puree to use in my beef and black bean chili. I had some puree leftover, so we used it for our delicious Sunday night shrimp dinner. We paired the ancho chile shrimp with spaghetti squash, spinach, and black rice. I adapted this from a recipe on eHow.

Ancho chile puree

4 cloves roasted garlic
4 dried whole ancho chiles
1 tsp. fresh cracked black pepper
1 tsp. salt
1/4 c cider vinegar

Soak the whole chiles in warm water for at least 30 minutes, turning to make sure that the floaters are coated for at least 15 minutes on all sides. Remove the stems and the seedpods from the chiles. Cut them in half, and roast them in a dry cast iron skillet over high heat. Slip the garlic cloves out of their skins and place them in the bowl of a food processor along with the salt and pepper, vinegar and the roasted chiles. Pulse the machine a few times to begin the puree. Scrape down the sides and continue pulsing the machine and adding small amounts of water until the puree is as thick as possible but still allows the machine to run smoothly. Scrape down the sides as necessary and puree to a fine paste. Use a rubber spatula to force the puree through a strainer to extract skin and seed fragments.*

*I was too lazy to actually perform this last step, although I should have.

Sunday, March 13, 2011

Confetti Cornbread

Sometimes I use a packaged mix. This is a risky admission on a blog that champions slow home cooking and tries to follow, as much as possible, Michael Pollan's suggestion to shop around the perimeter of the supermarket. But sometimes I do. I wanted to make cornbread for an annual chili party that friends of ours on the Upper West Side have every year, and I happened to have three boxes of Jiffy cornbread mix in the cabinet. You can find these little guys for as little as 33 cents in some grocery stores; these were 55 cents at Fairway. The ingredients aren't so bad, and its just so easy: add an egg (in this case three), and a 1/3 cup of milk (in this case one cup) and voila! Tasty cornbread. I dressed it up a bit, of course, with 1/2 cup of corn kernels and about 2 tbsp of chopped red jalapeno and fire-roasted poblano. My cornbread didn't hold up very well on the long walk and subway rides from Brooklyn to the party, but people gobbled them up despite their looks.

Saturday, February 26, 2011

Six of Everything

We finally have six of everything for entertaining: six fancy water glasses, six matching cloth napkins, six salad plates, six dessert plates, six steak knives, six matching chairs at a lovely new table, and matching silverware to boot....so we had to have four of our friends over for a mid-week dinner party. We haven't had a chance to use the lovely tagine that we received as a wedding present, so I decided to prepare a lamb tagine that I made as our very first tagine, which I wrote about here. One of our friends has very specific food aversions, including nuts, chocolate, and aged cheese--three things we discovered we use routinely. So dinner planning was a bit of a challenge, but a welcome one. Finding an appetizer without nuts or aged cheese was the first challenge. Dessert without chocolate was the second. Epicurious came through with flying colors on both fronts. I decided on a goat cheese with roasted yellow pepper and dill for an appetizer, served with lavash crackers from Damascus bakery on Atlantic Avenue in Brooklyn. For dessert, I chose a honey cake called Basboura. The Basboura was a hit; everyone had a second piece.

Basboura

2 cups fine semolina
1 cup dessicated coconut
1/2 cup sugar
1 tsp baking soda
A little less than 2/3 cup melted butter or ghee or semnah
1 cup milk

For the syrup...
1 1/2 cups sugar
1 1/2 cups water
1 tbsp lime juice or 2 tbsp lemon juice
2 tbsp honey

Preheat the oven to 345 degrees F. In a large bowl mix all the dry ingredients, the semolina, coconut, sugar and soda together. Mix in the melted butter and milk and stir until well combined. Pat this mixture into a buttered, shallow medium sized oven proof dish and level the surface with a spatula or a palette knife. Bake for 30 minutes or until golden brown on the top.

In a medium sized sauce pan, place the sugar and water on low heat and stir until the sugar dissolves completely. Increase the heat to medium and then bring the mixture to a vigorous boil and cook until it coats the back of a spoon or reduces by about one-third or until it reaches 220 degree F on a cooking thermometer. Stir in the lime juice and allow to cool. Once cooled or warm, mix in the honey and stir well.

Allow the cake to cool sllightly, for about 10 minutes and then cut it into squares or diamonds. Carefully pour the syrup over the cake. It will look like a lot of syrup, but the cake will absorb all the syrup gradually.

Serve at room temperature. We served ours with a dollop of yogurt mixed with a splash of rose water, and a generous sprinkling of dessicated coconut. The dessert can be served, or baked, with almonds as well.

Goat Cheese and Yellow Pepper Dip

2 yellow peppers, halved, seeded
2 jalapeno peppers, cut in half and de-seeded
2 tablespoons olive oil
8 ounces sharp soft goat cheese
2 tablespoons chopped dill, plus 1 sprig for garnish
1 tablespoon lime juice
Coarse salt and fresh cracked black pepper
Pinch cayenne

Roast peppers over an open flame until soft and a the skin a little charred, about 5-8 minutes. Place them in a plastic bag for about 20 minutes, remove and peel the skin off. Emulsify the peppers in a food processor and add the goat cheese, lime juice, dill, cayenne pepper, black pepper and salt to taste. Pulse until combined well. Serve with flat bread or pita chips.

Monday, February 21, 2011

Kimchi's Best Friend

I started buying packaged bulgogi from Trader Joe's about a year ago and it has become one of our favorite go-to dinners. We love kimchi so much, and pile it high on the plate alongside a modest amount of the seasoned beef and white rice. I swear we could go through a few pounds of kimchi every week without even trying. We've tried to find other kinds of bulgogi in different Asian shops, but haven't been able to find an alternative to Trader Joe's (which is kind of expensive) that doesn't have high fructose corn syrup. D kept suggesting that we could probably make it ourselves, and I don't know why I was so intimidated. Not only was it easy, it was actually deeply satisfying to make. Rubbing the meat with brown sugar and then mushy kiwi was an almost sensual experience. Even now as I write, I can still smell the sesame oil and garlic on my fingers.

I found this recipe on Epicurious, of course. That website never lets me down. The following is an adaptation of the recipe, which unmodified is probably very good.


Homemade Bulgogi

1 1/4 lb skirt steak, cut into 2 inch pieces
2 tablepoons tamari
2 teaspoons sesame oil
2 teaspoons crushed garlic
2 tablespoons brown sugar
1 tablespoon rice wine (sake)
Pinch of black pepper
1/2 tbsp sesame seeds
1 fresh kiwi, juiced in a blender

Juice the kiwi--it's okay if its just in little pieces. It's probably better if it's not completely juiced. Trim the fat off the beef with a sharp knife. Rub the sugar evenly into each piece of the beef. Allow beef to sit for at least 10 minutes. In a separate bowl, mix together the soy sauce, sesame oil, garlic, sesame seeds, sake, and black pepper. Put aside. Massage the beef with the kiwi using your hands. The kiwi works as a tenderizer. Add the soy sauce mixture and mix. Allow the beef to marinate for 10 minutes, and then pack closely into a plastic bag. Pop it in the fridge and it will be awesome in a day or so. When you're ready to prepare it, just heat up a wok or a cast iron pan with oil until smoking. Cook the meat directly from the bag quickly until browned, being careful not to overcook. Serve either over or to the side of white rice, with a generous side of kimchi. We've found that pickled mangoes on the side are a nice accompaniment, too.

Squid Memories

Seafood was not big in our house when I was a kid, so when I started hanging out with my late friend Jon Paul , I was constantly fascinated with the seafood stir frys, stews, and soups that he and his partner Wende would dish up for us after a night of street outreach for the needle exchange program that we worked with in Philadelphia. Tentacles, legs, sometimes even eyes would be floating around in the bowls he would hand me; the food they prepared was always delicious. I rarely work with that kind of seafood, but I picked up some fresh Long Island calamari at the farmer's market this weekend, and tried this recipe. JP passed away a few months ago, and this dish brought back fond memories of him.

Thai Calamari with Chili

1 pound calamari (squid)
1 medium onion
1 1/2 teaspoons chopped garlic
3 fresh red chilies, seeded and chopped
3 tablespoons vegetable oil
2 tablespoons Thai fish sauce
1 tablespoon rice vinegar
2 tablespoons palm sugar or brown sugar
2 tablespoons water
1 teaspoon cornstarch

Cut the calamari into chunks; leave the tentacled ones the way they are. Slice onion from top to bottom to form curved strips. in a skillet cook onion, garlic, and chilies in oil till onion is almost tender. Add calamari and cook for a few minutes or till they curl and become tender. In a bowl stir together fish sauce, vinegar, sugar, water, and cornstarch. Add to skillet. Cook and stir till thickened and bubbly. Cook and stir 2 minutes more.

Finally! Perfectly Risen Sourdough Loaf

If you know me, or have read this blog at all over the past year, you know that I've been working with sourdough since December 2009, baking at least two loaves of bread nearly every weekend. Maybe you've even been the recipient of one of my experiments. One of the most mysterious things about this process is that I haven't been able to find one good recipe for a rustic sourdough loaf that has the classic hard crunchy outer crust, and the spongy, fragrant inner bread. I've also had a hell of time getting my white breads to rise beyond bloated flatbread shapes. I finally stumbled upon a good recipe that produced a nice loaf with a strong rise. I served this bread at a chili party/meeting I hosted for my softball team and it got rave reviews.

Sourdough Olive Bread

2 cups lukewarm water (110°F)
2 cups white sourdough starter, room temperature
2 teaspoons active dry instant yeast
1/2 teaspoon diastatic malt**
7 to 8 cups bread flour***
1 tablespoon salt
2 tablespoons finely-minced fresh rosemary
2 tablespoons olive oil
2 cups Kalamata olives, pitted and coarsely chopped
Semolina flour, for dusting

** Diastatic malt is powdered malted grain, usually barley, but wheat, and rice may also be malted It breaks down the starch in dough to yield sugars on which the yeast can feed.

*** The thickness of your sourdough starter can determine how much flour needs to be used. If you think the dough is too moist, add additional flour (a tablespoon at a time). The same is true if the dough is looking dry and gnarly. Add warm water (a tablespoon at a time). Your dough should not be sticky but should form a nice elastic ball. I usually have to add extra flour.

Combine water, sourdough starter, yeast, and diastatic malt in the bowl of a mixer; stir with a rubber spatula or wooden spoon, just to moisten. Add flour, salt, rosemary, and olive oil; mix the dough until it snaps back quickly. Turn the dough onto a lightly floured board; add olives and knead by hand for several turns to be sure the olives are well incorporated and the dough is smooth, adding additional flour if needed. NOTE: Knead dough by pulling the dough towards you and then pushing down and forward with the palms of your hands (kneading gives the bread the elasticity and lets it rise).

Place the dough in a lightly oiled large bowl. Cover the bowl with plastic wrap Let rise until it doubles in volume (when you can put your finger in the dough and it leaves and indentation and doesn't spring back out) approximately 4 to 8 hours (depending on the temperature and the starter used, the rising time can vary as much as 2 hours).

Punch dough down and knead it on a floured board to feed it one more time before baking. Divide dough in half and shape each dough ball into a loaf or round shape (boule); place each loaf into a pan (I used both a loaf pan and a round spring-form cake pan). Cover with plastic wrap and place in a warm spot to rise until doubled in size, approximately 1 to 3 hours.

Oven Bread Rising: Sometimes I use my oven for the rising. Turn the oven on for a minute or so, then turn it off again. This will warm the oven and make it a great environment for rising bread. If you can't comfortably press your hand against the inside of the oven door, the oven is too hot. Let it stand open to cool a bit. Sourdough rises more slowly than yeast bread; Always remember, the longer the rise time, the more sourdough flavor.

Cool or Refrigerator Bread Rise: If I don't have the time to wait for the rise to finish or I know that I will be interrupted before the completed rise, I do a cool rise. A cool rise is when the dough is place in the refrigerator and left to rise slowly over night approximately 8 to 12 hours. I usually do this after the first rise and the dough has been shaped into a loaf. As this is a longer rise time, it improves the sourdough flavor in your finished bread.

Preheat oven to 450 degrees F. After the bread has risen, slash the bread with a bread razor or a very sharp knife making three 1/2-inch deep diagonal slashes. Brush or spray the top of the bread with cold water. Slide the trays in the oven. Spray the oven with a spray bottle full of water and close the oven door. Thirty seconds later, open the oven door and mist the oven again. Repeat this two more times, then turn the oven temperature down to 400 degrees F. and let the bread bake for 15 minutes.

After 15 minutes, turn the bread around 180 degrees so it can brown evenly; bake another 10 minutes or until nicely browned. NOTE: A good check is to use an digital thermometer to test your bread. The temperature should be between 200 and 210 degrees F.

Remove from oven and place bread on a wire rack to cool. Let the loaves cool for 30 minutes before cutting (this is because the bread is still cooking while it is cooling).

Poor Man's Fish

It's been so long since I've been to the Grand Army Plaza Farmer's Market, things have just been too busy. But yesterday, despite the violent wind, I took a walk through the neighborhood to the farmer's market with a short shopping list in mind: fresh fish, butternut squash, and kale. It's hit or miss at the fish market, and if you don't get there early, some of the fish is sold out and the line is always long. But this Saturday, I was lucky. The wind was so bitter and strong that there weren't that many people out, and instead of the regular fish stand, there was a new one with only two or three people on line. The poor woman who was staffing the table was rosy red with cold and her hands looked like they were on the verge of frostbite. I watched her "fish" out a big slab of cod and a squirmy-looking handful of calamari for the woman in front of me, and so I got the same. The cod looked beautiful--it was a thick, white, meaty 2 1/4 lbs coming in at a whopping $29, but it was Long Island line-fished, never frozen, and we hadn't eaten fish for so so long.

When I brought it home, D was shocked at the price. He told me that codfish used to be known as the "poor man's fish," they used to make fish sticks out of cod. But to me, it's political. We spend too little on food in this country, and we get what we pay for. Fishing off the Long Island coast is probably no easy matter in this weather, and fishermen have to make a living (not to mention the freezing cold fish monger!) I'd rather splurge on a nice piece of cod once a month, than pick up some cheap fish every friday night from Chinatown like we used to do. God knows where that fish comes from, and you can totally tell it'd been frozen. Unfortunately, I violated the complicated fish rules in terms of sustainability. The sustainability issue, as well as the health-related issues surrounding fish, are one of the reasons we hardly eat fish anymore. I still can't quite figure out the rules, but when I consulted one of my food experts, Mark Bittman, while writing this entry, I learned that cod is overfished. : (

We found this spice mix that must have been part of a gift basket at one point, and decided we'd use it on the fish. It is amazing, just check out the ingredients: ginger, roasted garlic, sea salt, caraway seeds, sugar, roasted sesame seeds, cumin, paprika, cassia, chillies, coriander, blackpepper, turmeric, mint, nutmeg, grains of paradise, rose petals, and saffron. D loves roasted cauliflower, so we decided to use that with some sauteed spinach to accompany the fish. D's the king of fish, so he's the one who pulled this meal together. He just asked me to make a tahini sauce like the kind we get at Tanoreen. I can't compare my cooking to that of the chef at Tanoreen, but I think the sauce came out pretty well. We suspect that Tanoreen fries their cauliflower, and nothing beats the taste of fried cauliflower, no matter what the sauce.

This is the recipe I used:

Tahini Lemon Sauce with Pomegranate Molasses

2 tbsp tahini
1 tbsp lebne
2 tbsp plain yogurt (low-fat, for texture)
1 tsp cumin
1 tsp salt
2 tsp minced and mashed garlic
1 tsp fresh ground black pepper
1 1/2 tbsp lemon juice
1 1/2 tsp pomegranate molasses

Combine all and stir vigorously with a fork until it's really smooth. This sauce should be poured over the cauliflower and just thick enough to stick on the vegetables; it shouldn't be the consistency of a dip or a liquid.

We sauteed small pieces of cauliflower with some salt and pepper and when it was nicely browned, it was done. We served it alongside the fish with the sauce drizzled over the cauliflower with a drizzling of additional pomegranate molasses--both for taste and for decoration.

For the cod, D marinated the fish with olive and lemon with salt and pepper, and let it sit for three hours in the fridge. When we took it out to prepare dinner, he coated it generously with the spice rub and patted it into the fish with his hands. He sauteed it on one side for three minutes, flipped it, put a handful of spinach on top, splashed it with some white wine, and some butter and covered it to let it steam for about 7 or 8 minutes at a simmer.

Sunday, February 6, 2011

Last Minute Brownies

We had a few friends over to watch the Superbowl, and after setting out all of the dips and veggies and popping the chicken wings in the oven, D asked me if we had anything sweet. We didn't, but I offered to whip up a quick batch of brownies. I was lucky enough to have just enough organic cocoa from Trader Joe's left. The recipe only made about 10 decent sized brownies, but that was perfect. They were chocolatey and chewy...but they would have been better with some Ghiardelli chips.

Epicurious Best Cocoa Brownies

10 tablespoons (1 1/4 sticks) unsalted butter
1 1/4 cups sugar
3/4 cup plus 2 tablespoons unsweetened cocoa powder
1/4 teaspoon salt
1/2 teaspoon pure vanilla extract
2 cold large eggs
1/2 cup all-purpose flour
2/3 cup walnut

Preheat the oven to 350°F. Spray your baking pan (8" square) with olive oil. Combine the butter, sugar, cocoa, and salt in a medium heatproof bowl and set the bowl in a pot of water so that it fits, and bring to a simmer. Stir from time to time until the butter is melted and the mixture is smooth and hot enough that you want to remove your finger fairly quickly after dipping it in to test. Remove the bowl from the skillet and set aside briefly until the mixture is only warm, not hot. Stir in the vanilla with a wooden spoon. Add the eggs one at a time, stirring vigorously after each one. When the batter looks thick, shiny, and well blended, add the flour and stir until you cannot see it any longer, then beat vigorously for 40 strokes with the wooden spoon or a rubber spatula. Stir in the nuts. Spread evenly in the pan. Bake until a toothpick plunged into the center emerges slightly moist with batter, about 30 minutes. Let cool before attempting to cut, but not too much. These brownies are delicious warm.

Saturday, January 15, 2011

Stayin' Home Pizza

D and I were going to go and see a friend play with his band at a Lower East Side club this evening, but at some point, we just decided we'd rather stay in. Earlier in the day, I'd unpacked the freezer to see what we could use for the week and found a small ball of whole wheat pizza dough we must have made a few months ago. I scavenged some vegetables that were leftovers in the fridge and made a small pizza for lunch. It was so good that D asked if I'd make pizza again for dinner. I found this great recipe for whole wheat pizza crust, and it turned out great. It was much thicker and and puffier than the dough I usually make, but it was very good.

Whole Wheat Pizza Crust

2 tsp honey
1 1/2 cups warm water
1 tablespoon active dry yeast
1 tablespoon olive oil
1 teaspoon salt
2 cups whole wheat flour
1 1/2 cups white flour

In a large bowl, dissolve honey in warm water. Sprinkle yeast over the top, and let stand for about 10 minutes, until foamy.

Stir the olive oil and salt into the yeast mixture, then mix in the whole wheat flour and 1 cup of the white flour until dough starts to come together. Tip dough out onto a surface floured with the remaining all-purpose flour, and knead until all of the flour has been absorbed, and the ball of dough becomes smooth, about 10 minutes. Place dough in an oiled bowl, and turn to coat the surface. Cover loosely with a towel, and let stand in a warm place until doubled in size, about 1 hour.

When the dough is doubled, tip the dough out onto a lightly floured surface, and divide into 2 balls for 2 crusts.

Preheat the oven to 450 degrees F. Shape the dough into a circle. When the circle has reached the desired size, place on a well oiled pizza pan. Top pizza with your favorite toppings, such as sauce, cheese, meats, or vegetables.

Bake for 16 to 20 minutes (depending on thickness) in the preheated oven, until the crust is crisp and golden at the edges, and cheese is melted on the top.

We topped our pizza with homemade tomato sauce, mushrooms, kale, green bell pepper, onion, mozarella, salt and pepper.

Saturday, January 8, 2011

Mimicking Muhammara

The last time D and I went to Tanoreen in Bay Ridge, just before Christmas, we asked for a double order of Muhammara. I'd been looking forward to the trip to Tanoreen for weeks, thinking of the slightly crunchy, garlicky sweet mystery. It didn't occur to me until the end of the night, after sopping up the last juicy specks on the dish with a piece of pita, that I could probably learn how to make it at home. If not as good as Tanoreen, I could at least enjoy and entertain others with something like it at home. I vowed I would make it sometime shortly after the New Year.

Epicurious has a great recipe that's simple and ended up being very tasty. I might add more olive oil next time, and try to blend the ingredients in a way that allows it to retain a bit more of the individual ingredients' distinctness, but for a first try, it was very good.

There will never be a substitute to enjoying a warm dish of muhammara with a glass of Lebanese wine surrounded by friends and the warmth of Tanoreen itself, but I'm glad I can whip this up for any occasion.

Muhammara

a 12-ounce jar roasted red peppers, drained
1/2 cup toasted bread crumbs
1/2 cup walnuts, toasted lightly and chopped fine
2 to 4 garlic cloves, minced and mashed to a paste with 1/2 teaspoon salt
1 tablespoon fresh lemon or lime juice, or to taste
2 teaspoons pomegranate molasses
1 teaspoon ground cumin
1/2 teaspoon dried hot red pepper flakes
1/2-3/4 cup extra-virgin olive oil
toasted pita triangles as an accompaniment

In a food processor blend together the peppers, the bread crumbs, the walnuts, the garlic, the lemon juice, the pomegranate molasses, the cumin, the red pepper flakes, and salt to taste until the mixture is the consistency you'd like. Add the oil gradually. Transfer the muhammara to a bowl and serve it at room temperature with the pita triangles.


The original recipe, which I adapted only slightly, from Epicurious can be found here.

Sunday, January 2, 2011

Restorative Kale

After the excess of the holidays, I find myself craving kale. I wrote about kale around this time last year, with a link to all of it's nutritional benefits. It's worth repeating that here. We had a leftover butternut squash that never got made into soup over the holidays, and the Washington Post recently published a recipe that was perfect: Butternut Squash, Kale, and Shitake Casserole. I followed the recipe almost to the letter and it was absolutely delicious. The original recipe is in the link, my modifications are reflected here. (And yes, that is a margarita in the background of the picture above. Everything in moderation.)

Butternut Squash, Kale, and Shitake Mushroom Casserole

1 cup whole-fat coconut milk
4 tablespoons Thai green curry paste
2 teaspoon Chinese chili paste with garlic
1-inch piece peeled ginger root, finely grated or pureed (1 tablespoon)
2 tablespoons soy sauce or tamari
2 cups of peeled butternut squash, cut into 2-inch pieces
8 ounces shiitake mushroom caps, cut into quarters
1 bunch (9 ounces) kale, center veins removed, leaves torn into large pieces and rinsed and blotted dry
2 tablespoons white sesame seeds

Preheat the oven to 350 degrees. Lightly coat a 9-by-13-inch baking dish with olive oil. Use a whisk to combine the coconut milk, Thai curry paste, Chinese chili paste, ginger, and soy sauce or tamari in a large mixing bowl. Add the squash pieces, mushrooms and kale; stir to coat evenly. Transfer the vegetables to the baking dish and sprinkle the top evenly with sesame seeds. Cover with a layer of parchment paper, then seal tightly with aluminum foil. Bake for 45 minutes, then uncover and bake for 25 minutes, or until the squash is fork-tender and the kale on top is dark brown and crisp. Serve warm all by itself, or over rice.

Friday, December 31, 2010

2010 New Year's Eve Meaty Balls

Believe it or not, I never made a meatball before today. It's the last day of 2010, and I decided it was high time. The Joy of Cooking has about seven meatball recipes--traditional Italian meatballs to Hawaiian meatballs. I see more meatballs in my future.

I deviated only slightly from The Joy of Cooking's recipe for Italian meatballs, which start with a German meatball (or Konigsberger Klops), and then get more Italian-y.

Here's what I did:

2010 New Year's Eve Meaty Balls

1 lb grassfed beef, ground
2 eggs
1/2 cup panko crumbs
olive oil
3 heaping tbsp chopped parsley
3 heaping tbsp parmesan cheese
1/2 cup finely chopped onion
4 garlic cloves, finely chopped
1 1/2 tsp salt
1/2 tsp paprika
1/2 tsp oregano
1 tsp lemon juice
1 tsp nutmeg

Saute onion and garlic in olive oil (I cheated and used leftover bacon fat). Once cooled, add to ground beef in a good-sized bowl. Add the rest of the ingredients and mix with clean hands. Form into your desired shape (I made one inch balls) and sautee in a large pan in olive oil, turning so that each part of the meaty-balls is browned. Place in a casserole dish filled with tomato sauce and bake at 350 for 30 minutes.


I asked D to do the pasta up right, and that he did. I don't think I'll ever serve pasta without doing it up this way. I had roasted two heads of garlic the day before, and D melted some butter with the roasted garlic and tossed it with whole wheat linguine. He added fresh cracked black pepper and chopped parsley and that's how we served the meat balls....on top of this amazing pasta.

Tuesday, December 28, 2010

Mystic Gypsy Libations

In addition to the jars of hot sauce that we gave folks this Christmas, I also made Chai Infused Vodka and a bottle of Frangelico to a few people as a special treat. People are always so impressed with infused vodka, and it's the easiest thing in the world to make. I brought this concoction to a tea party for a dear friend's birthday party a few months ago and it was a hit.

I remember visiting a Russian bar-bistro in the East Village called Anyway Cafe years ago and being transfixed by the number of infused vodkas on the menu (the food an ambiance there are fantastic, too). I chose this spot to celebrate a publication I worked on once with the Open Society Institute and a Ukranian colleague, and we had a really nice time.

Friday, December 24, 2010

Christmas celebration at Tanoreen

It was the night before Christmas Eve, and we'd planned to spend it with friends at Fone of our favorite restaurants, Tanoreen in Bay Ridge. We were seven: two close friends who were headed to Ghana for the holidays, a friend from Florida who'd come to town to house- and dog-sit for them while they were away, and another couple from Jersey. We'd gotten to the neighborhood a little early, so D and I drove to Dyker Heights, a neighborhood where folks try to outdo each other every year in over-the-top lawn decorations. It's really an unbelievable sight: life-sized toy soldiers, Santas, reindeer.....D jokes that Con Ed makes a profit just from this neighborhood every year.

Tanoreen recently moved to a larger location with a liquor license. I was afraid a move like that might kill the spirit of the lovely little restaurant where the chef and owner, Palestinian and Nazareth-born Rawia Bishawa, would come out from the kitchen and check in with guests to make sure they were enjoying their meal. Bishawa still comes out, and the place is even warmer and more festive than its smaller digs down the street. Bishawa and her team cook up an amazing array of food from all over the Middle East. I am so glad that I've outgrown my childish distaste of lamb, because lamb is a huge part of Tanoreen's menu.

One of my favorite dishes is muhamarra, which is a blend of roasted red pepper, walnut, and garlic. I absolutely love it, and have vowed to make it in the New Year. D and I shared the lamb kafta roll, which the menu noted was featured on ABC news, along with the recipe. It was one of the best entrees I have ever had. We ordered several bottles of this Lebanese wine, which D really enjoyed. Our friend told us he can sometimes find it at Red, White, and Bubbly in Park Slope.

Wednesday, December 22, 2010

Mystic Gypsy Sauces

We made hot sauce for our friends and colleagues this year for Christmas. I had an elaborate idea in my mind for labels, but life was hectic, and I ended up doing each label by hand. They were minimalist and I think they turned out okay. After making a special coffee-mustard sauce for pigs n' blankets we brought to a party, we bottled up that sauce, too, and paired it with the smoky plum sauce.

Friday, December 17, 2010

Saucy-Son En Croute

The past few months have been so busy that we haven't done a lot of adventurous cooking. But I knew that I wanted to make something fun for our holiday potluck office party. One day I was shopping at Trader Joe's, and they were giving out samples of their crescent rolls with Quattro Formaggio cheese. It was delicious. I remembered D mentioning that we should make pigs in blankets, so I picked up three packages of sausage (smoked apple Chardonnay chicken sausage), three containers of crescent dough, a bag of Quattro Formaggio, and some dijon mustard. D suggested we make a spicy coffee mustard sauce for dipping.

I couldn't quite visualize how to roll these up, but it was pretty simple. Just stretch the dough out to be large enough to cover one whole sausage, and then roll it up with cheese and fresh ground black pepper, stretching the pastry dough over the sausage. At the last minute, we had the idea of rolling the sausages in parsley.

We popped them back in the fridge and let them sit overnight. About an hour and a half before the party, we cut them into 8 pieces each and placed them on a greased cookie pan. We baked them at 350 degrees until the pastry started to brown. Then we placed them on a tray decorated with red tissue paper.

For the spicy mustard sauce, we brewed a strong cup of coffee and then boiled it down to a syrup. We added that to a 12 oz jar of mustard, added some maple syrup, and seasoned it with a tiny bit of salt, pepper and Worcestershire sauce. It was very spicy; I think the dijon base we used was a bit too strong (Roland's). In the future, I might increase the amount of coffee syrup, and switch the maple syrup to honey. It was very tasty, though.

I love making little signs for potlucks. I started making little signs with used envelope backs, and then taping them to little toothpicks and sticking them in the food. I think people really appreciate knowing what they're about to eat. There were lots of people who don't eat pork at the party, and I think the sign helped to let them know it was chicken sausage.

I would definitely make this dish again.